
 Possibly my favorite part of living in an old house is the character of the home. Sure, you could design interesting woodwork and quirky layouts into a new home, but there’s nothing quite like a 100+ year old house that’s had half a dozen or more people living in it over the years. Changing this, adding that, ruining this, fixing that. We’ve found some of the craziest wallpaper remnants and knick knacks stuck behind layers of paint and old shelving. I love imagining what those areas would have looked like when they were first put together and then taking my favorite parts and incorporating them back into the home. You just can’t get that with a new home. The history isn’t there yet.
They don’t make them like they used to.
To me, some of the most fun parts of character in old homes are the stained glass windows. The second I bought this house, I started dreaming about how I could work them into the current windows. I quickly learned that the stained glass looking doors you can buy new now are just not the same as old panes. A lot of them tend to have more of an Art Deco look to them than Victorian.
While new models are much easier to clean because the stained glass panels are often sandwiched between two solid pieces of glass, meaning instead of scrubbing hundreds of individual pieces of glass separated by lead lines, you have one solid window pane to clean because the hundreds of individual pieces below it never get dirty, I’d still rather have one that looks more like they used to. Call me crazy! But I’m looking at it every day. If I’m being honest, I’m only going to clean it once every few months at best. Daily visual appeal beats out semi-annual cleaning annoyance.
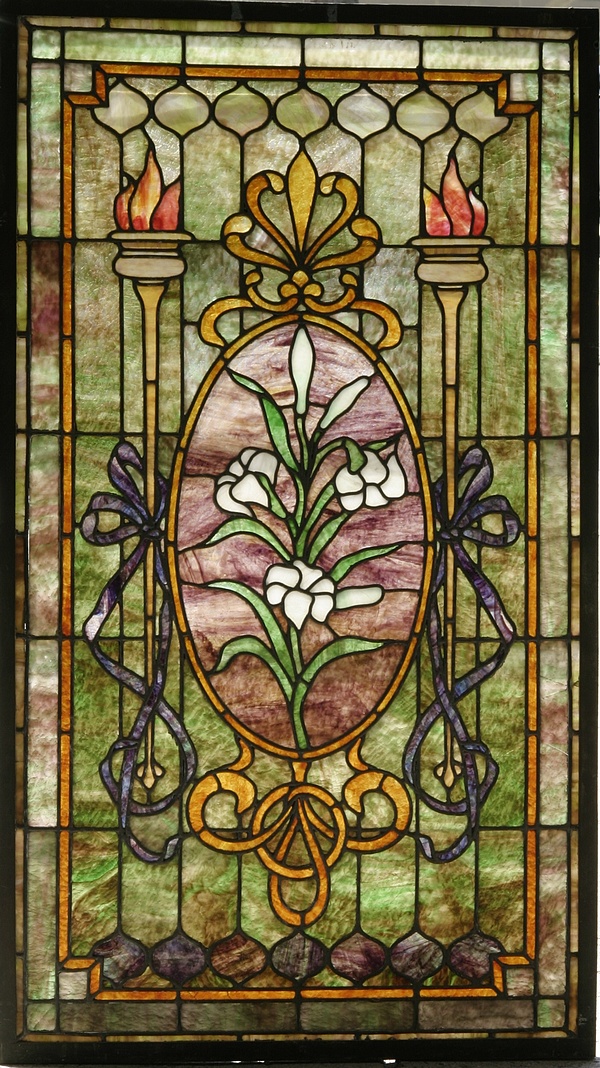
Original pieces sometimes aren’t ideal either.
If you’re lucky enough to have an architectural salvage place nearby or a nice antique shop, you can sometimes find original old stained glass windows and doors. The down sides are they are NOT cheap, they’re often missing a few pieces that have broken over the years, and it’s a one in a million shot you’d find one that’s already the perfect size for where you’re wanting to install it. You’re basically guaranteed to have to have it fixed, which is also not cheap, and build the window or door frame out to fit your newly acquired piece.
Why not do it yourself?!
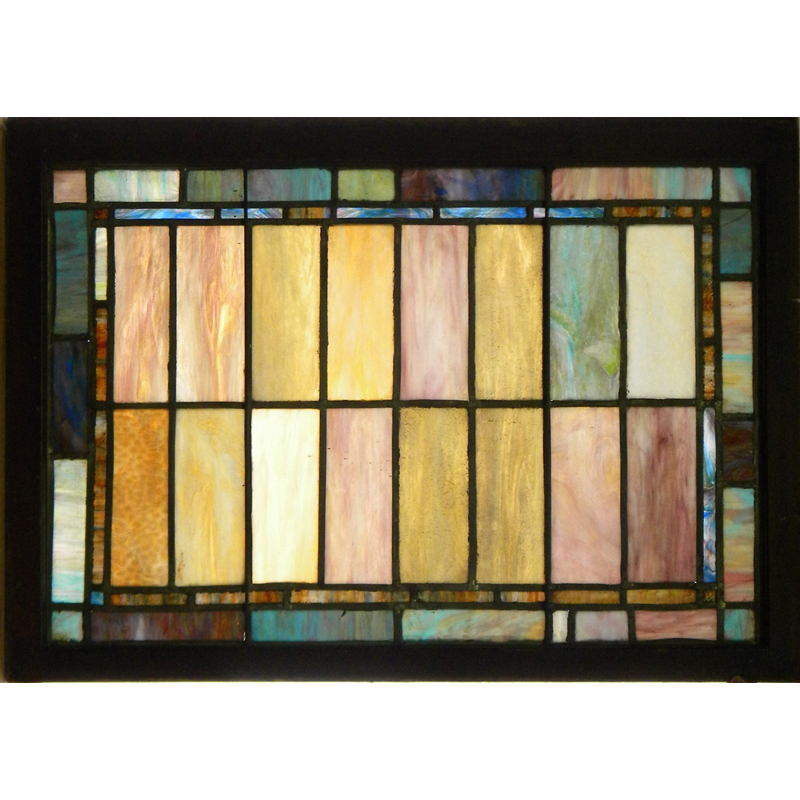
On top of all of the above, I also realized that I wasn’t sure I liked the variety of color you find in older pieces. They’re absolutely beautiful on their own but if I was going to eventually work stained glass into most of my windows over the years, it would look like a circus if they didn’t all have some unifying colors or designs throughout.
Plus, I wasn’t entirely convinced I wanted much color at all. Do you still call it “stained” glass if the window is entirely clear glass with different textures? I don’t know, but I knew I wanted to have the old charm but still have it work in a modernized home. This is about the time in a project when I say, “Ya know what? I’m just gonna have to do it myself.” I knew there was no way I was going to find exactly what I wanted, so I set out to figure out how to do it myself.
Take a class
I’m lucky enough to have a glass shop in town that specifically caters to stained glass and offers a variety of classes every year. I’ve taken both their copper foil and leaded glass class. While leaded glass, or using lead came, seems to be better for very large windows where more strength is needed, I definitely preferred the process of the copper foil method, and that’s the method I will continue to use for the rest of the windows I make.
I’m going to go through some tips I’ve found helpful, but there really is no substitute for taking a class from an experienced artisan. They will be able to cover every precaution you should consider and answer questions throughout your project. I remember in my class, for our second project, everyone was making a different window and everyone had slightly different techniques which lead to slightly different problems we needed help with along the way. Having someone there to watch over each project and answer questions as we went was the best way to learn.
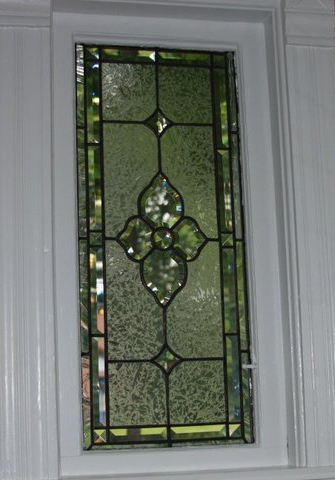
The first stained glass window I made in class.
Safety first.
They don’t call ’em “leaded glass” for nothin’! Whether you’re using lead came which is…well…lead…or copper foil, both methods contain lead. Pretty much every liquid and solution you use in making stained glass is toxic. Even after you’re finished making the window and get everything cleaned up, it’s still a LEADED glass window. There is a lot of lead in those lines. Not to mention, you’re working with shards of glass. You WILL get cut. A LOT. No matter how careful you are. Be safe. A class will go over every precaution you need to take but keep band aids nearby, wear safety glasses, work in a well ventilated area when soldering, and never work near food or handle food until you’ve completely cleaned up after working on any stage of stained glass. Wash your face, hands, arms and change your clothes. Even after it’s complete, don’t rub and fondle your stained glass in admiration and then eat a sandwich without washing your hands first. Don’t install the window somewhere where kids may rub on it (or lick it 😉 ). Use your common sense. Stained glass windows are beautiful and perfectly safe as long as you’re planning ahead and taking the proper precautions.
Supplies
Having the right tools makes a project so much easier. Stained glass is no different. Here are the tools I use.
Band Aids – You might as well just keep a box of these nearby. You’ll need a lot of them.
Graph paper – Unless you’re buying a pattern, you’ll need this to draw your pattern. If you buy a pattern book, you’ll likely have to take it to a copy shop to get it to the size you need. Depending on how big the window you’re making is, you could get away with a pad of graph paper but for every window in my house, I’ve needed a roll of it. The bigger the window, the bigger the roll you need.
Pencil and Sharpie – This is to draw your pattern. You want a “fine” point sharpie but not an “ultra-fine” point. The fine point creates lines with the perfect thickness. Your solder or “lead” will be slightly wider than the thickness of this line so fine point sharpies are perfect to get a good amount of solder between each glass piece so it’s solid but thin enough to still look nice. It’s possible to do much thinner lines but I’m not comfortable risking the strength of the piece.
Glass – This is a big one and probably the most expensive, but also the most fun to select. Once you have an idea in your head of what you want the window to look like, It’s time to buy some glass. Buy extra because you’re sure to snap at least a few pieces where you don’t want them to snap. There are places online to buy it but I would be hesitant to purchase without seeing the color in person, especially since color is so important for stained glass. Even clear glass has a variety of different textures and finishes to choose from. Doing a google search for a local stained glass supply shop or checking your local hobby stores is a good place to start.
Bevels – I also really love bevels and I’ve found those to be pretty safe to buy online. Bevels are those faceted, pre-cut shapes that give the window that extra sparkle because they reflect light in more directions. Of course, the bigger and more ornate the bevel, the more expensive it is. They’re pretty thick so I think the risk of them breaking during shipment is much less than a sheet of glass.
Glass cutter – There are several different versions to choose from. There are straight styles and pistol grips and a variety of ways to hold each. Taking a class or going to a stained glass supply store will allow you to try a few different styles before purchasing one. They can be pretty inexpensive though so buying two different styles and trying each out is feasible as well.
Glass cutter oil – Even though my cutter has an oil reservoir in it to feed oil onto the tip as the cutting wheel turns, I don’t fill it. I think it almost makes things too oily. I use a small bowl with a piece of steel wool in the bottom of it, pour a bit of cutter oil onto that, then dip the tip of my cutter into it before beginning a cut. I store the cutter, cutting tip down, in this bowl as well. It has literally been in my basement like this for YEARS and I’ve never had a problem with it.
Copper foil tape – This comes in a few different widths. I’ve always used the 1/4″. Each piece of glass you cut out will be surrounded on all edges by this tape. The solder then sticks to the copper, which is what creates the stability of the piece.
Wooden tongue depressor – Or popsicle sticks, wooden wax applicators, whatever you want to call them. I think these are a must. When you’re applying your copper foil to the edges of your glass pieces, sometimes you don’t always have a perfectly smooth edge of glass. I’d much rather use the wooden stick to press the foil onto all of the edges firmly than use my fingertip or nail to do it.
Solder and soldering iron– Solder comes in a bunch of different gauges or thicknesses and a few different ratios. I’ve always used the thicker 1/8″ gauge and have used both 50/50 and 60/40 ratios and haven’t had a problem with any of them. I have a very basic soldering iron that does not let you control the temperature. I’ve never had trouble with it but I’ve also never used one where you can adjust the temp so I may just be living in ignorant bliss. 😉 If I start making windows more regularly, I may splurge and get a fancier model but for now, the basic versions have worked fine.
Flux – This is what allows the solder to flow smoothly along the copper.
Disposable brushes – You’ll need these to apply the flux to the copper foil before soldering as well as apply patina if you choose to use it.
Work surface – You’ll also need a work surface that is high enough for you to be comfortable bending over for long periods of time but is one that you don’t mind getting beat up. You can also make a wooden work surface that is big enough to give you space to work, but small enough to carry from place to place. Message me if you want details on how to make it.
Windex and paper towels – are also important to keep your glass clean between steps and prevent your cutter from getting dull.
–
Additional supplies that aren’t absolutely necessary, but are definitely helpful.
–
Time to make the stained glass!
Measure twice, cut once.
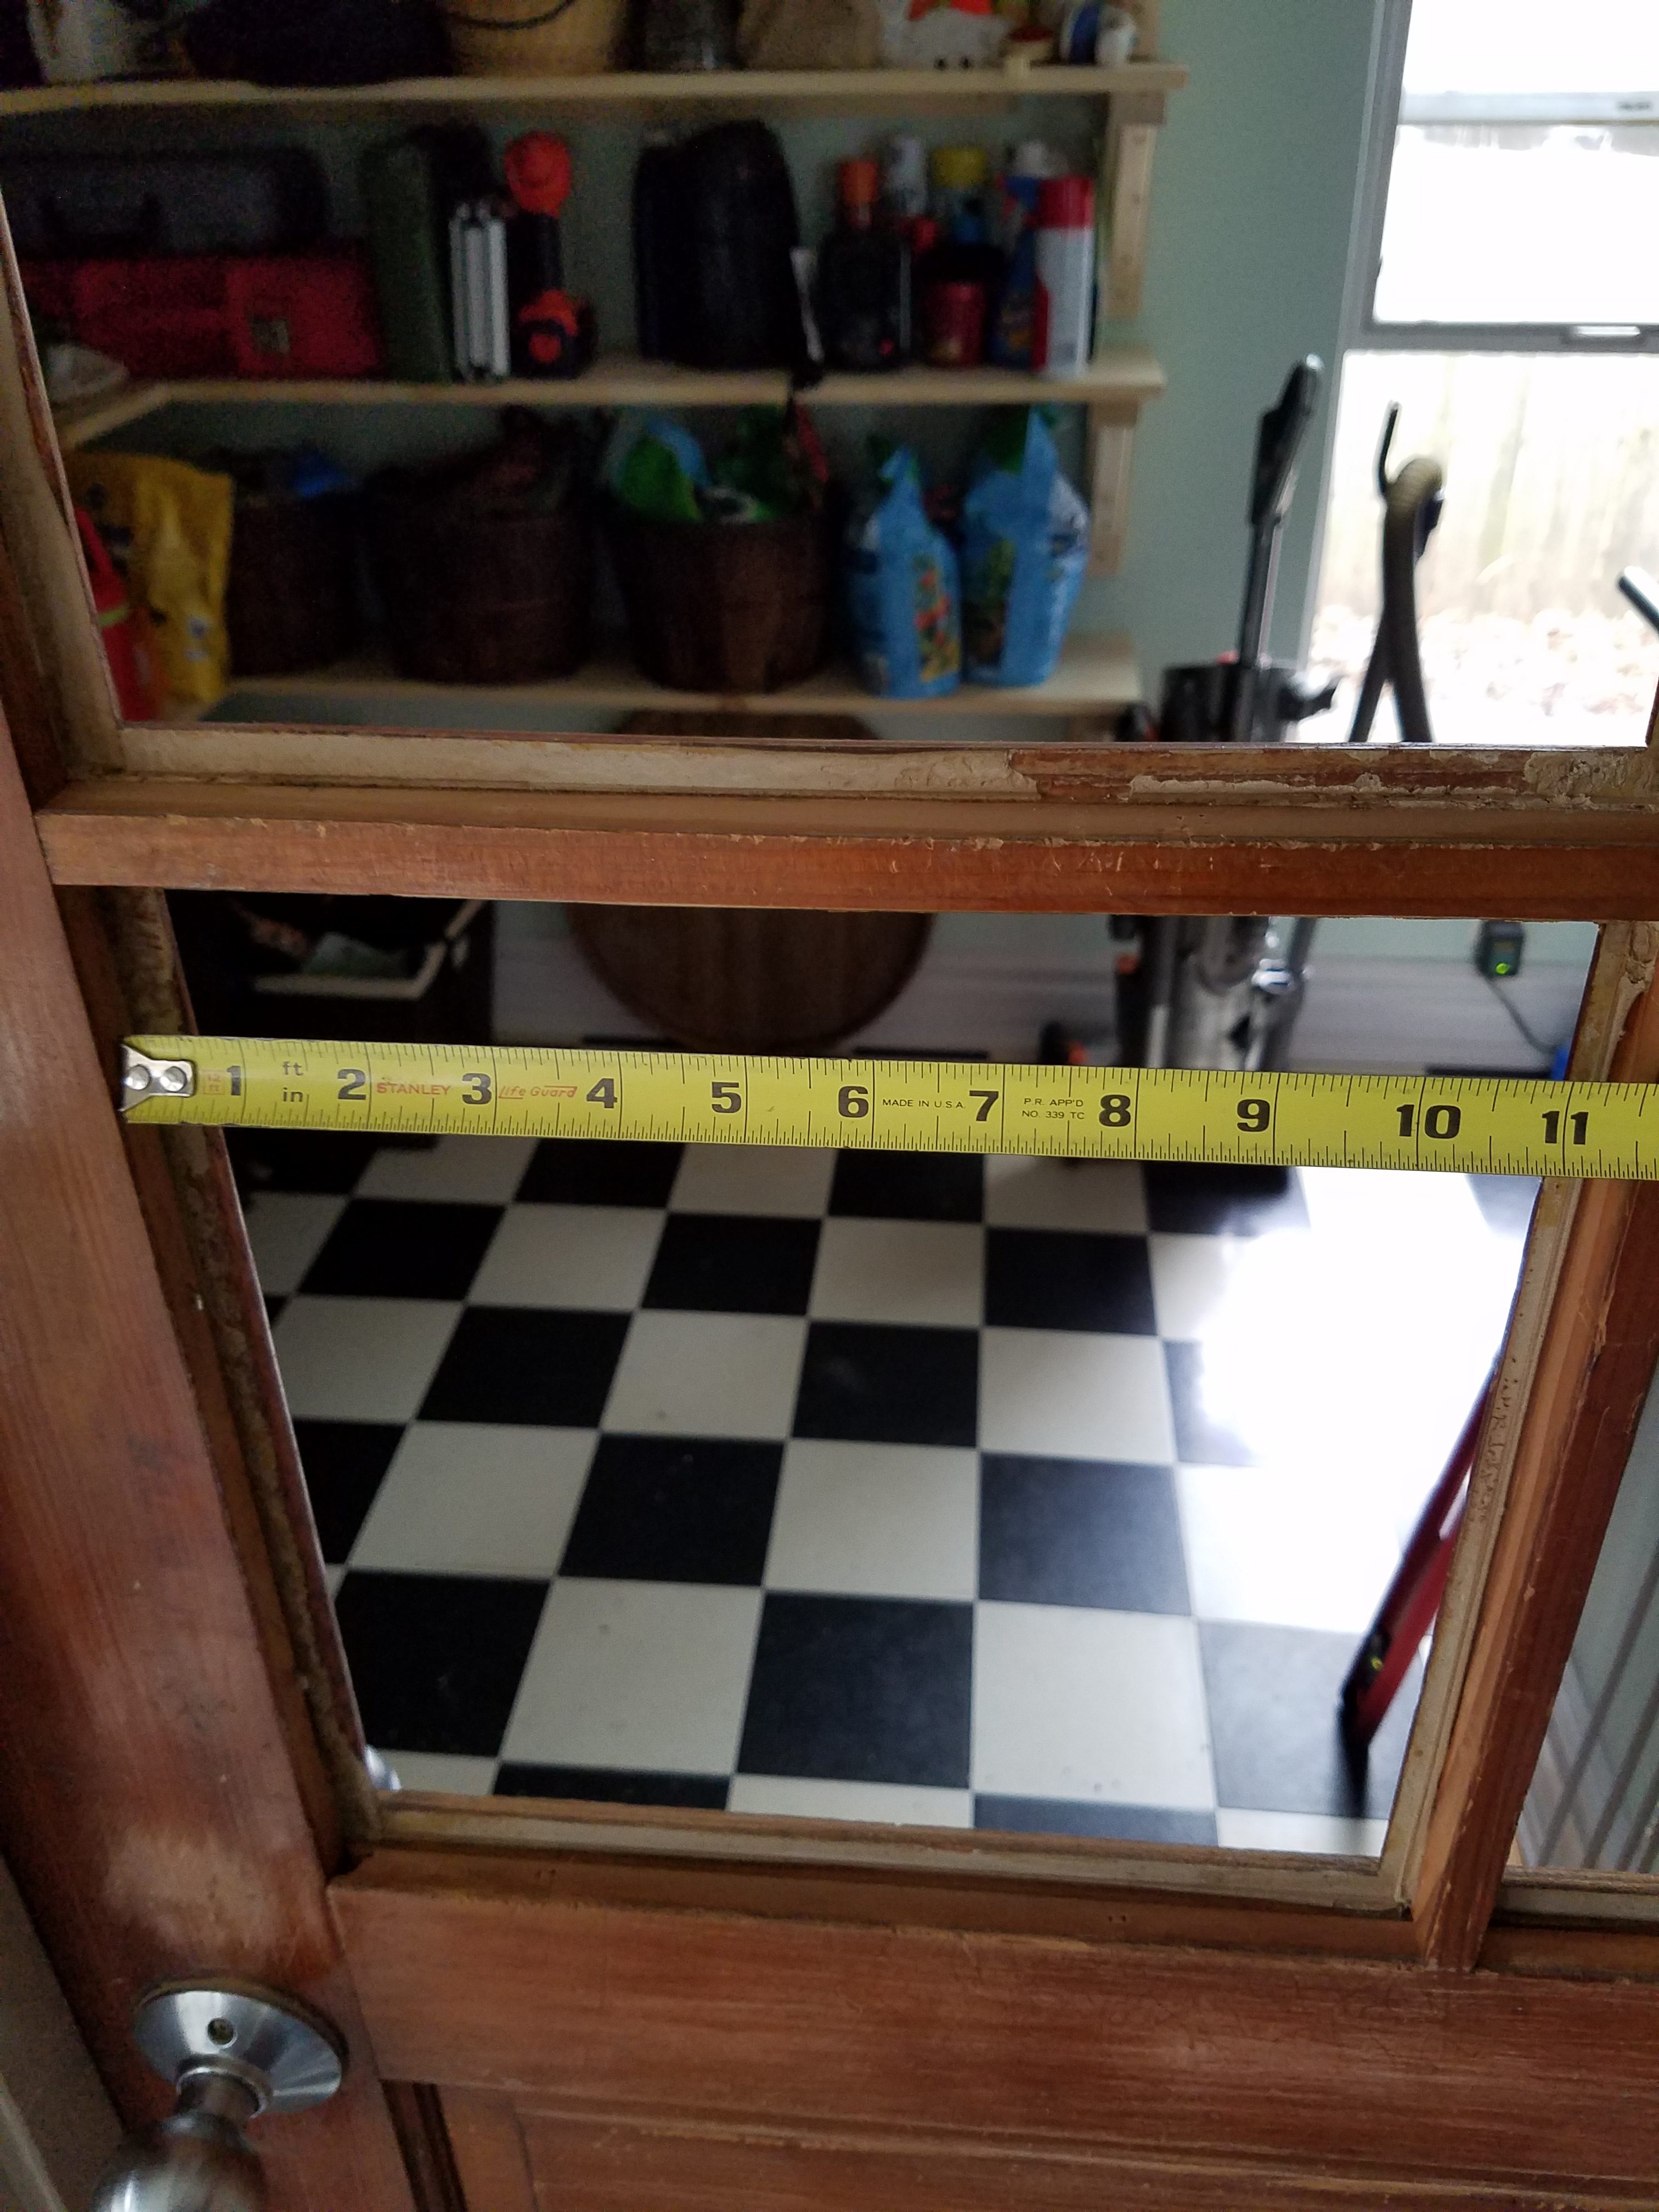
Measure the opening for the pane carefully. Leave about 1/8″-1/4″ wiggle room for expansion of the wood frame.
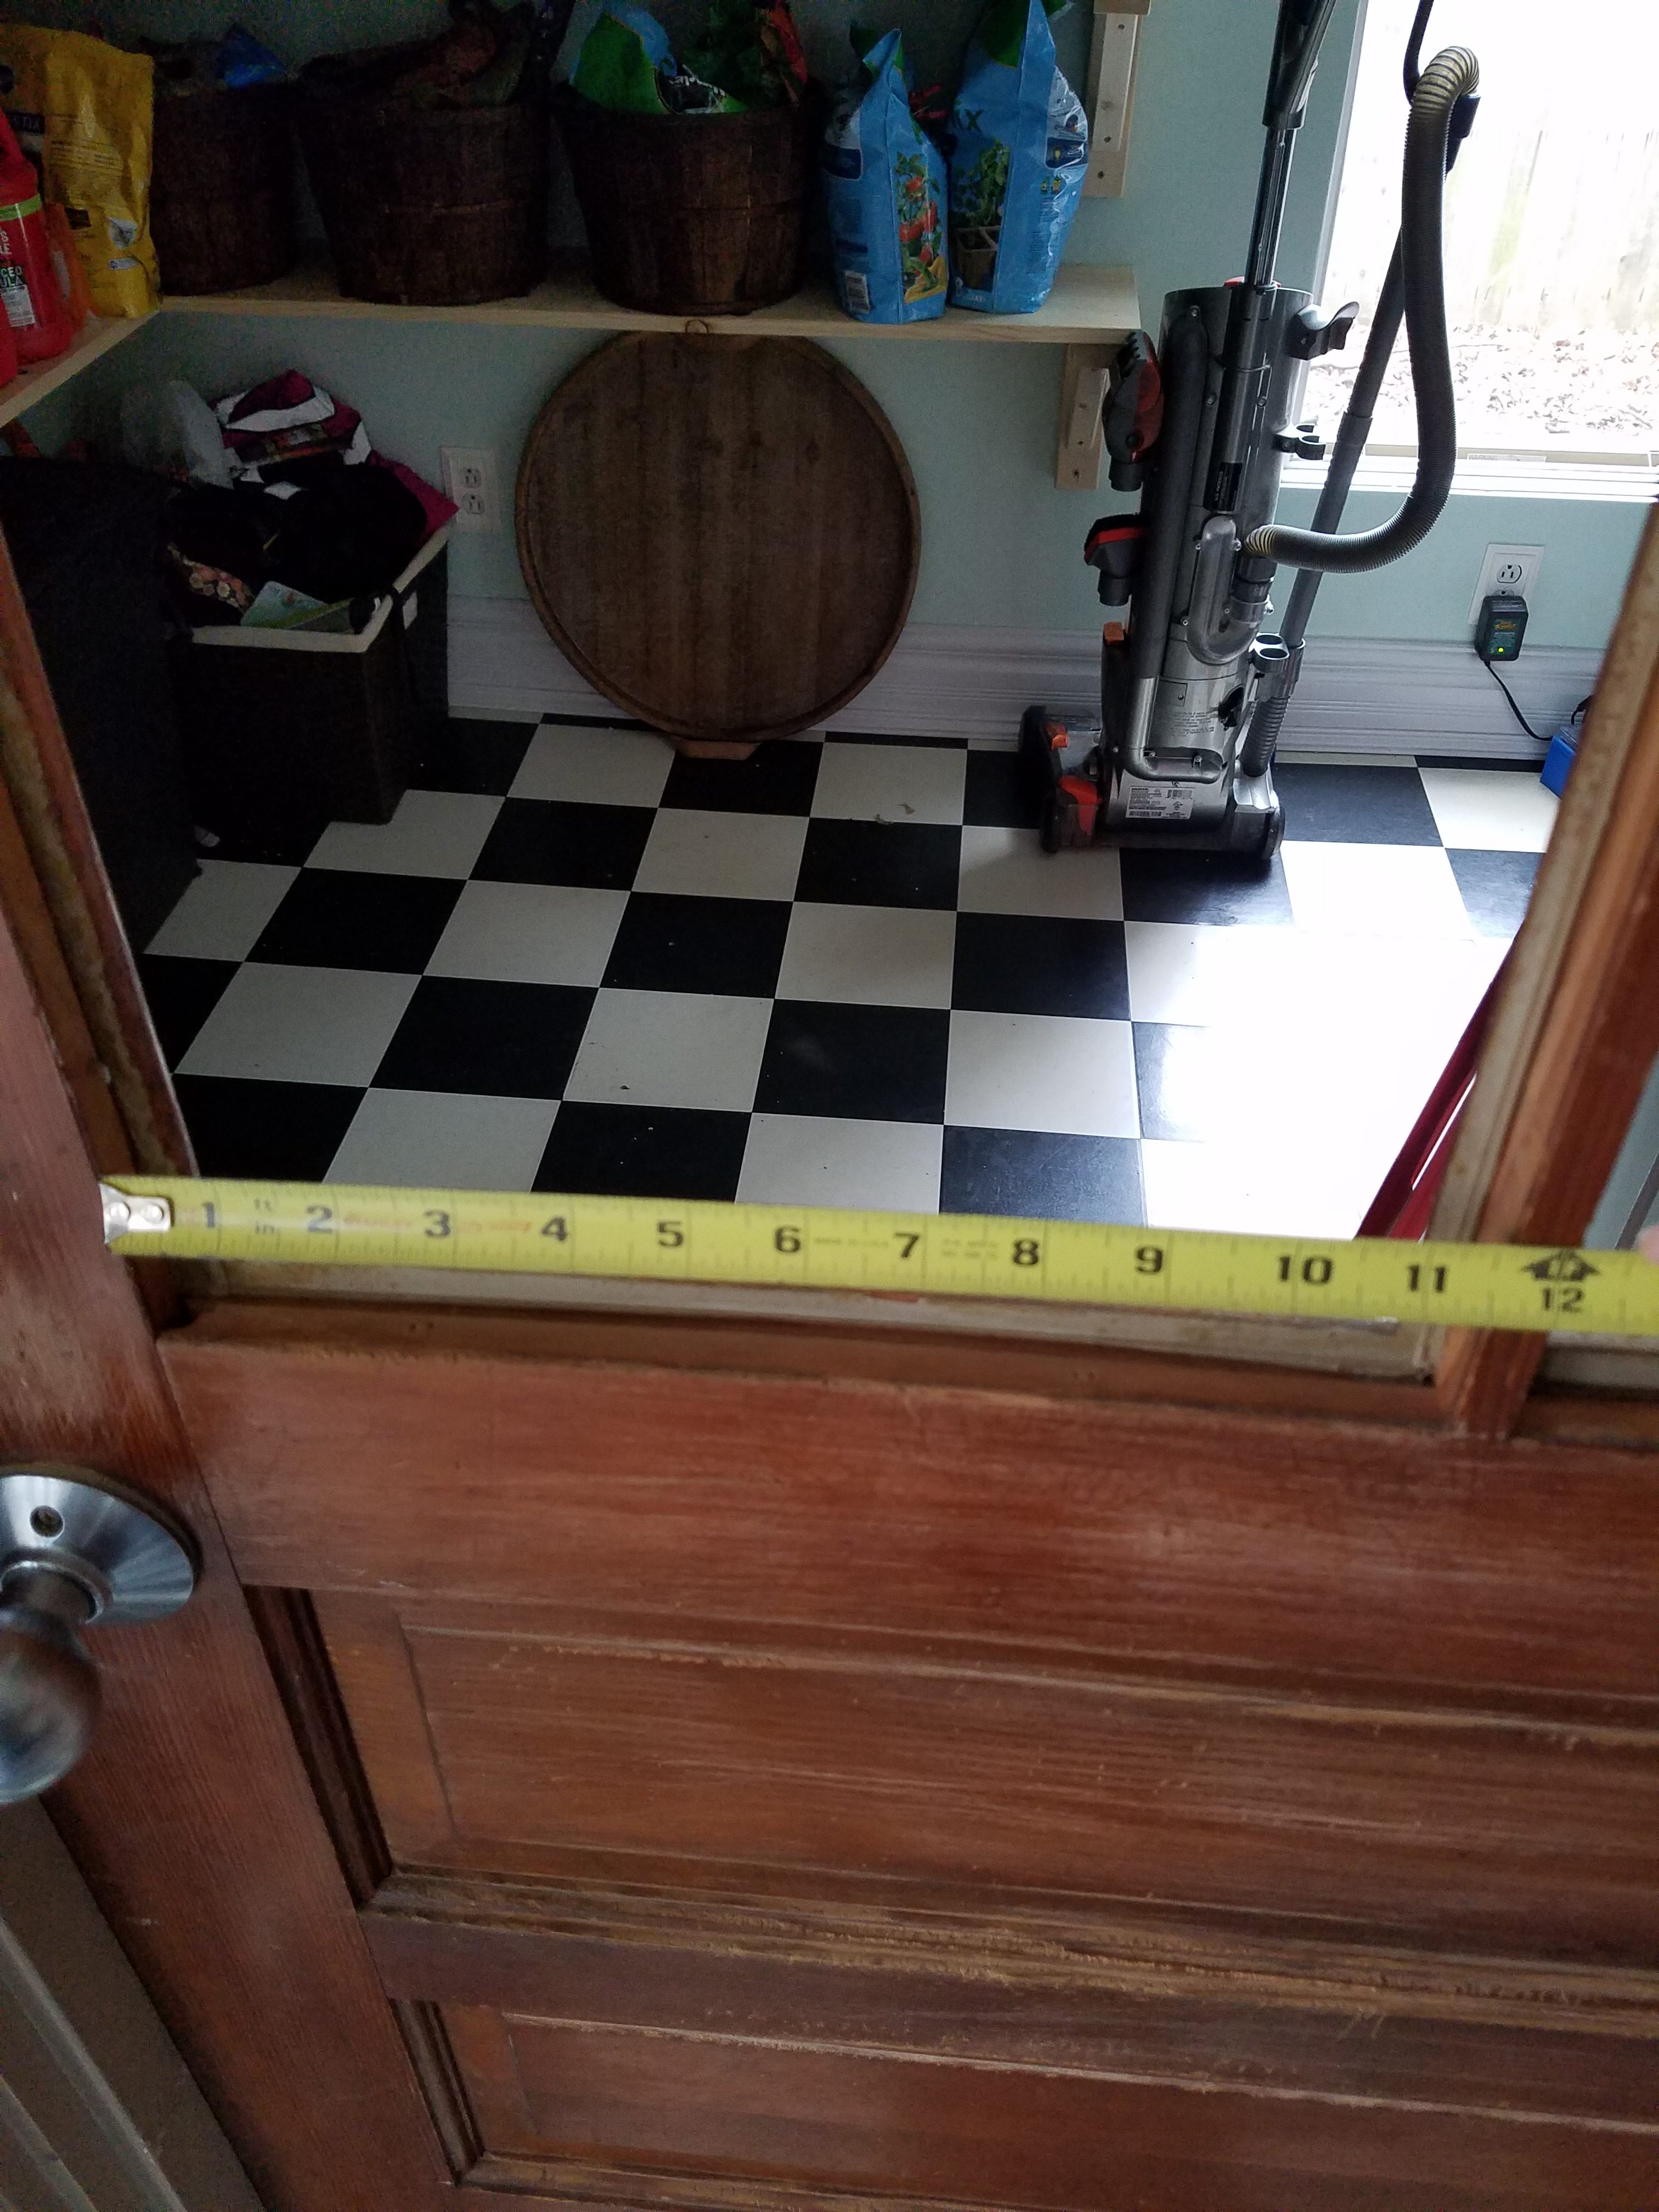
Measure top and bottom in both directions. Not all openings have perfectly parallel sides and it will be very difficult to cut the window down to size later. Measure carefully so your pattern is the correct size to begin with.
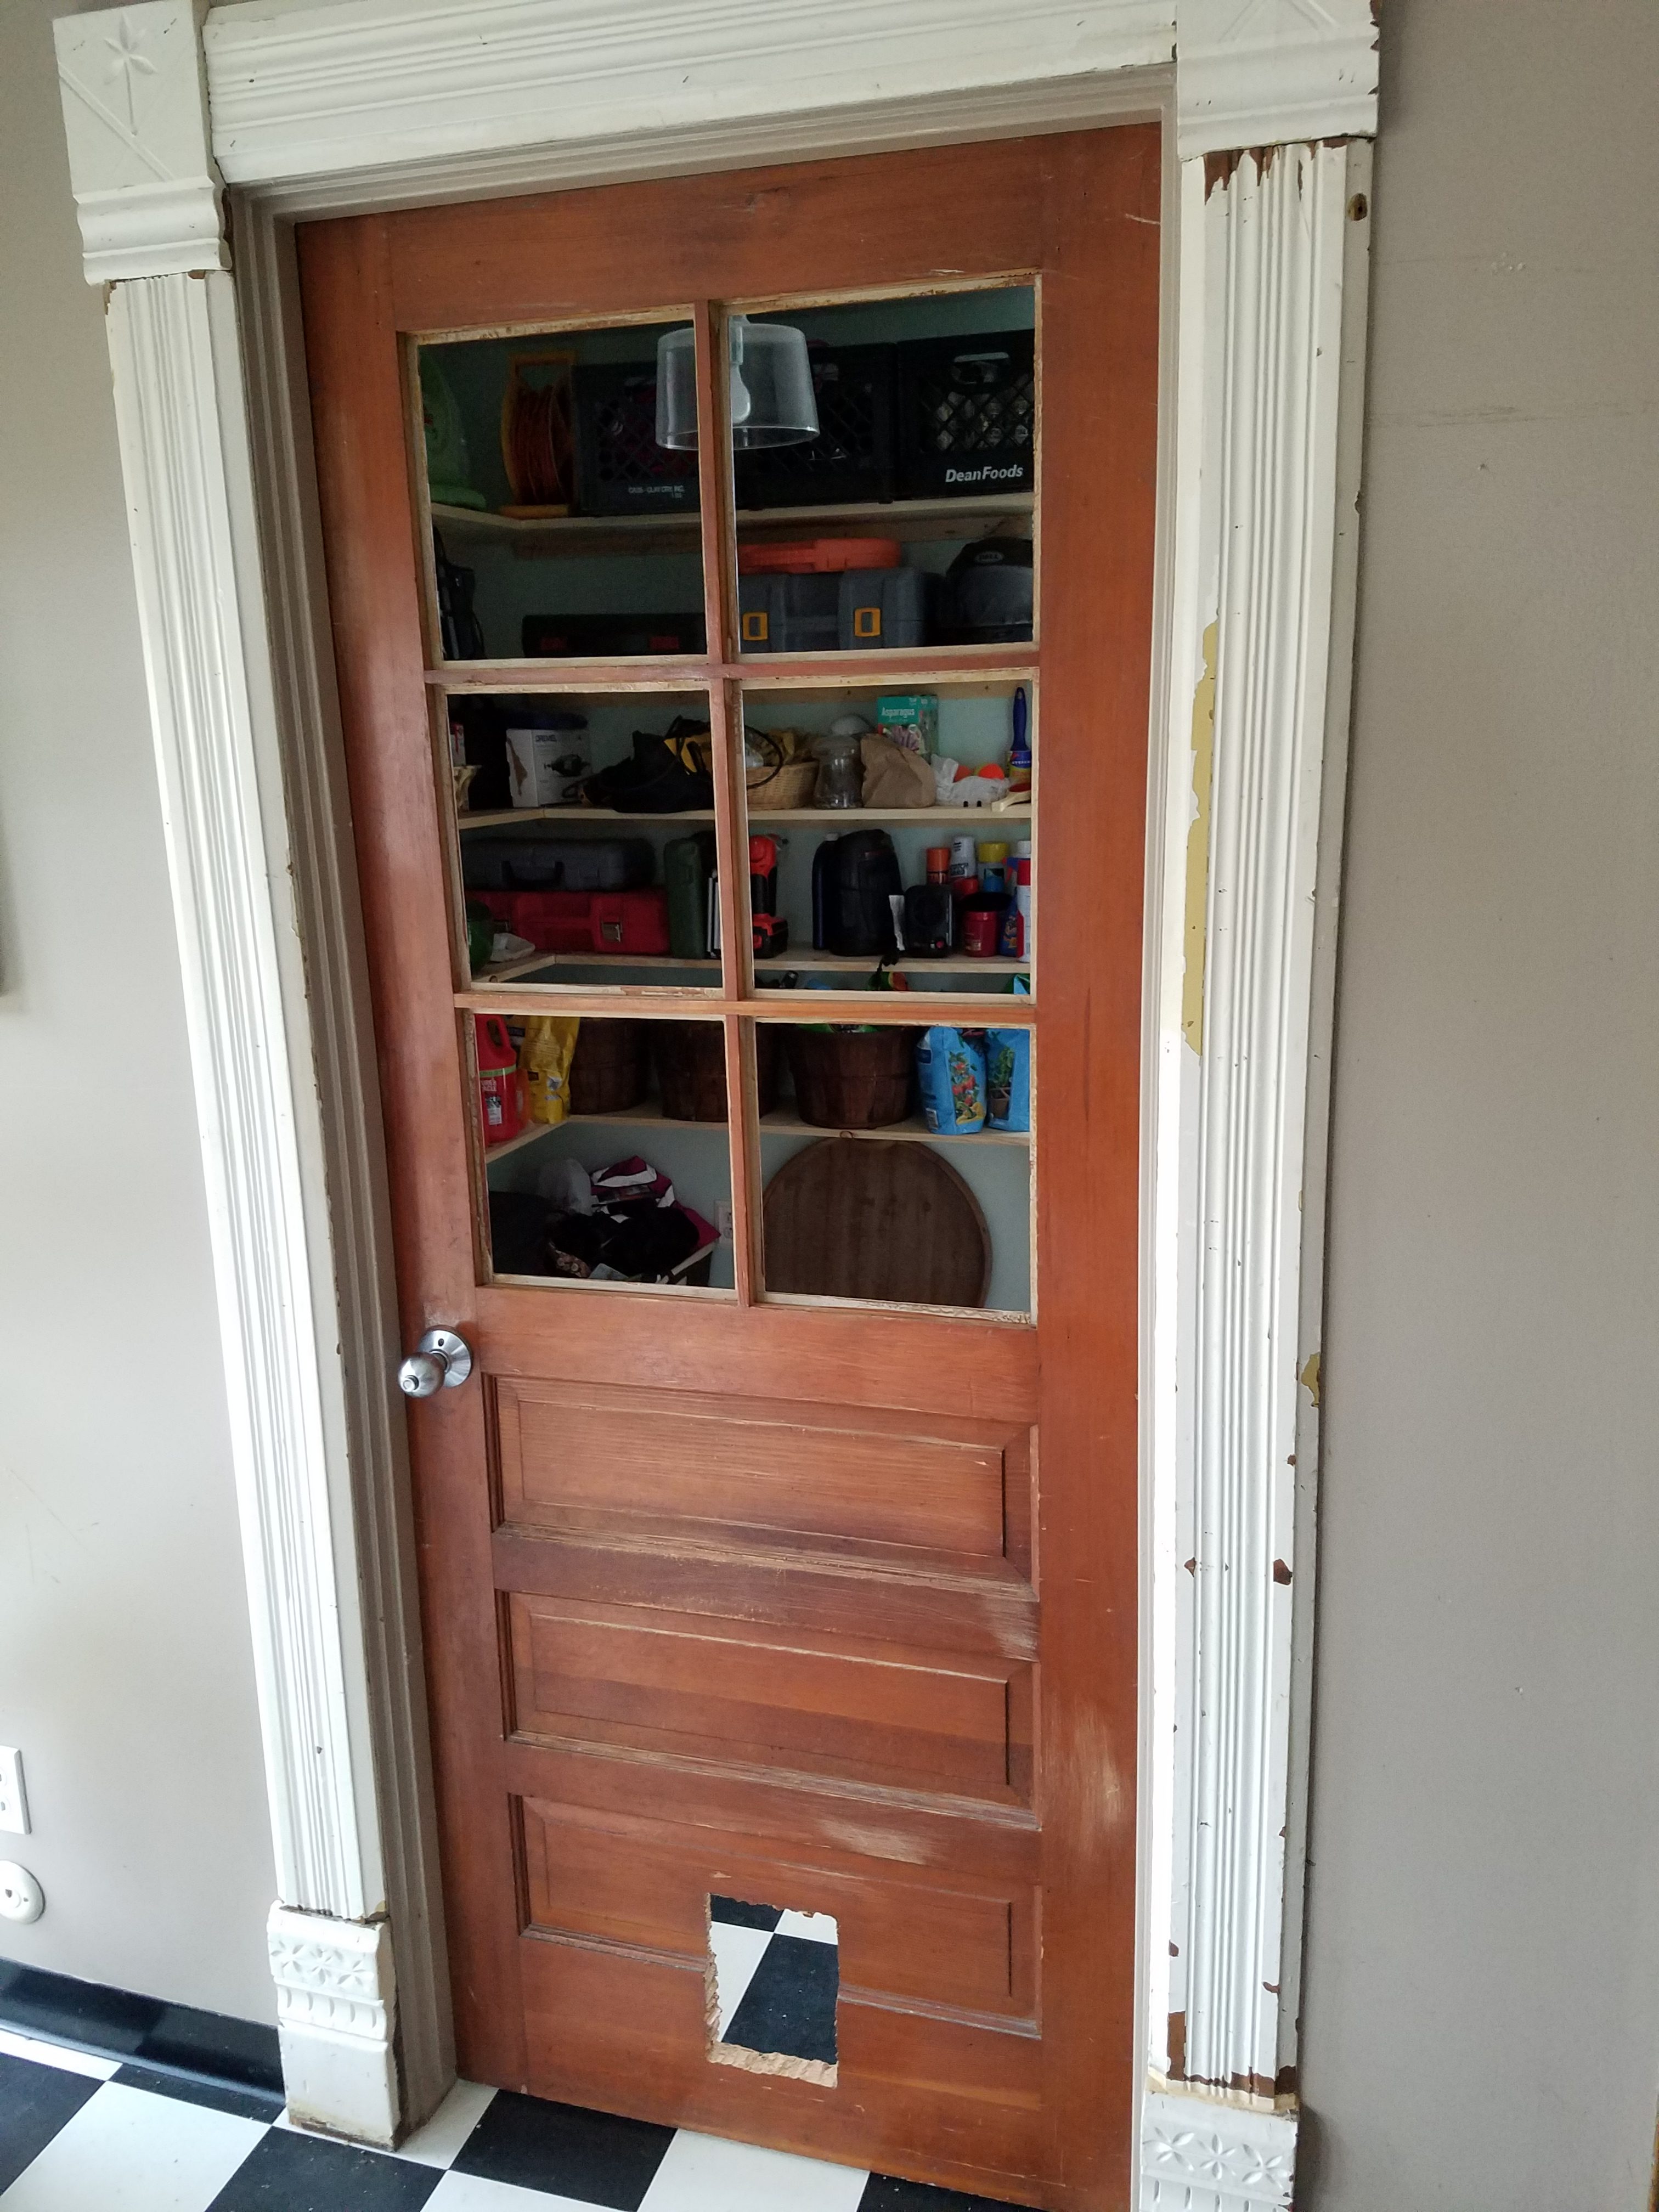
I measured every single one of these openings in each direction. It’d be awful if I made all 6 panes only to find a few of them didn’t fit quite right. Measure twice, cut once!
Draw the outline of the opening, then draw your pattern in the middle.
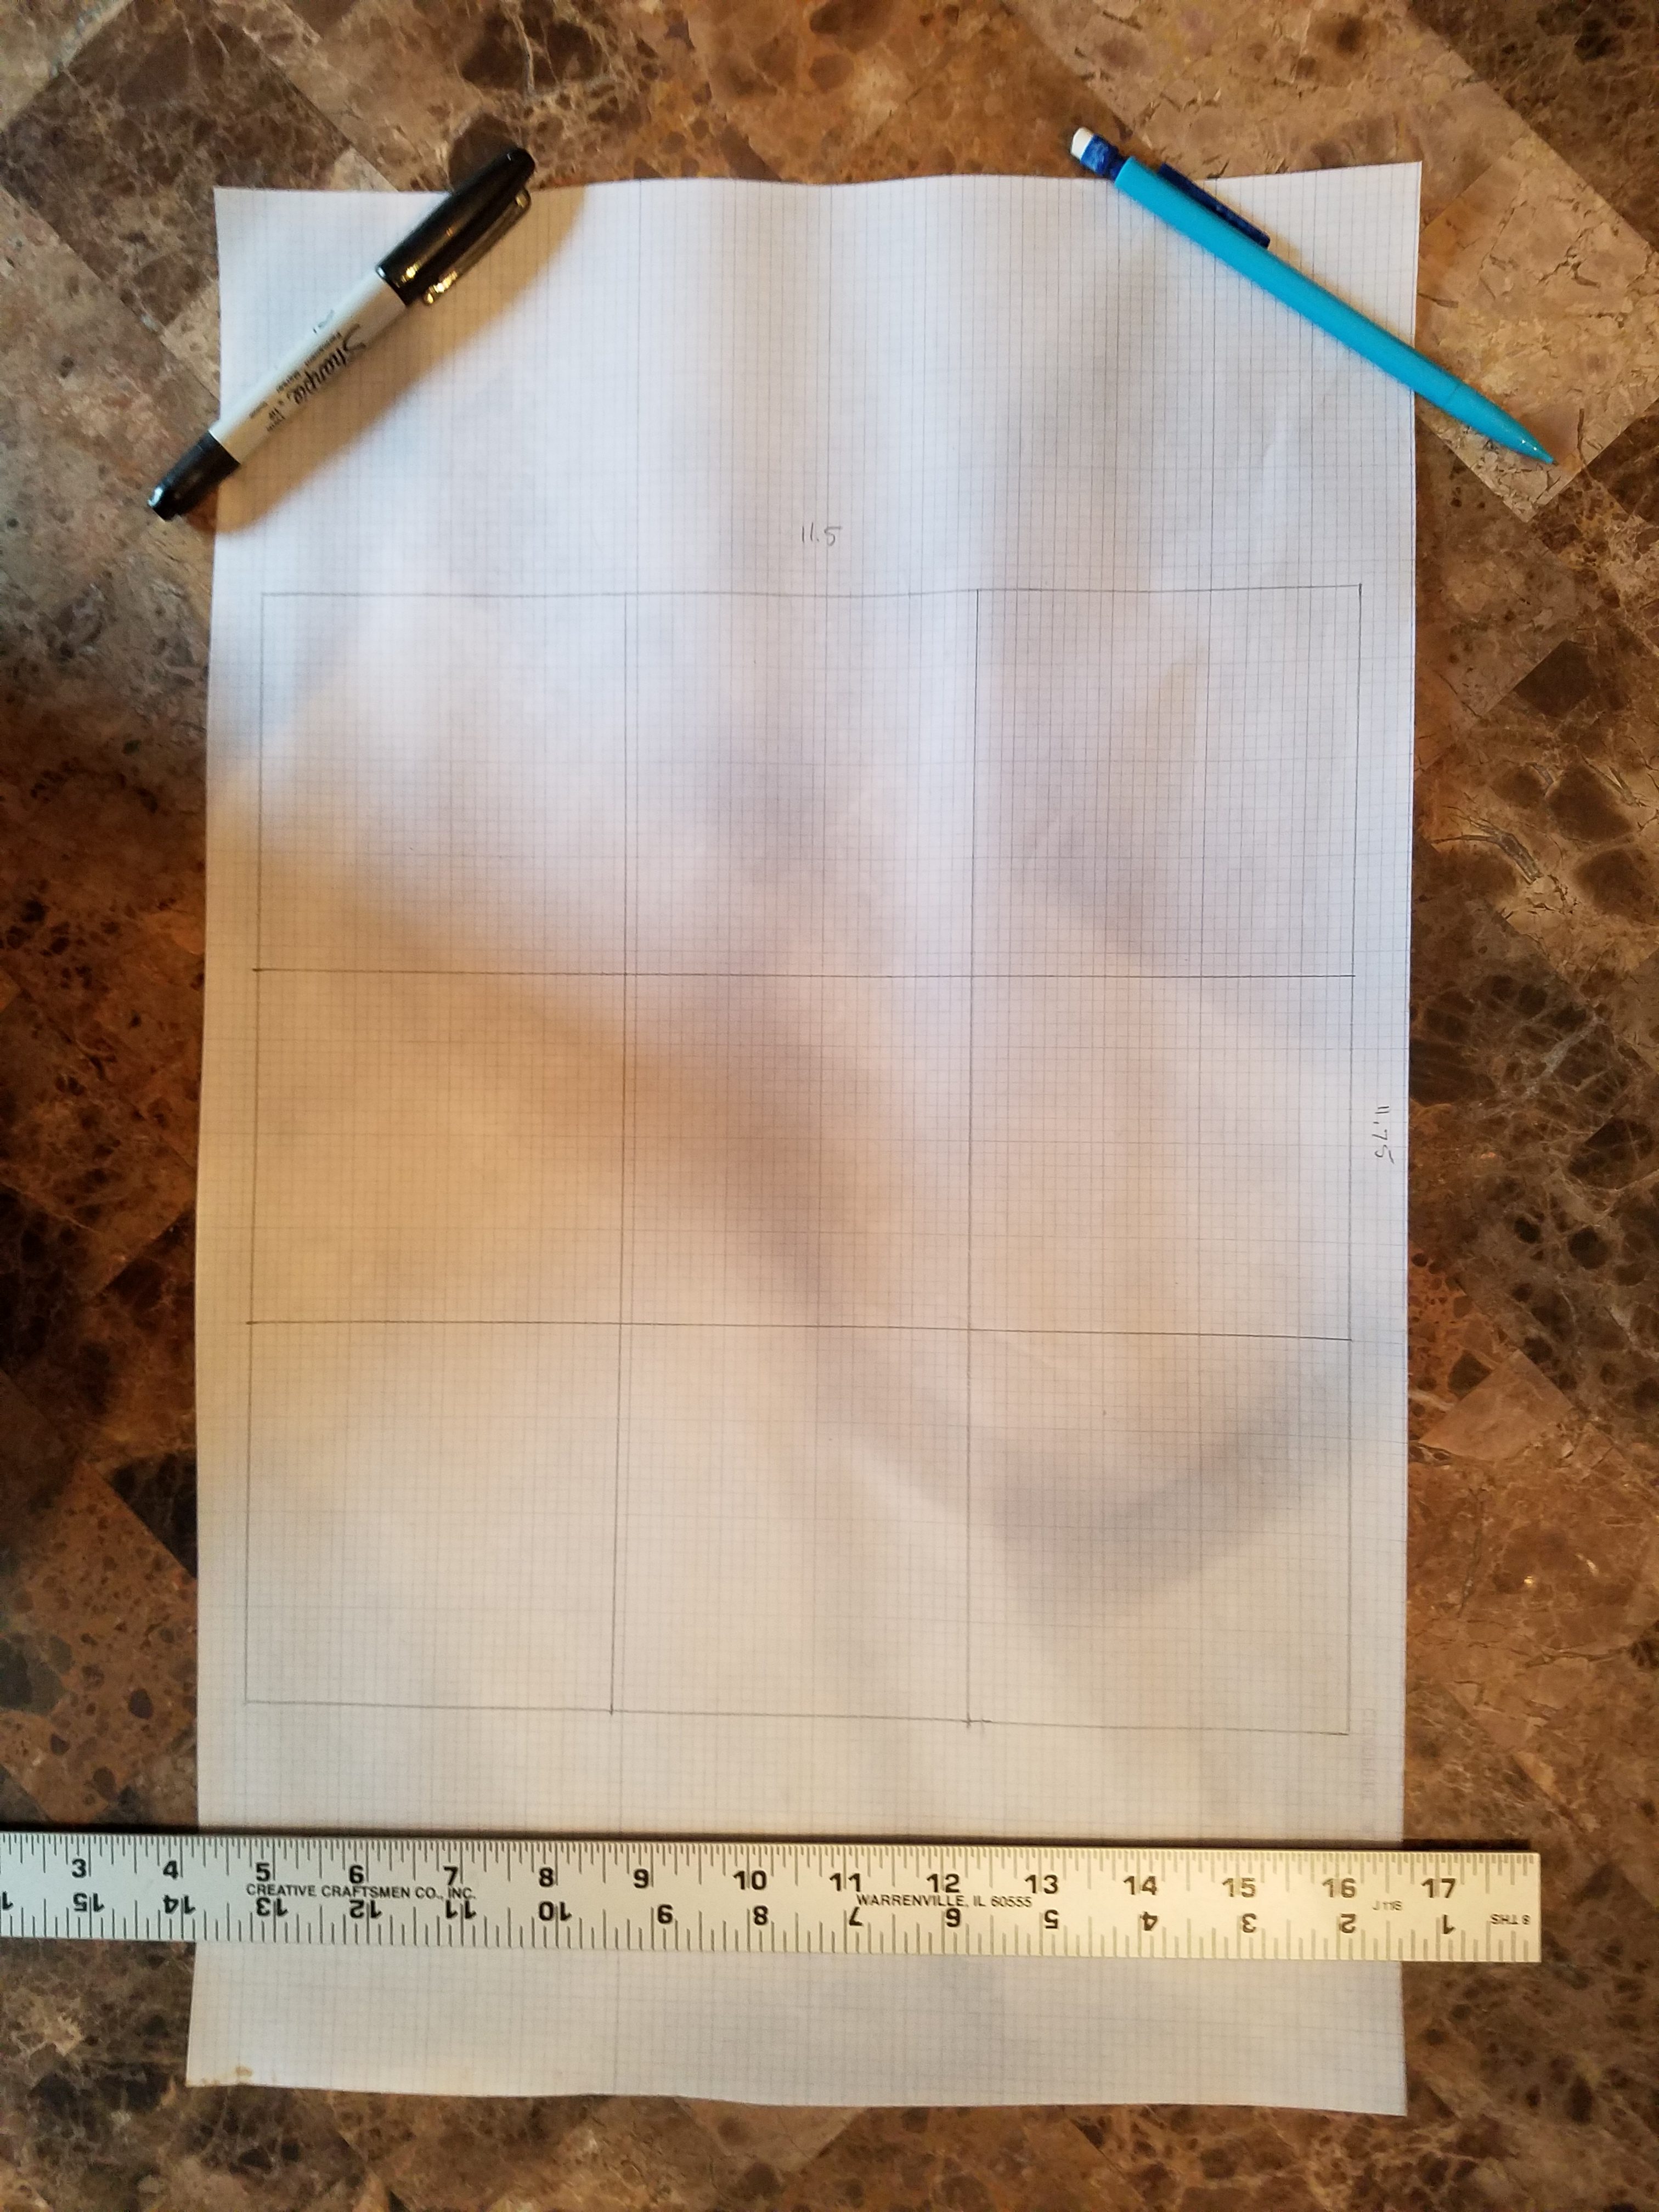
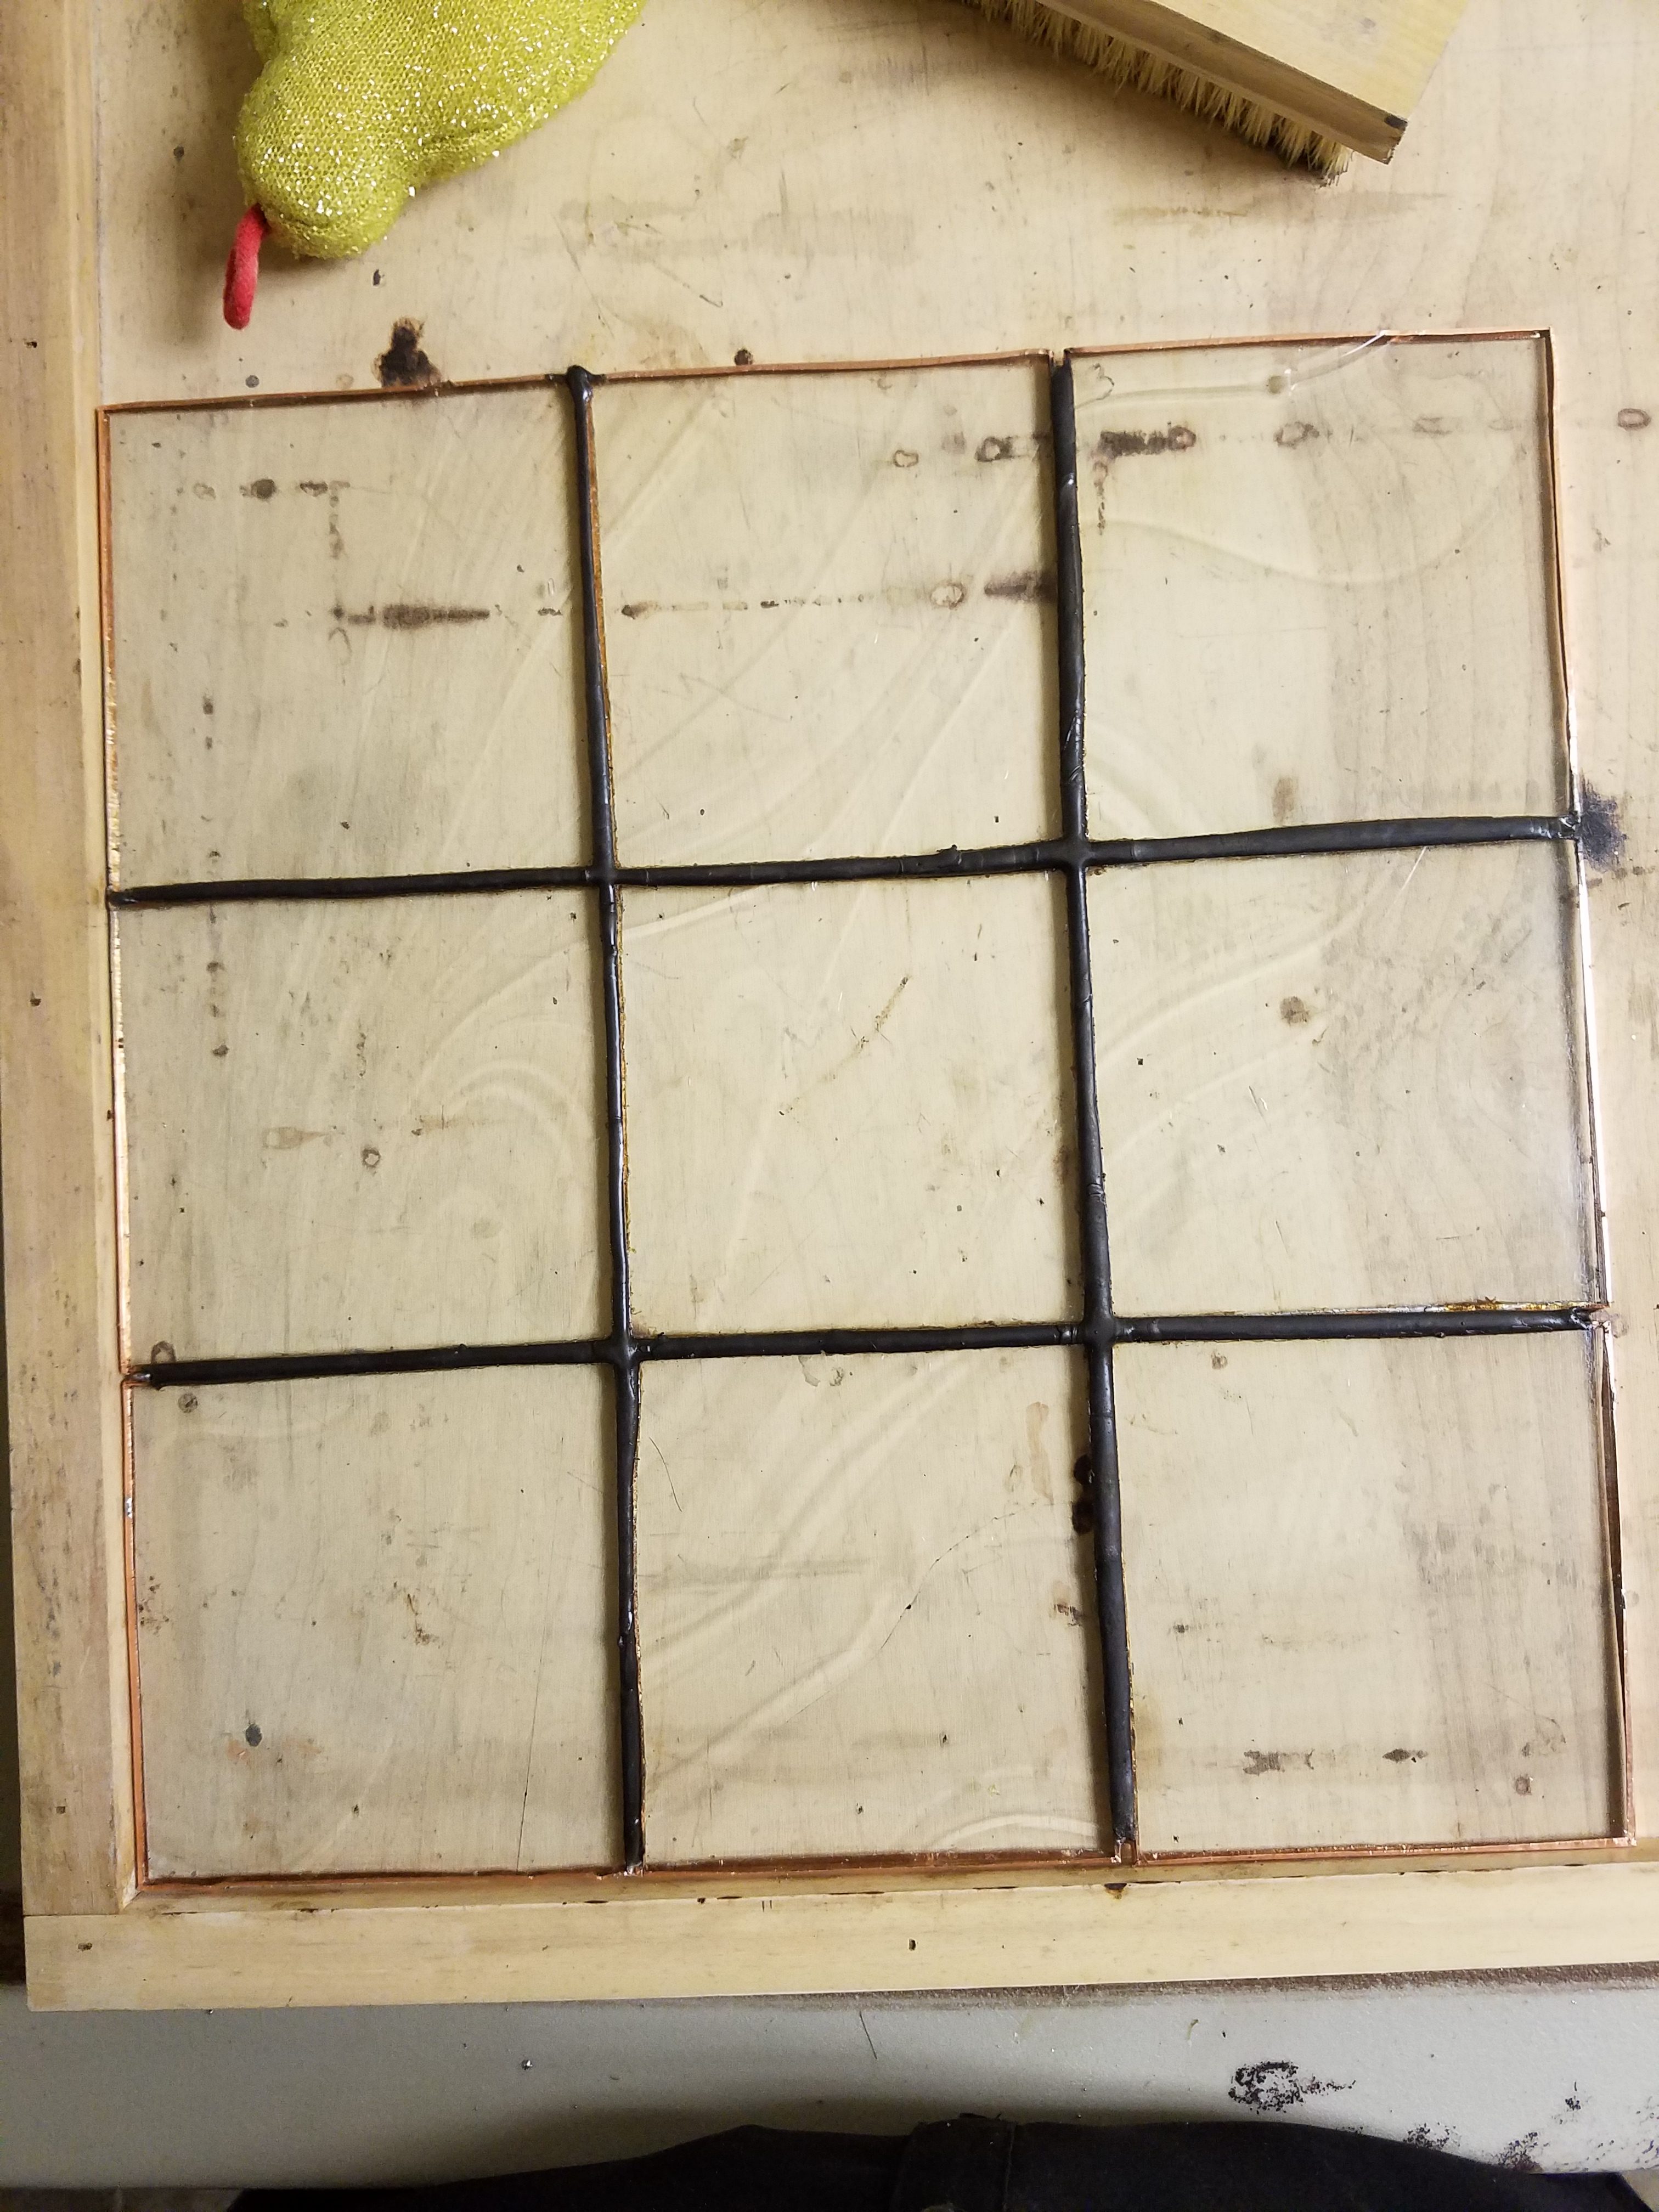
Draw out your pattern with pencil. If using bevels, be sure to trace them into the pattern exactly. I’m making a simple grid pattern with these panes.
Trace your pattern with a sharpie
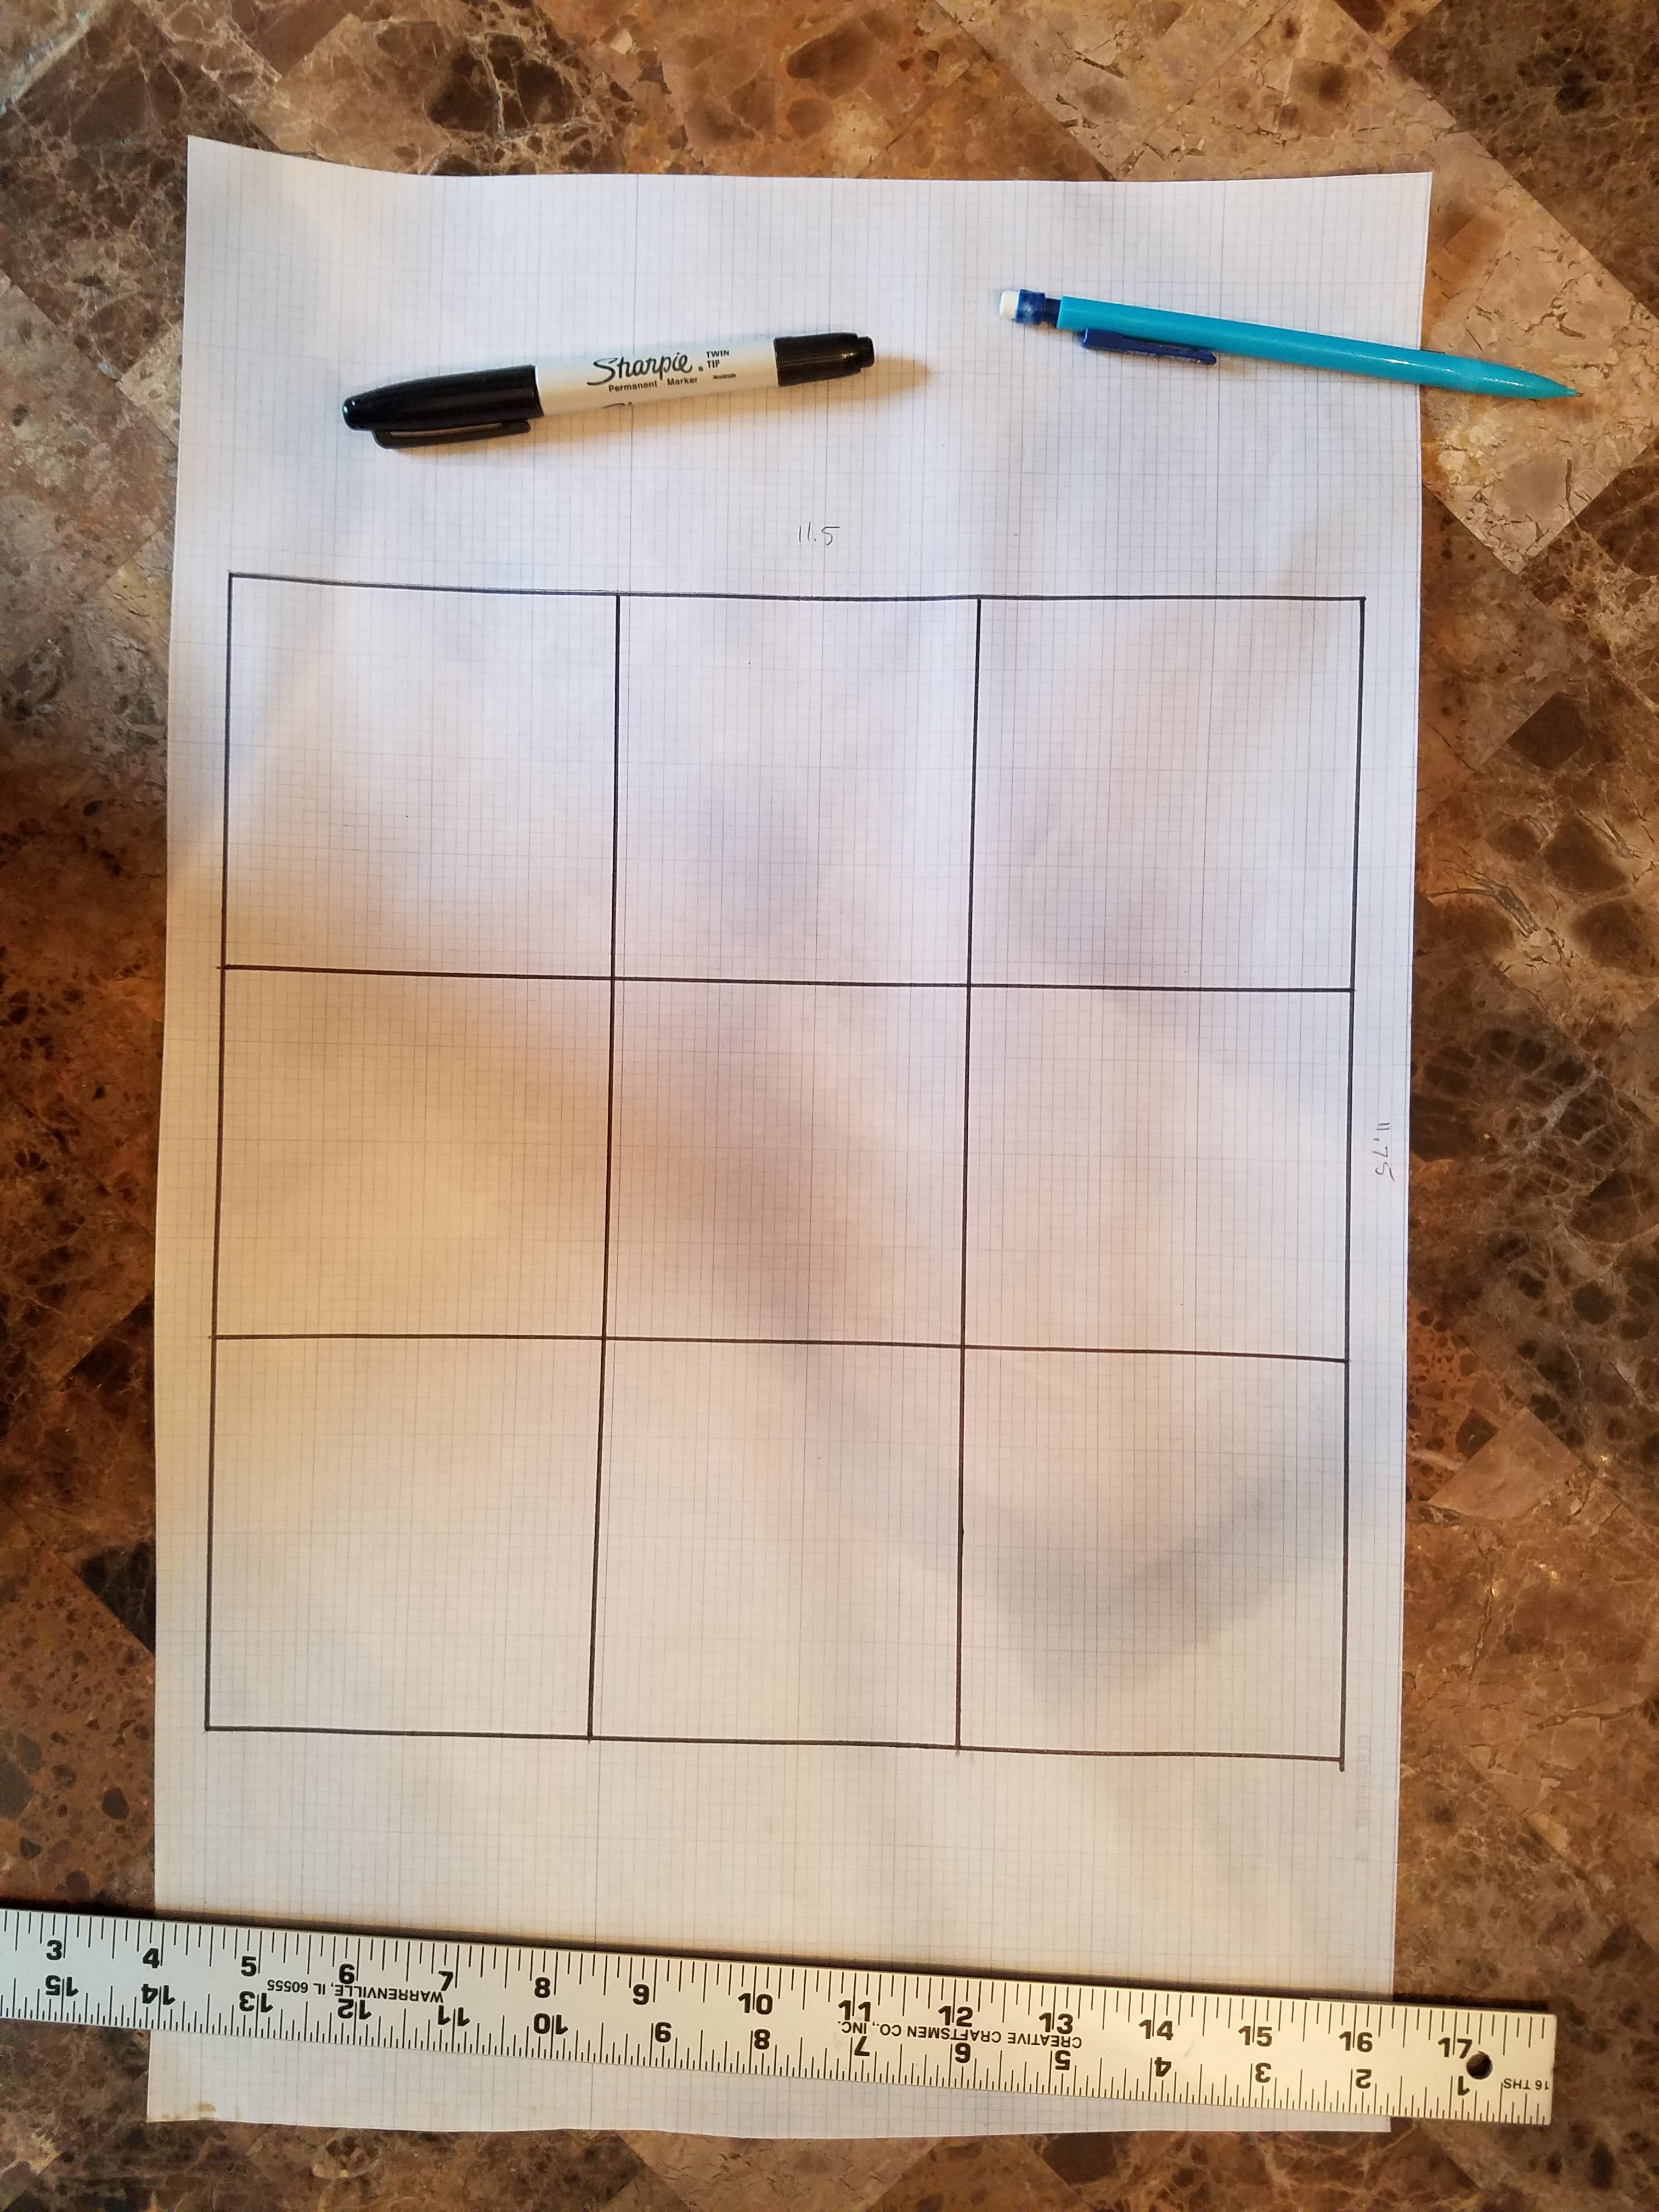
Once you’re happy with your pencil sketched pattern, trace it all with a fine point sharpie.
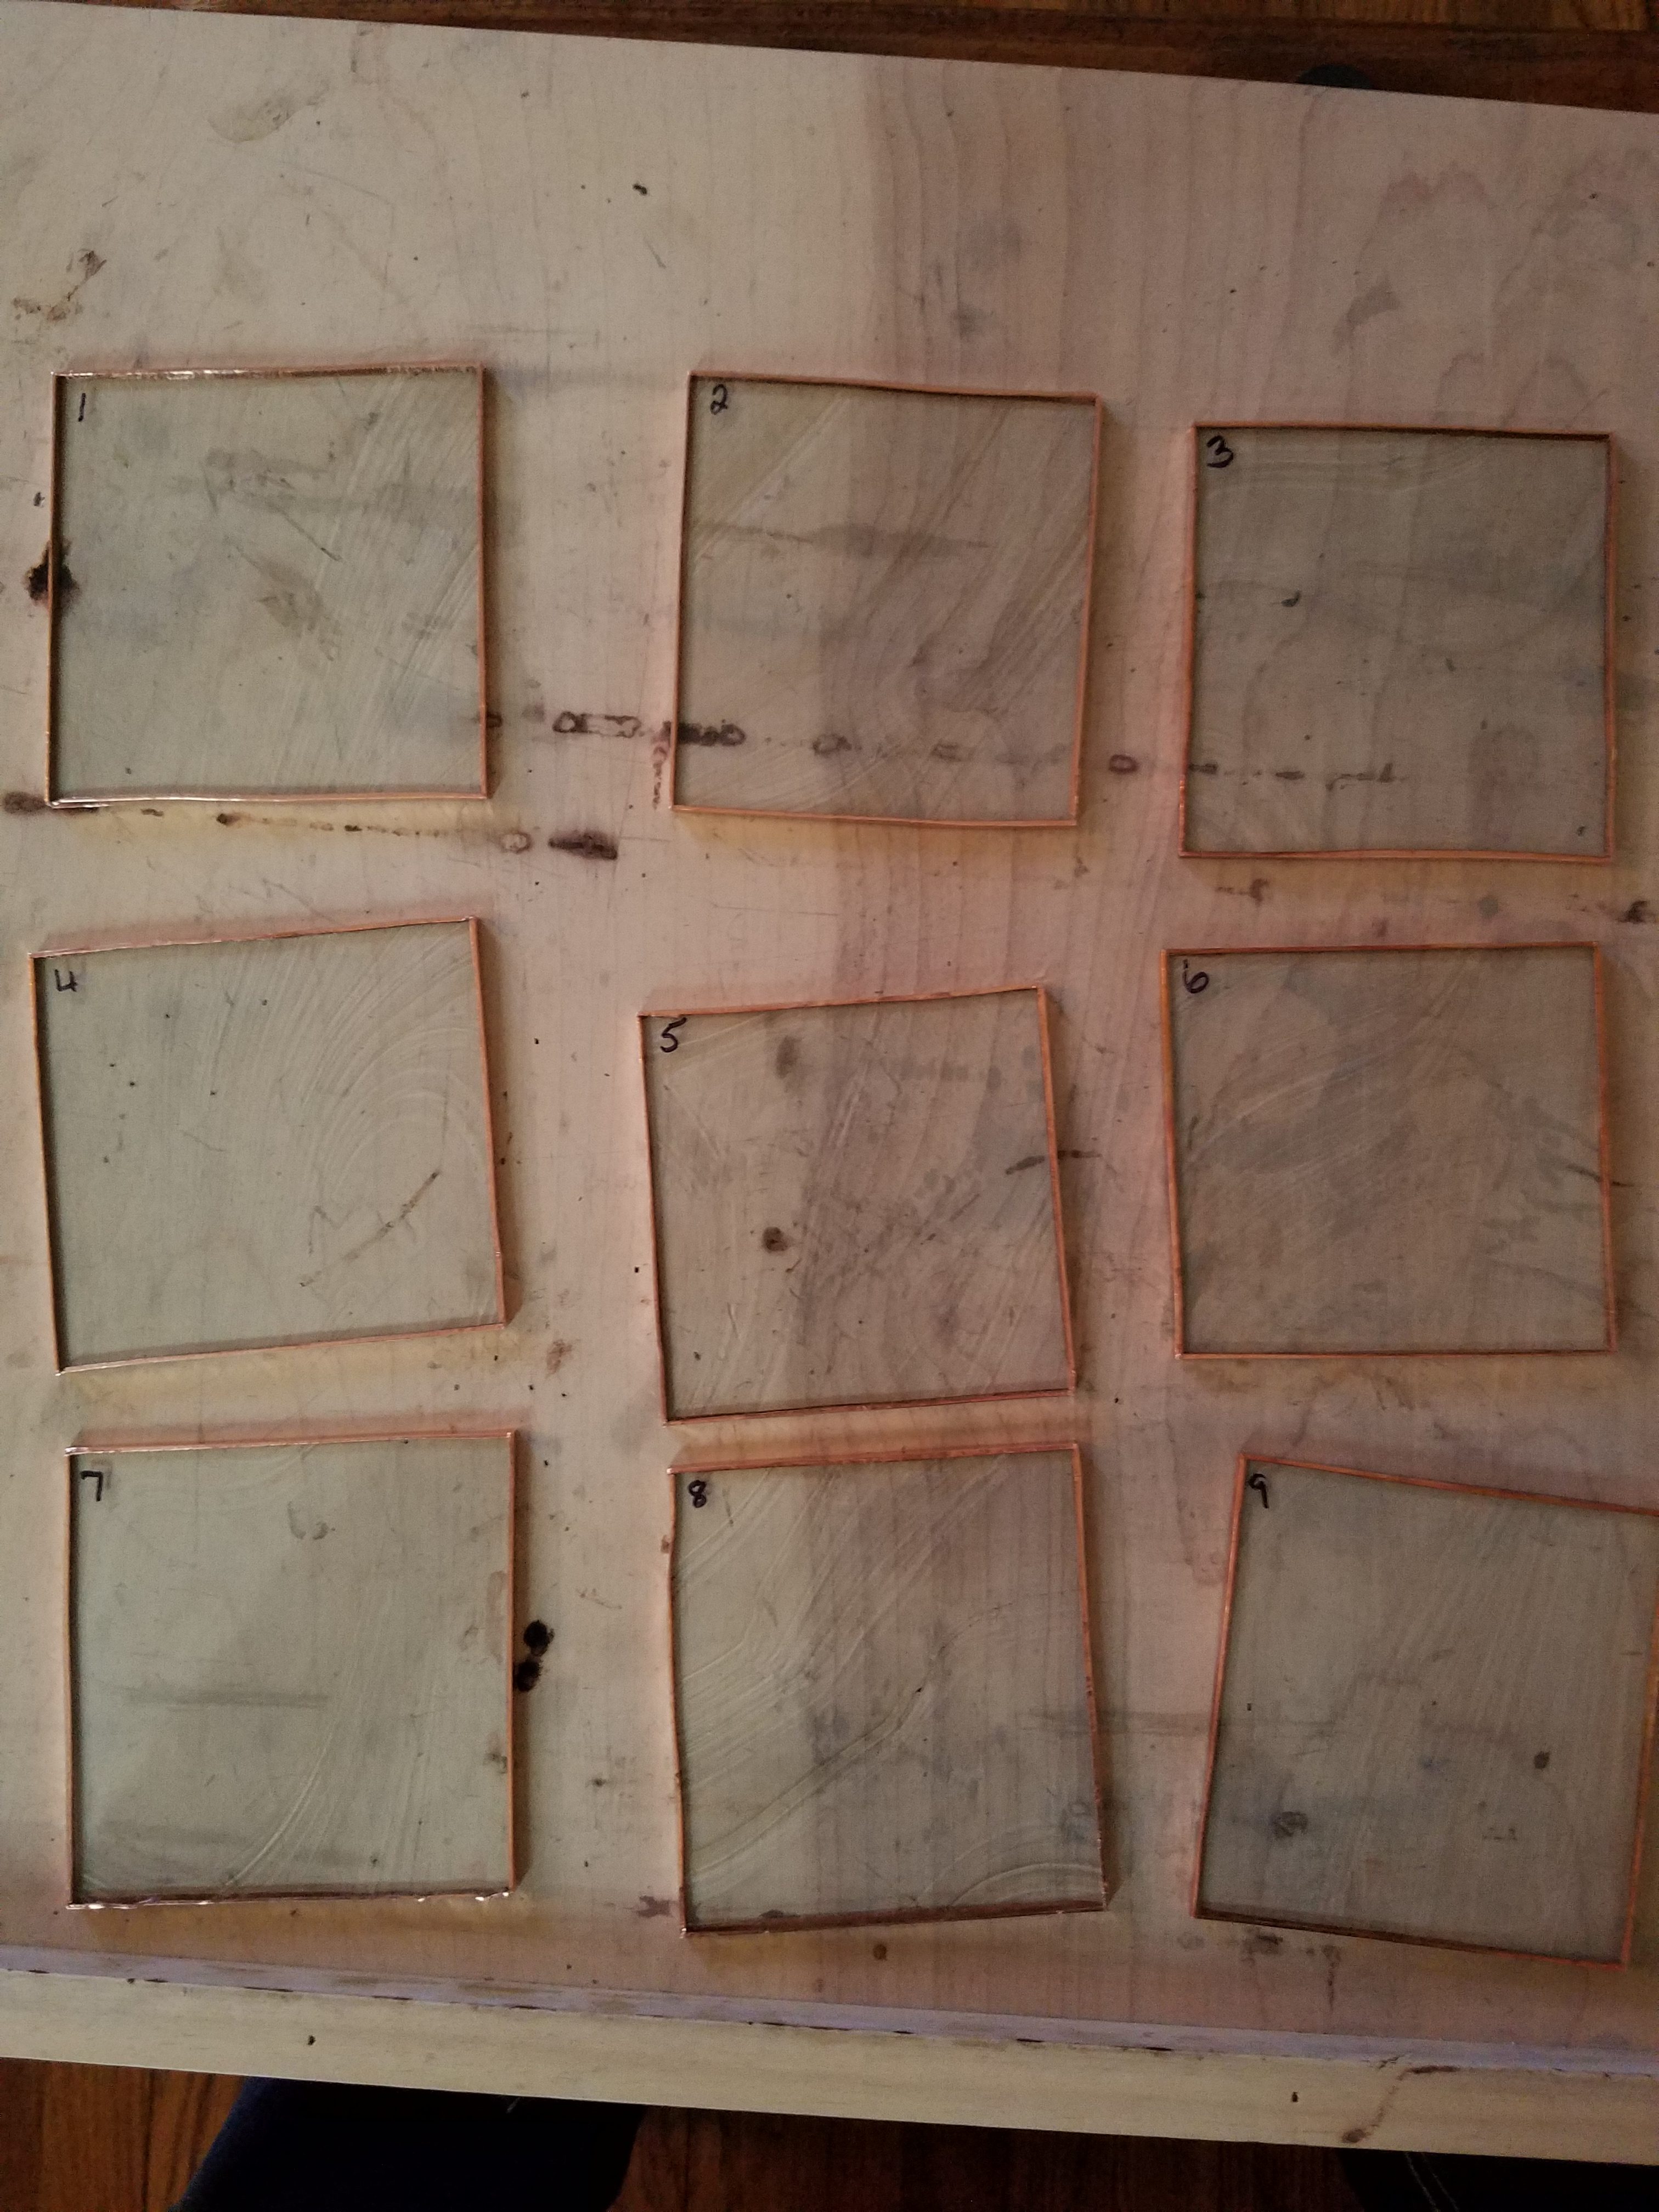
Number each piece
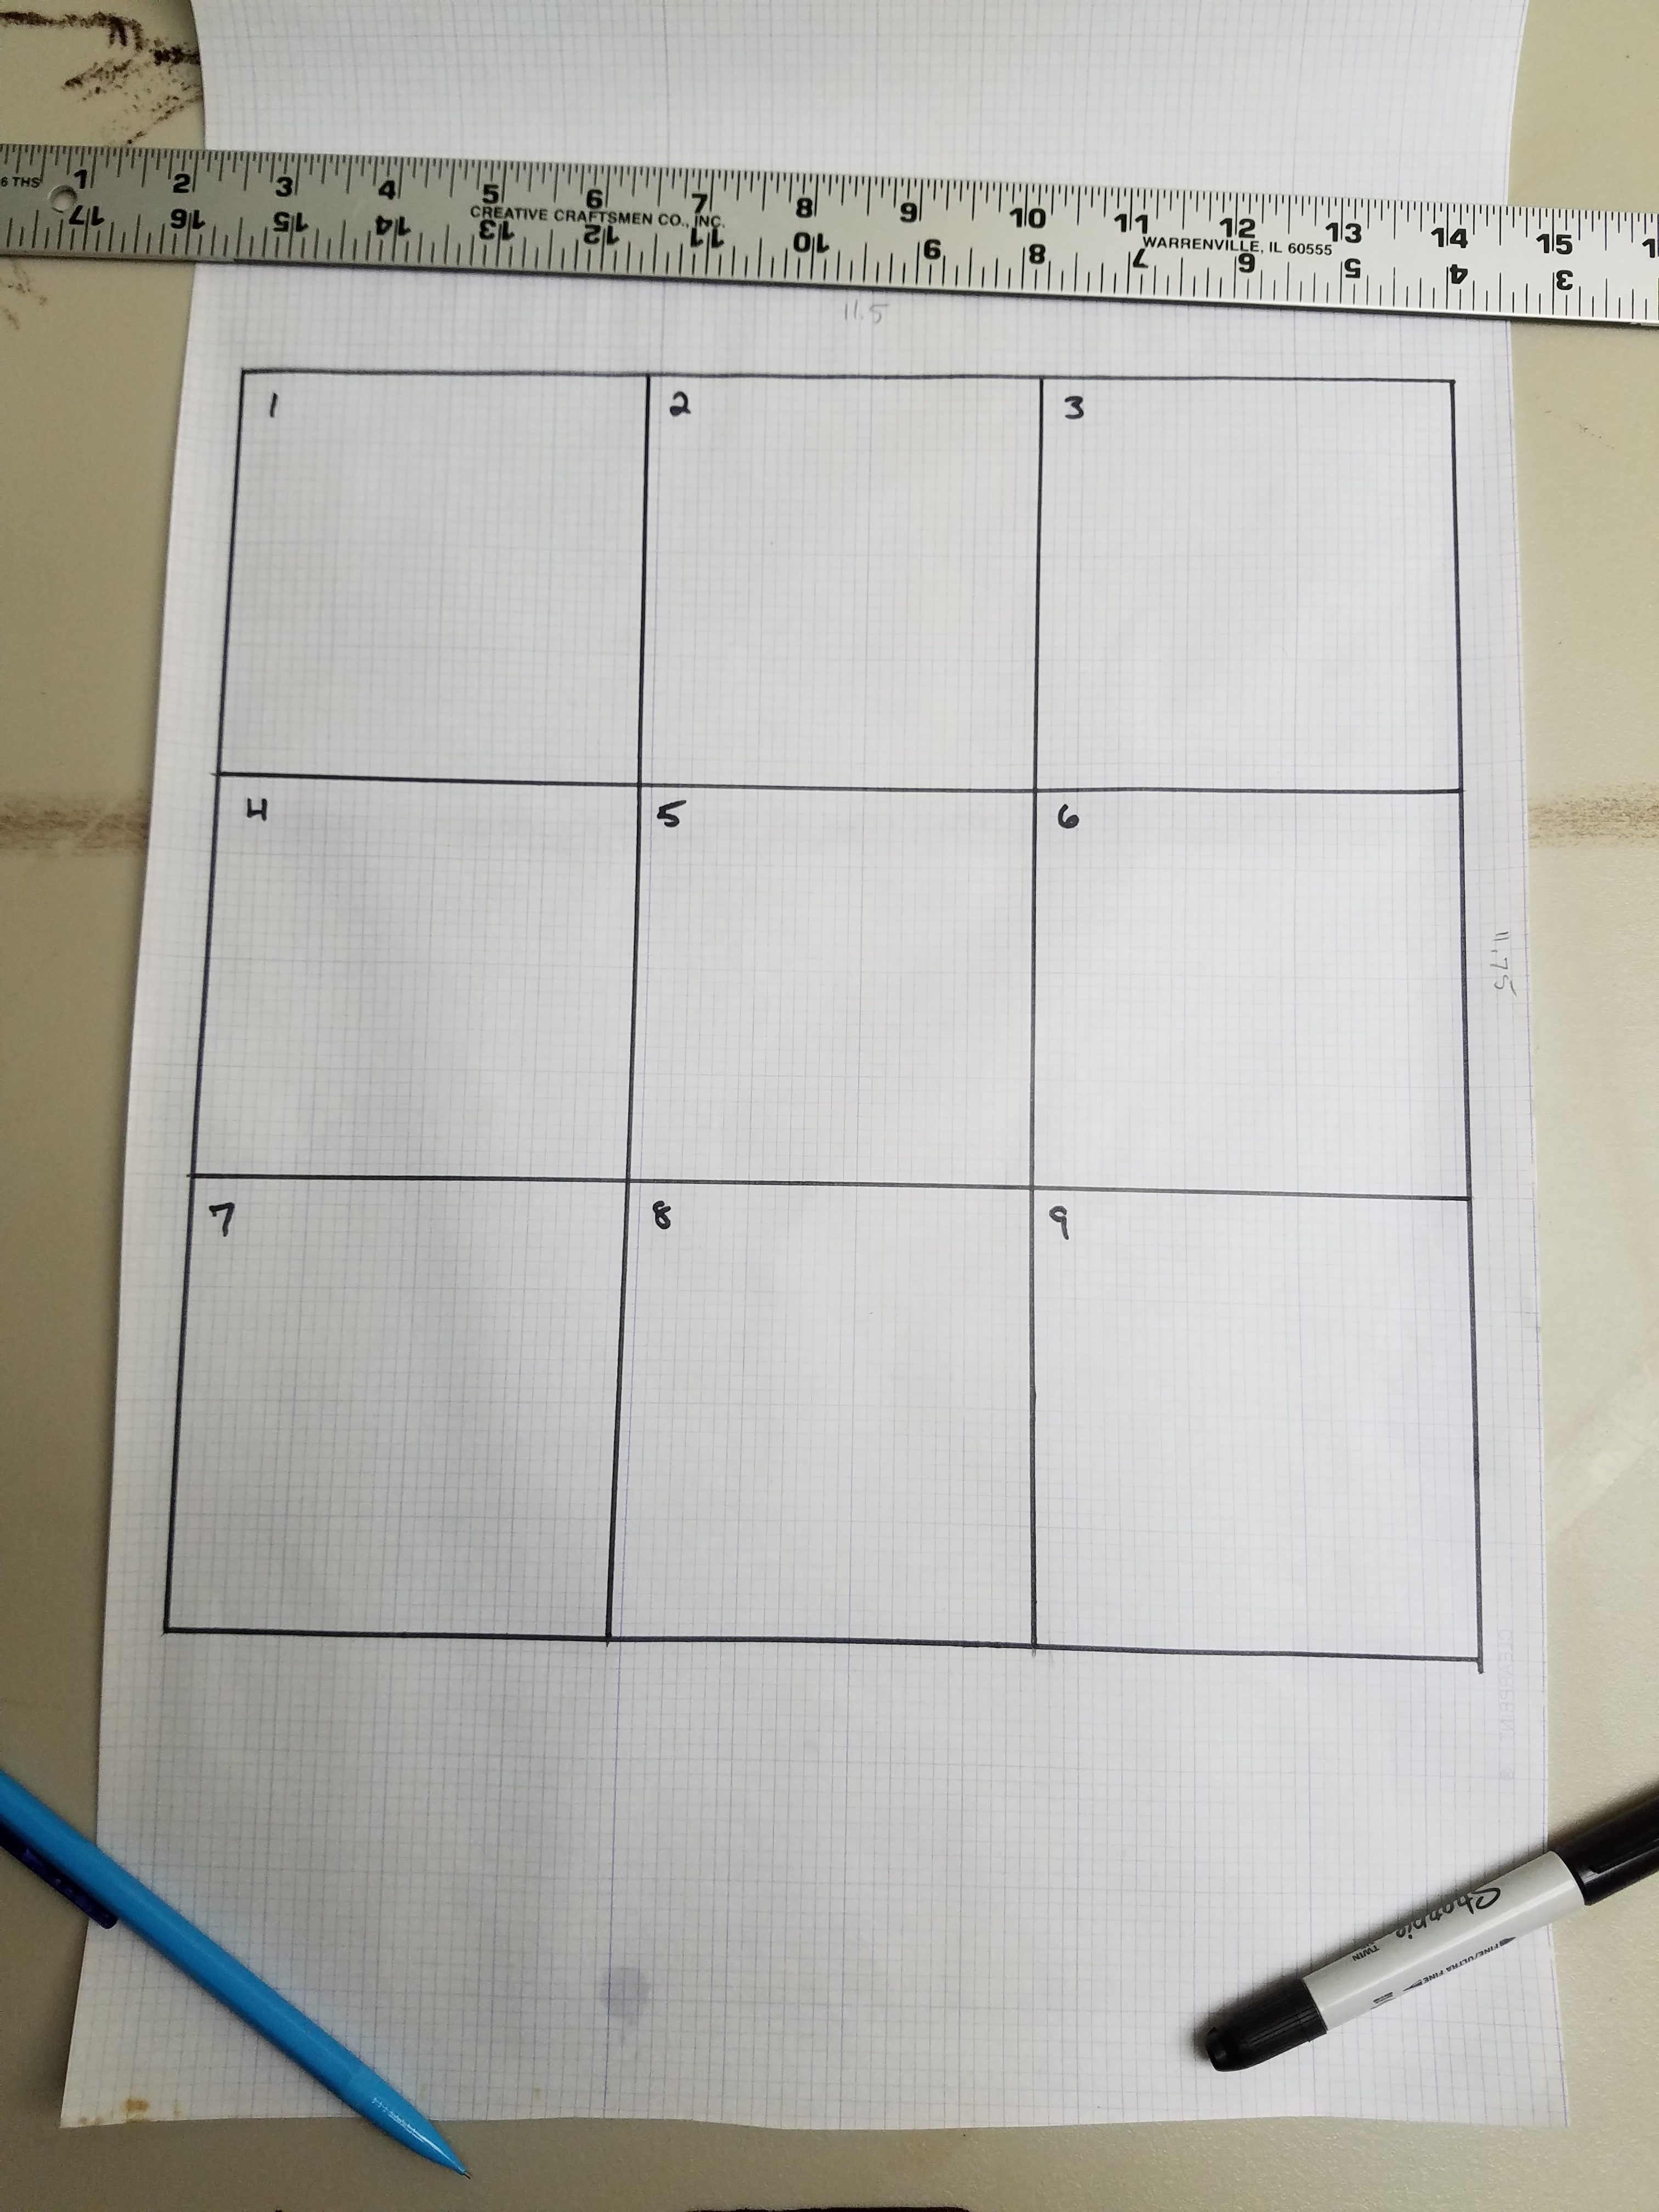
Number each piece so you’ll know which way is up and you’ll know which piece goes where when you have a million pieces of glass lying around. They look similar but each one of these 9 squares is slightly different in size. They are not interchangeable. They MUST be numbered.
Line up your glass and draw one piece from your pattern onto the glass.
Important Note:
The “face up” side of glass is important. Especially when using textured glass like this piece. One side will be smooth while the other is grooved where the swirls are. Be consistent. I marked the pattern on the rough side of glass, then flipped it and cut on the smooth side. If you have a very dark or hard to see through piece, you may need to mark and cut on the same side and may even need a light box under your pattern to see through the glass to transfer the pattern. However you do it, be consistent. If after you put your window together, some pieces have the smooth side up and others have smooth side down, it will look funky. Pay attention as you mark and cut each piece.
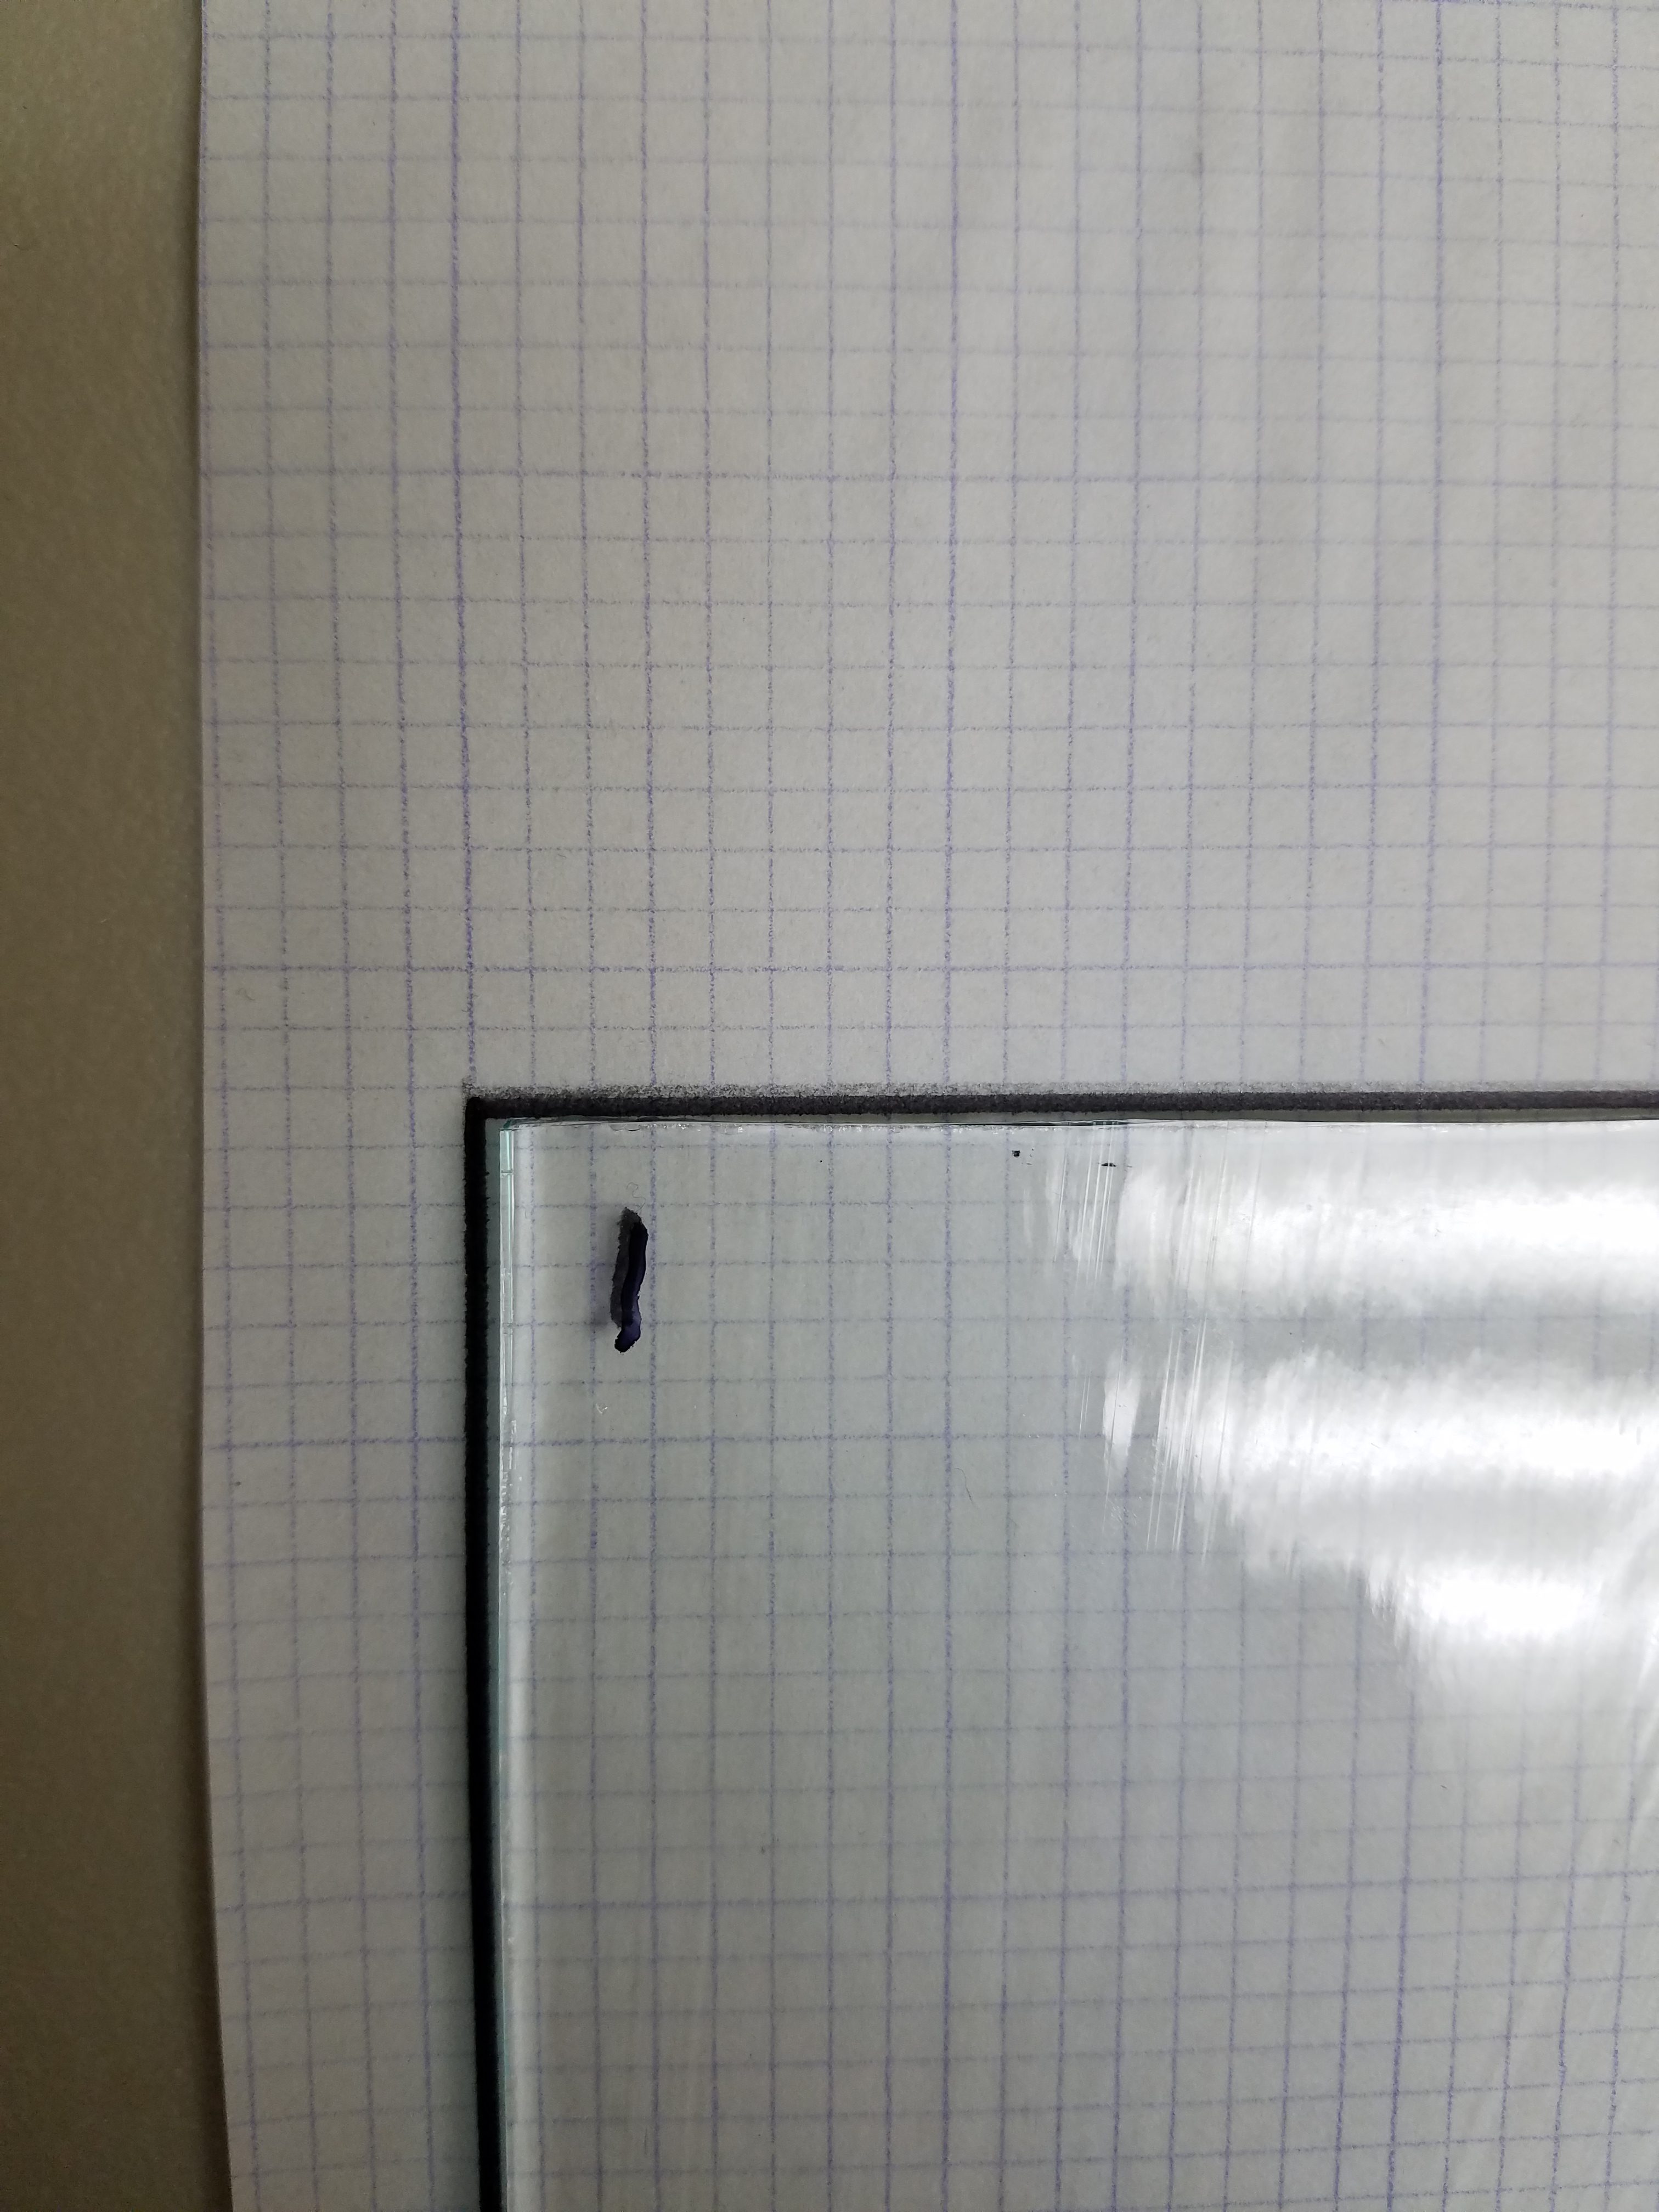
If you can use the existing edges on your sheet of glass, that’s less you have to cut. The glass should line up INSIDE the sharpie lines. The sharpie lines will become your lead lines. If you don’t leave space, solder won’t be able to flow between the glass pieces. If you leave too much space, your solder lines could be huge and messy. Get as close to the sharpie line as possible without going over it.
Don’t forget to number the glass.

Trace the remaining sides of one piece of glass and be sure to number it. DO NOT TRACE MORE THAN ONE AT A TIME. If you do, you’re piece will be off by the width of the sharpie line. Just trust me. Only trace one piece at a time. Then cut one. Trace one, cut one.
Cut out your piece!
Here’s a great video I found. You can find dozens more on YouTube.
A note about cutting out traced pieces.
You want to cognizant of which side of the sharpie line you’re cutting on. You don’t want to cut in the middle of it, you want to cut along the inside of it. Basically, you don’t want the sharpie line still attached to your piece of glass. You want to cut as close to it as possible, but you need that gap to be filled with solder to strengthen your piece. If you cut on the wrong side of the line, there will either be no space for the solder, or the pane will end up bigger than the pattern, and potentially too big to fit in its frame.
Copper foil
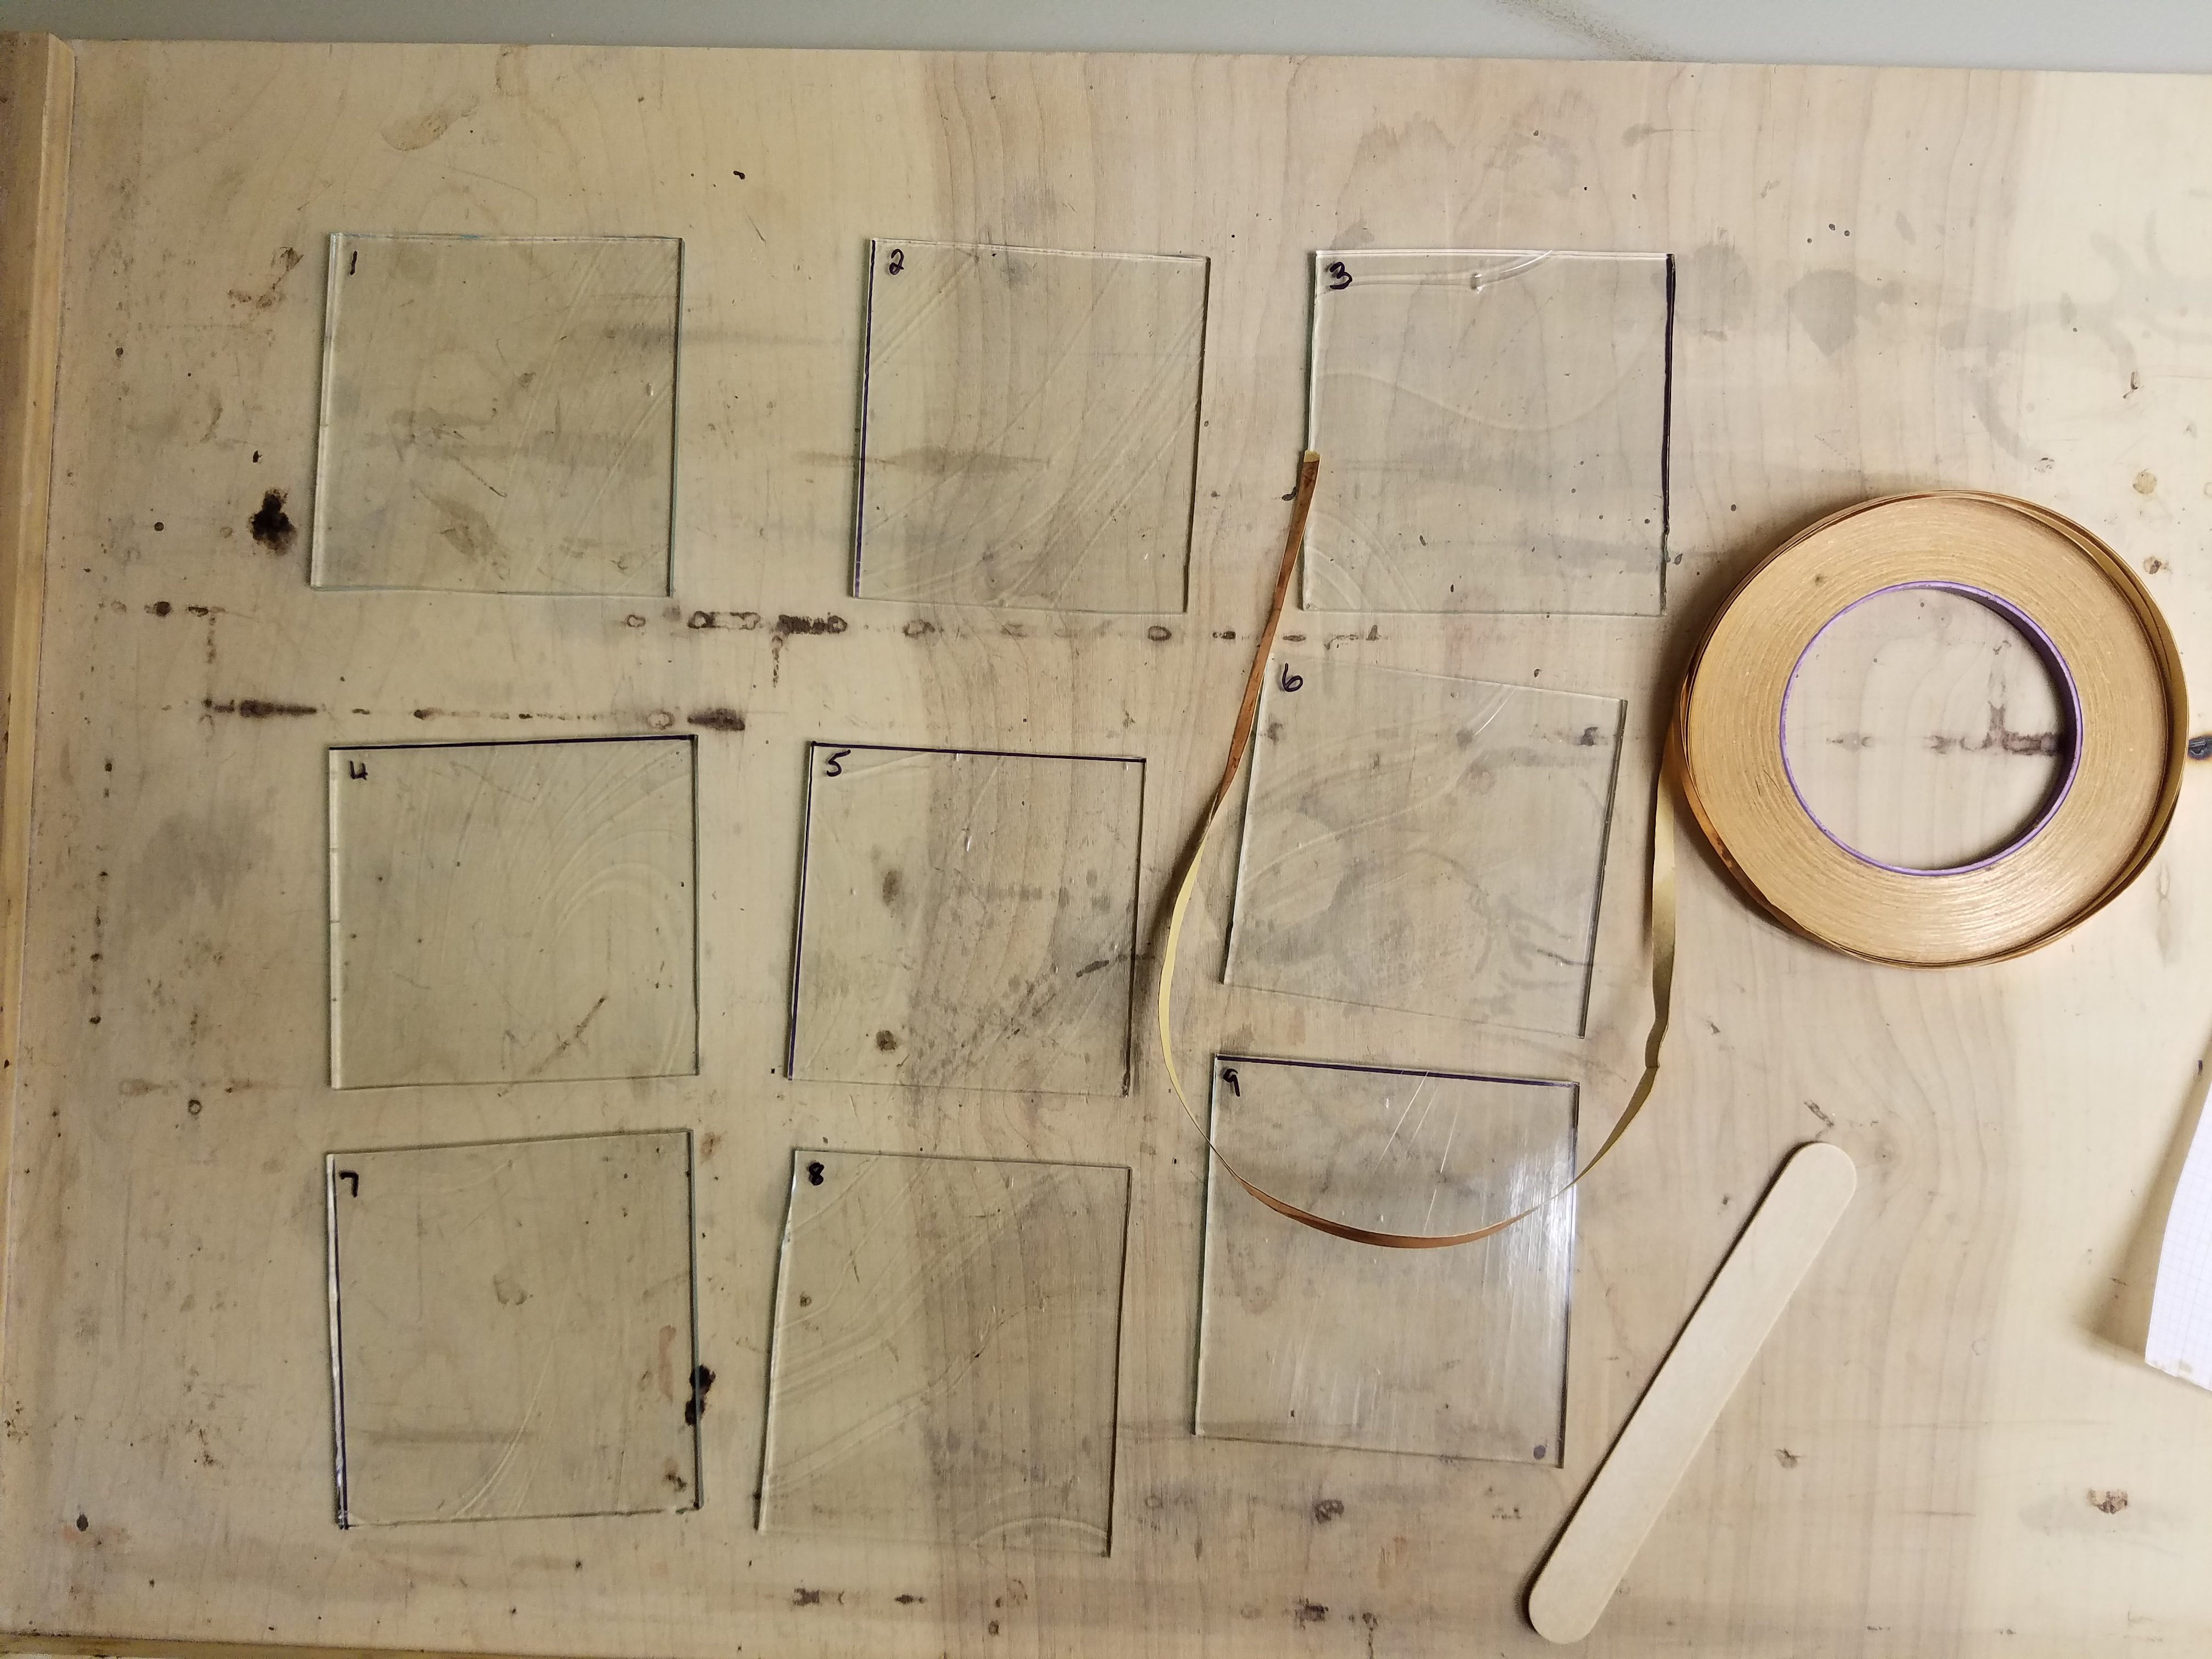
All pieces are cut and numbered. Time to copper foil!
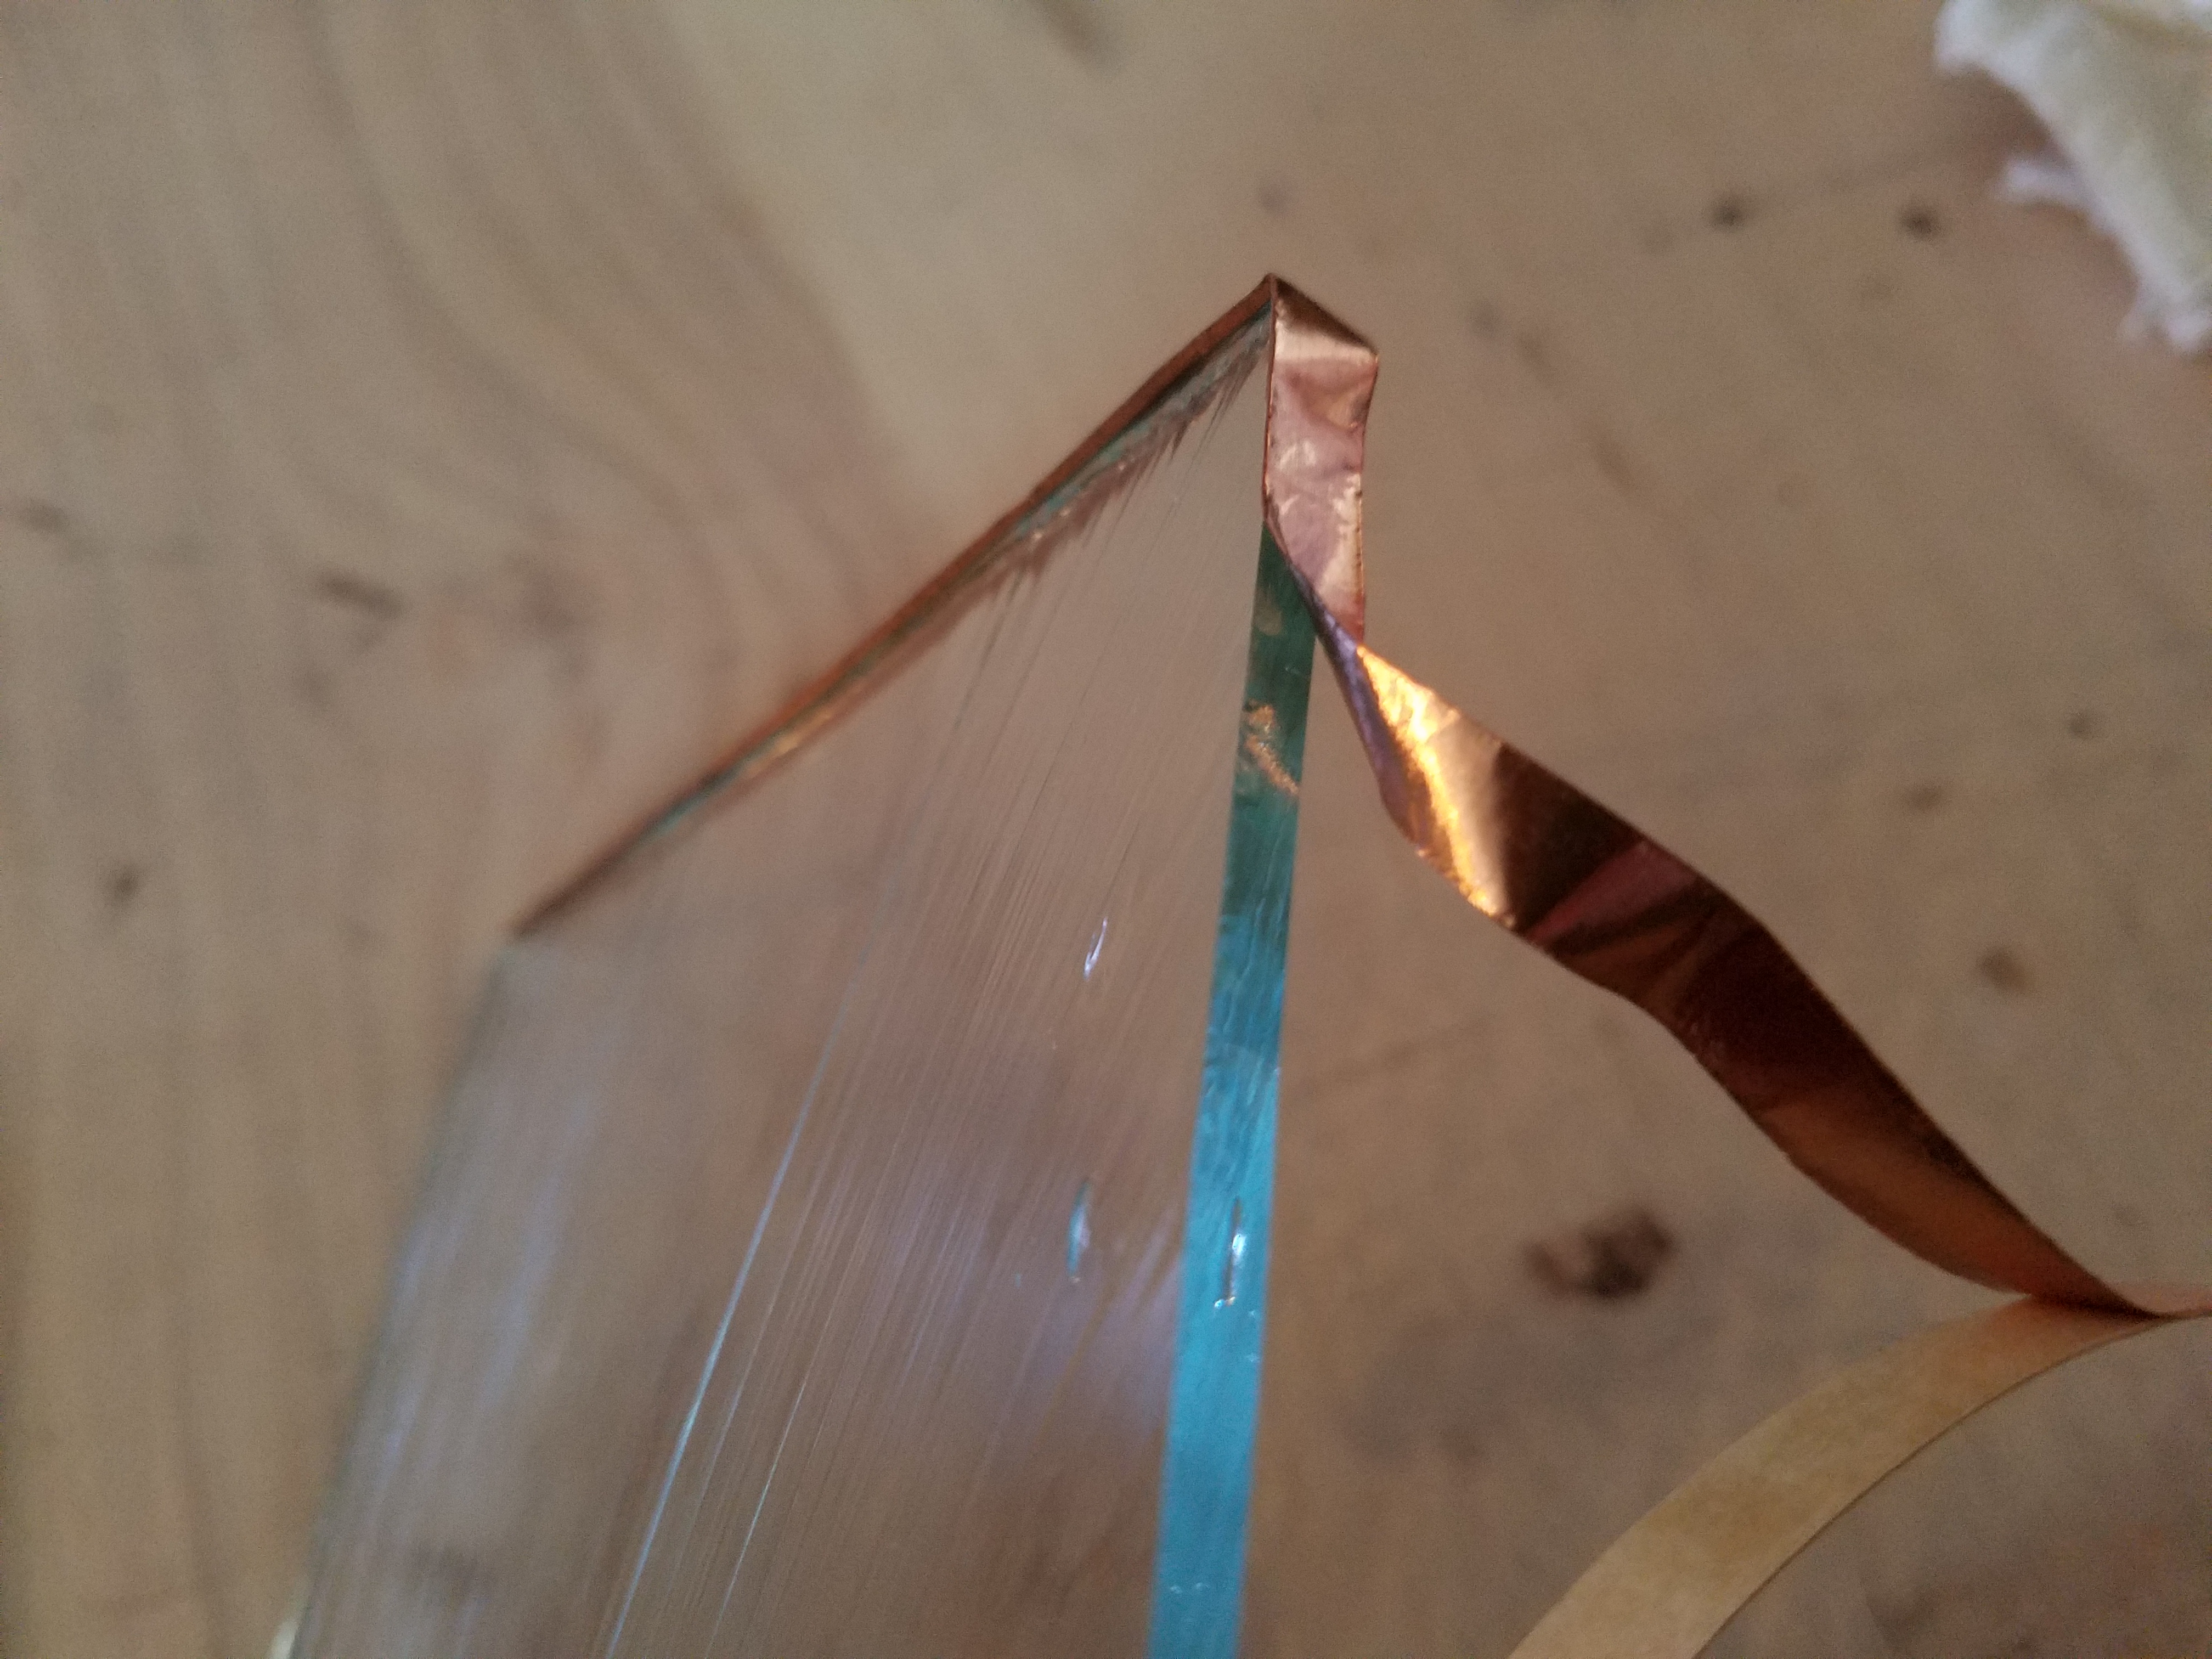
You want the glass edge in the very center of the foil so a tiny lip can be folded over onto each side of the glass.
All pieces are copper foiled and have been firmly rubbed flat on the edge, front and back with a wooden popsicle stick.
Place your glass pieces back onto the pattern. Take care to space them according to the pattern.
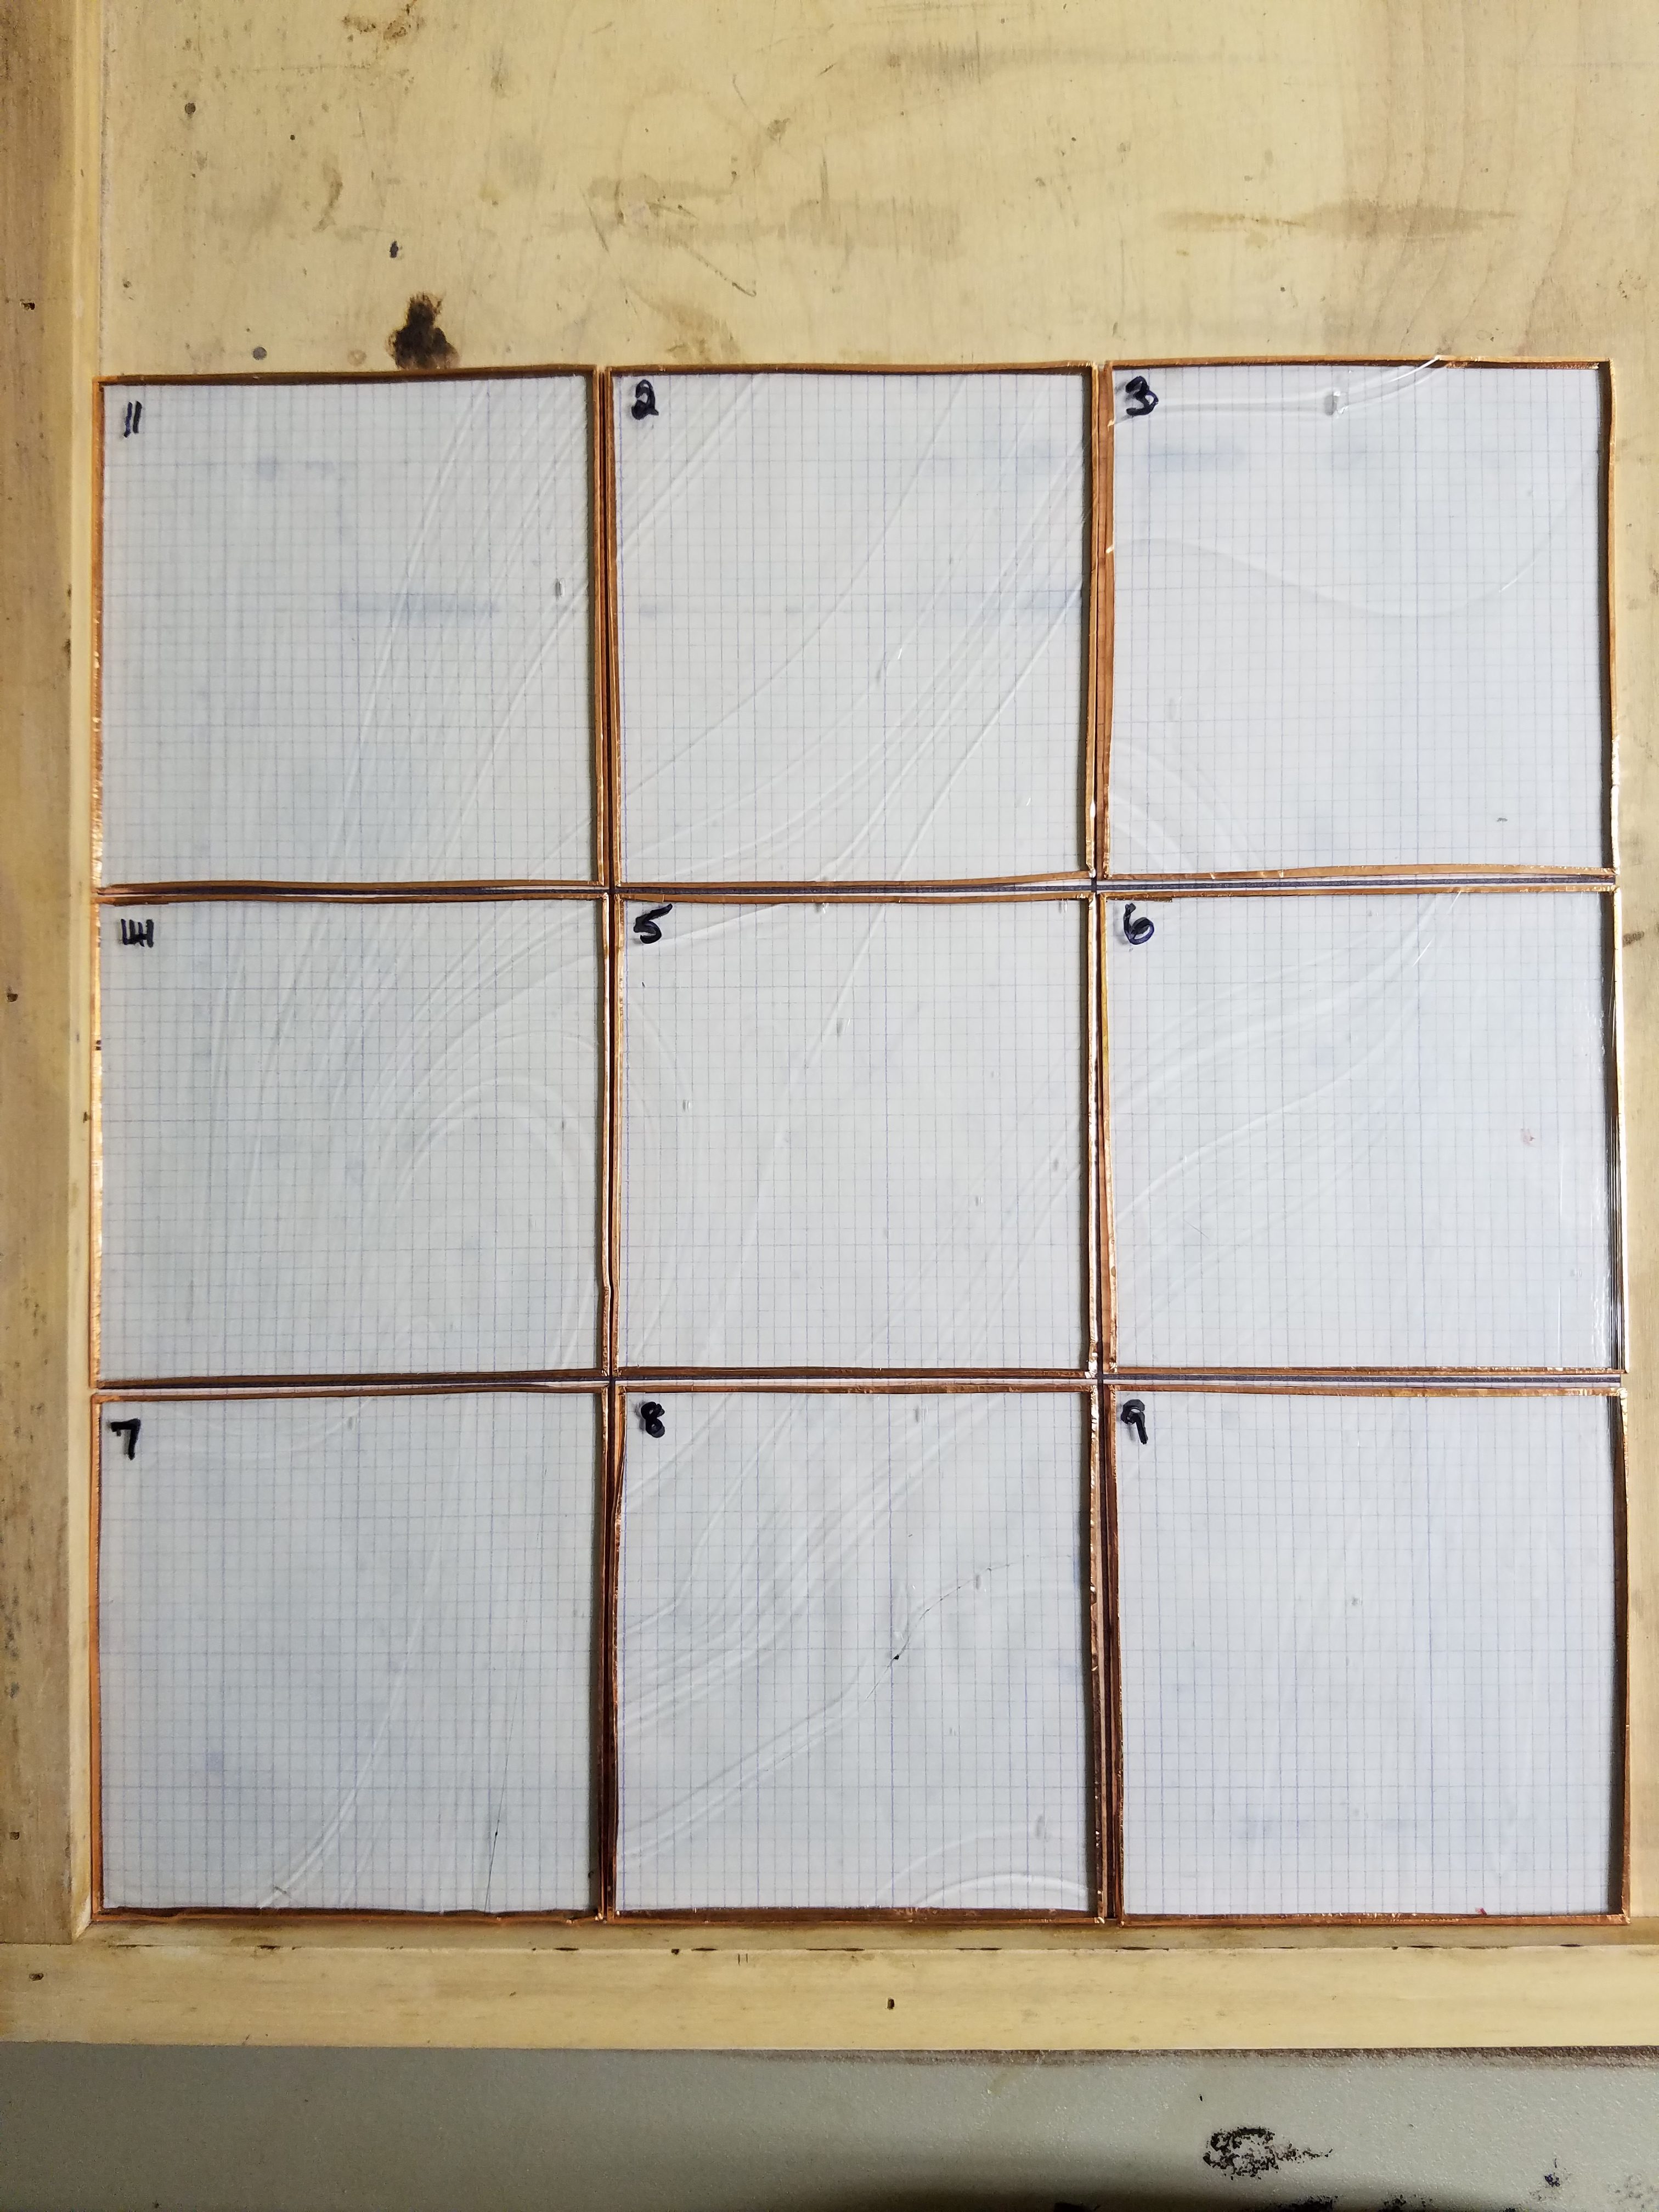
Cut your pattern out so you can use it under your glass pieces to ensure you’re spacing them correctly while you solder the intersections.
Solder all intersections so you can remove the pattern.
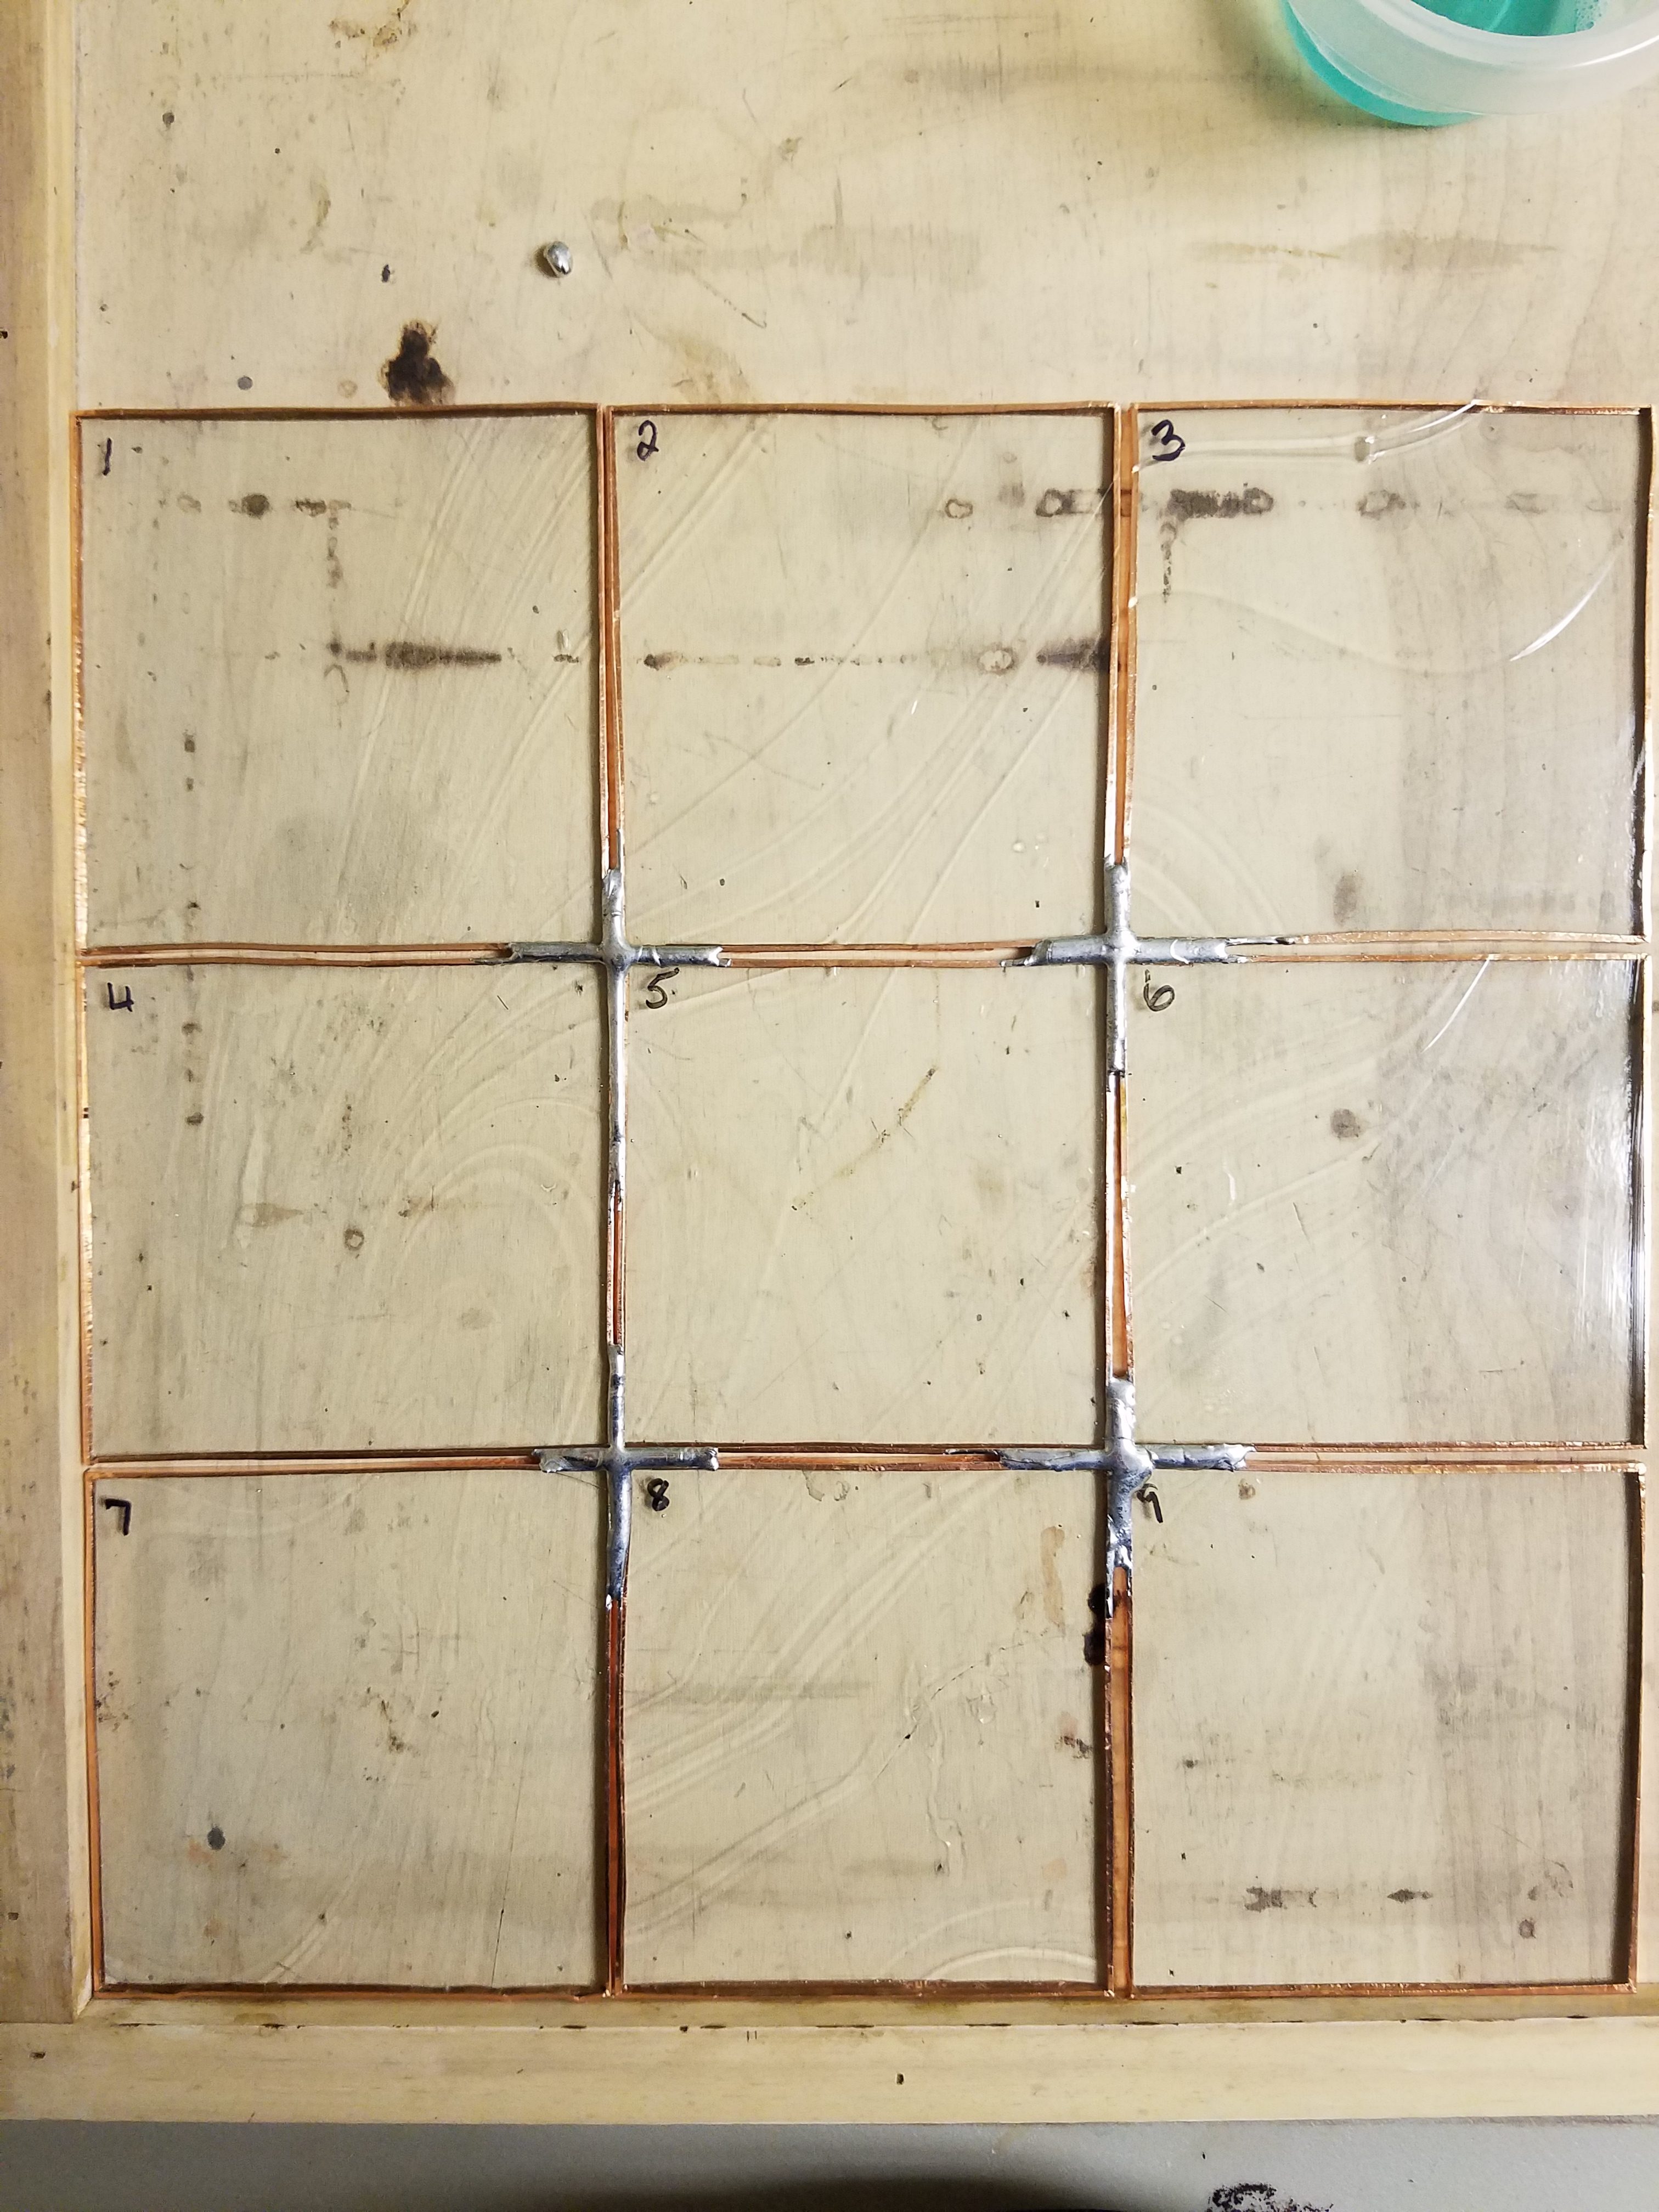
After soldering the intersections, you can remove your pattern so you don’t risk burning/oiling it up more than it already is.
I really liked this video on soldering copper foil. You can find dozens more on YouTube.
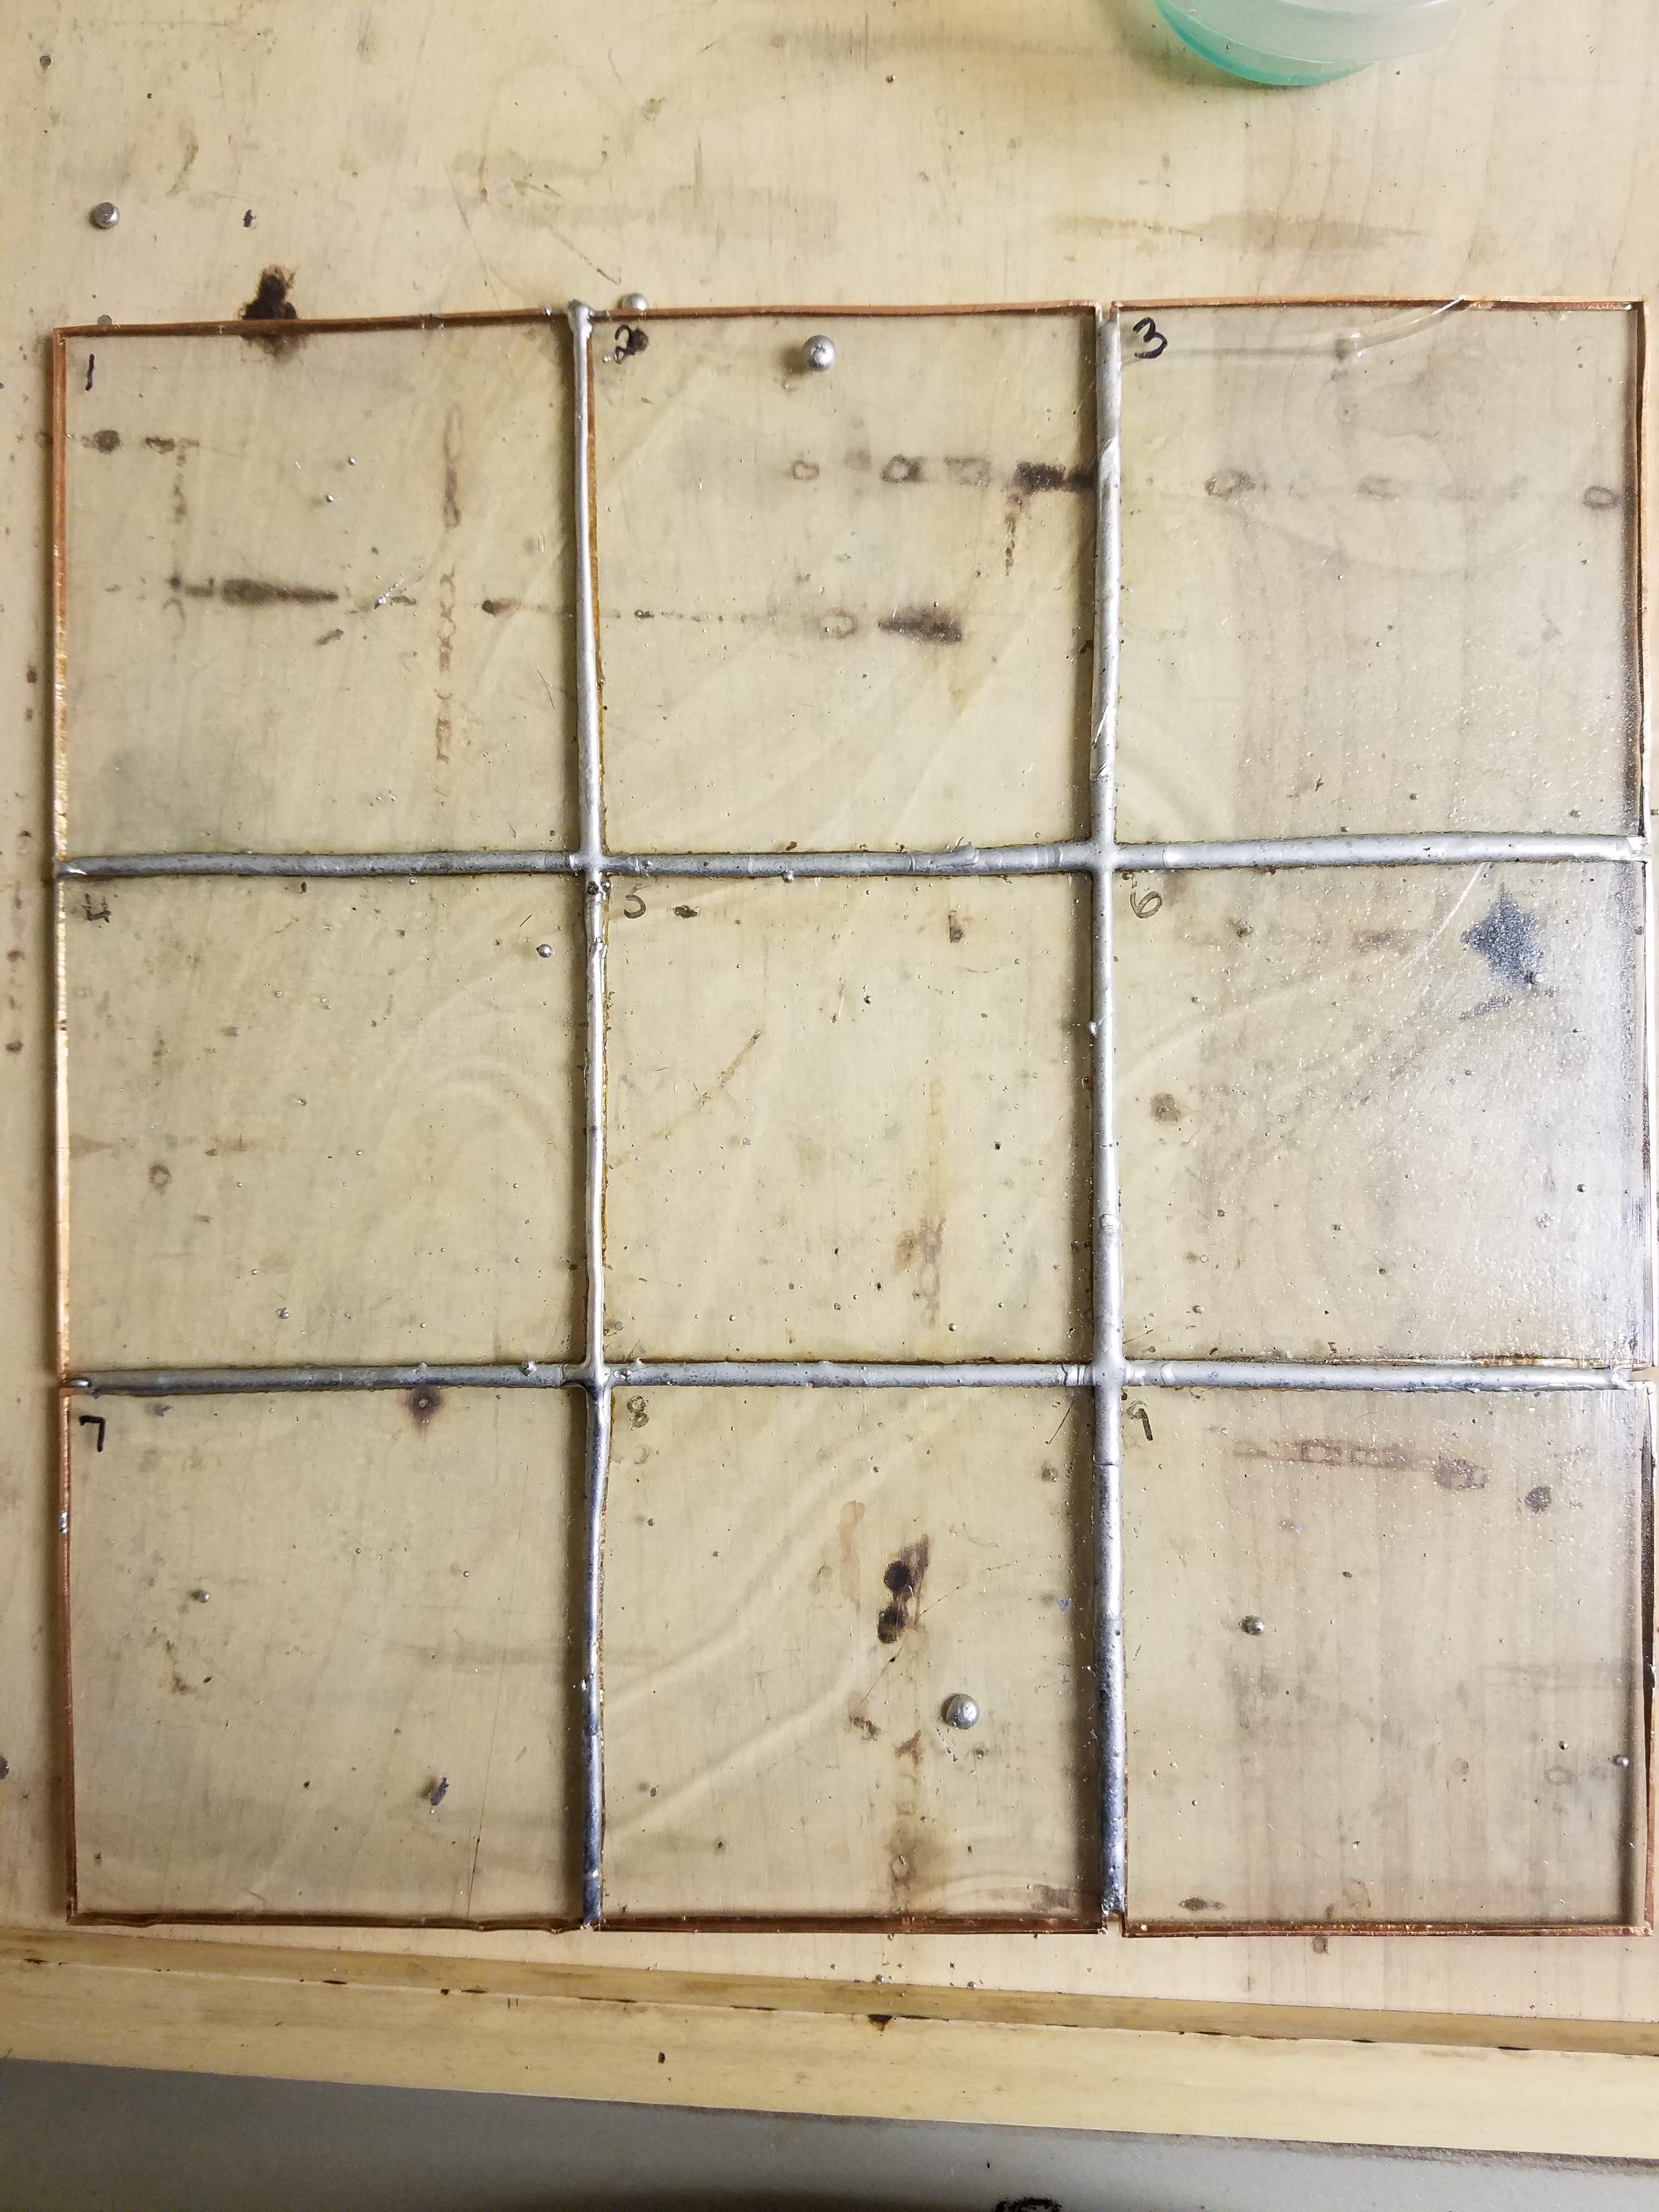
Not perfect, but it’s as good as I was going to get it.
Cleanup and patina
Clean the pane with glass cleaner. Then use steel wool or an abrasive, dry sponge to scrub all of the solder and get it as clean as possible. Then apply patina.
Black patina makes all the difference. I like the black so much that I’ve never even tried a different color.
Clean and install the window!
You’ll want to clean the window right away after applying patina or it could stain the glass. I just use a regular glass cleaner but be sure to get right up along the lead lines. Brown puddles tend to form there. I’ve never put a lead frame around a pane I was installing in a window. The window frame itself seems to provide plenty of support. Pop your pane in, put the molding back in place and admire your work!
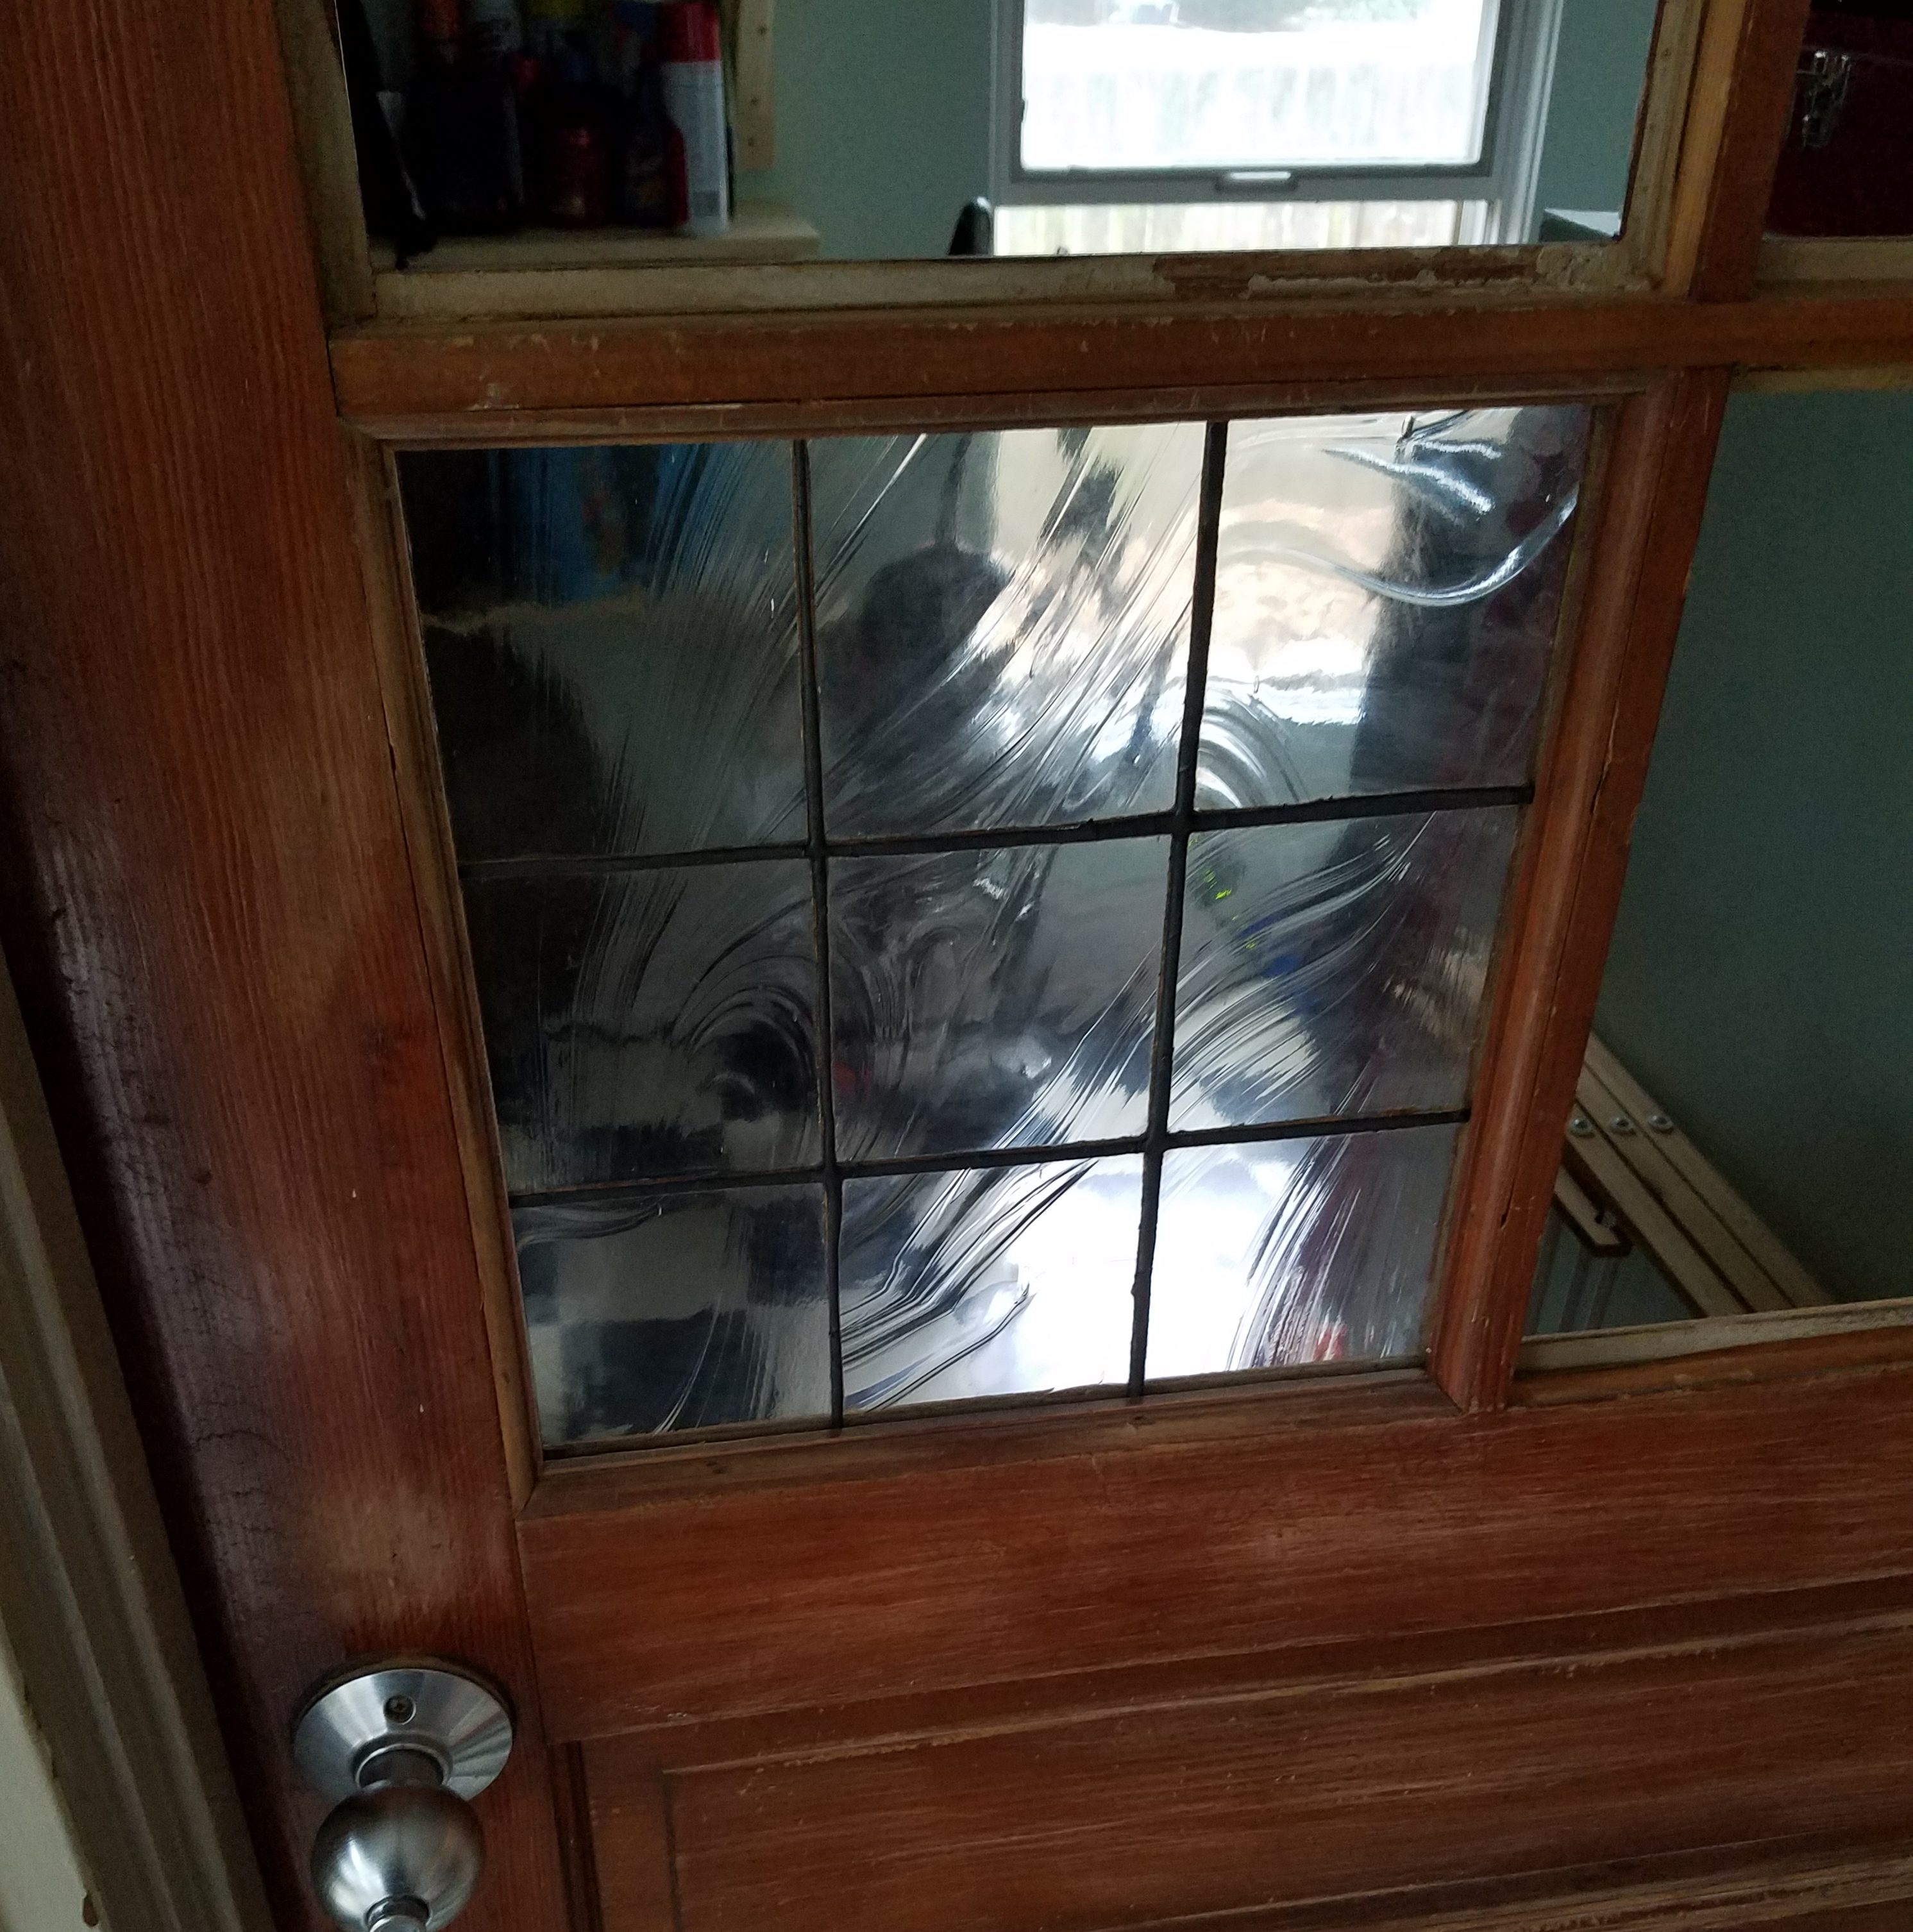
After extensive cleaning, pane number 1 looks great!
Cleanup
You’ll want to clean both yourself and your work area thoroughly when you’re finished. A large plastic tub with a tight fitting lid would be perfect to store all of the supplies. Just be sure to store it where pets and/or kids can’t accidentally get into it.
I’m still working on this door but when It’s finished, I’ll be sure to post “after” pictures.
Have you made stained glass windows before? Do you prefer the copper foil or lead came method? Is this a project you’d be interested in tackling yourself or would you rather buy one already made? Comment below!