
Pi Day is here! If you’re not familiar with “Pi Day”, check out the beginning of my previous post, Maple Bourbon Pecan Pie. I had to do at least one more pie for the occasion. I decided on one that I’ve made a million times because I’ve been thinking how I really need to work on documenting more of my go-to recipes before going crazy with all of the new ones I want to start testing.
Blueberry pie is generally one I reserve for the summer when blueberries are in season, but when our grocery store had them on sale, I knew what I had to do: I HAD to make a blueberry pie. Side note: have you realized that frozen blueberries are more than twice the price of fresh blueberries? Well…when the fresh blueberries are on sale that is, but still. The frozen ones were more than twice the price! Check the fresh produce prices on your way out before buying frozen, folks!
I had decided to make blueberry pie, but I wanted to fancy it up a bit. It’s been unseasonably warm the last several weeks, I’m talking 60 degree weather during a time of year when there are normally still freezing temps. Then, suddenly, mother nature dumped a truckload of snow in our backyard, and just like that, it was winter again. Gotta love living in the Midwest.
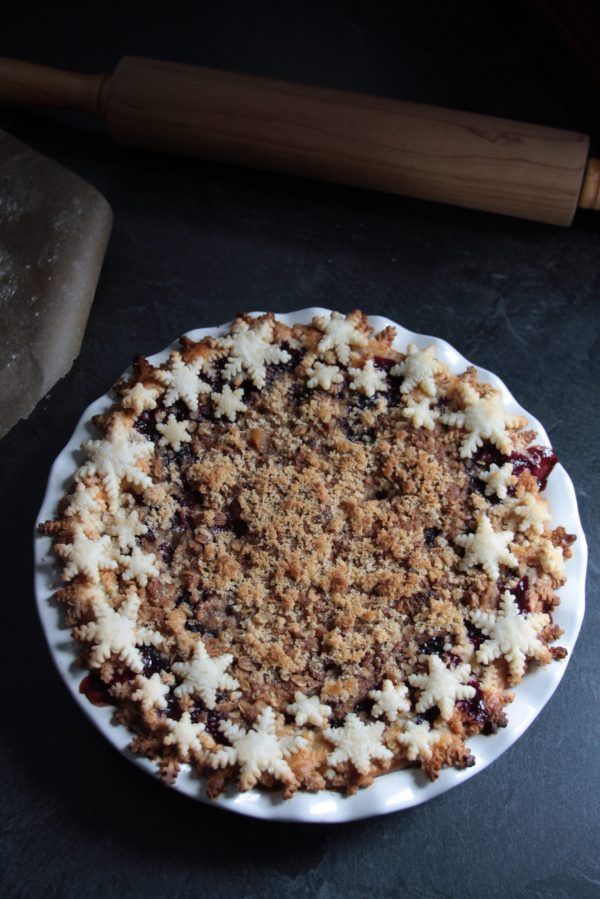
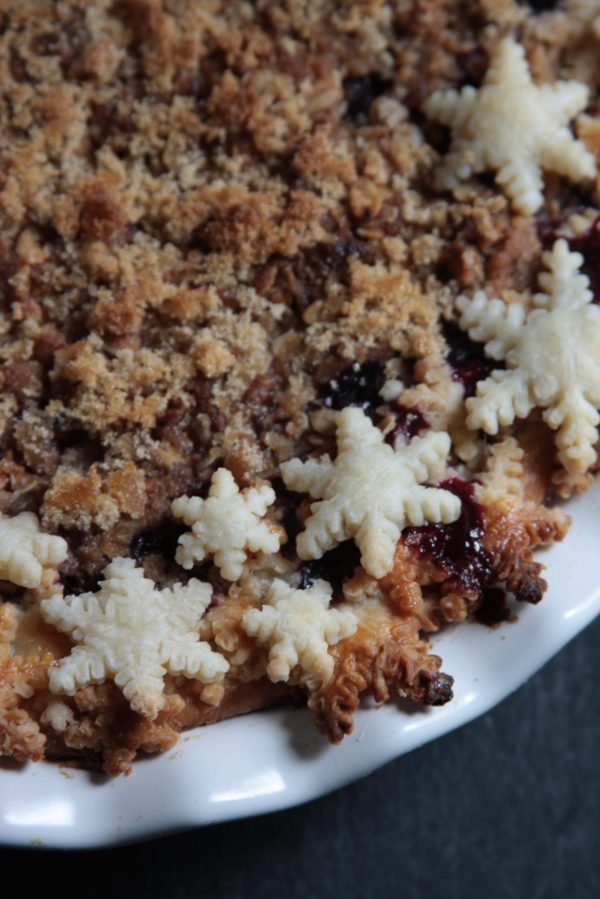
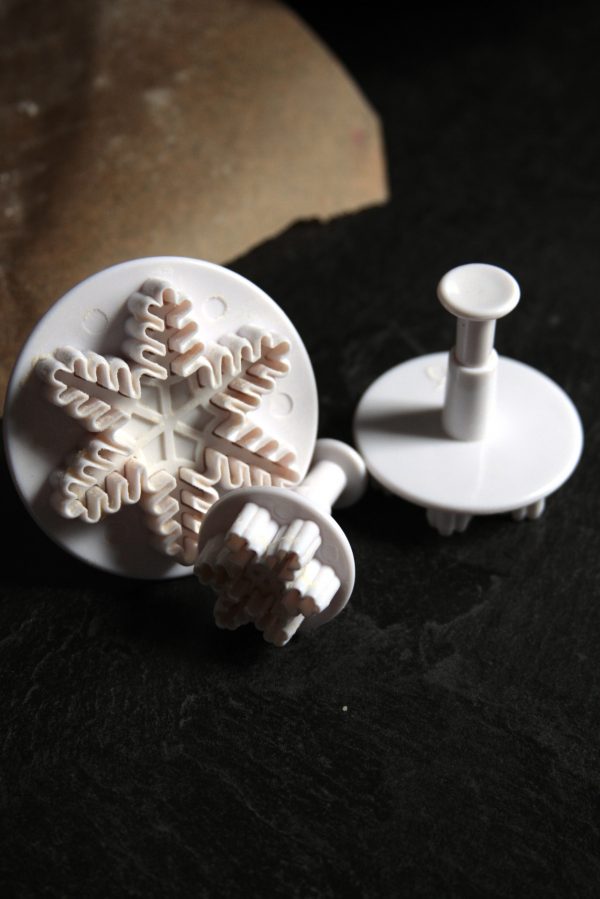
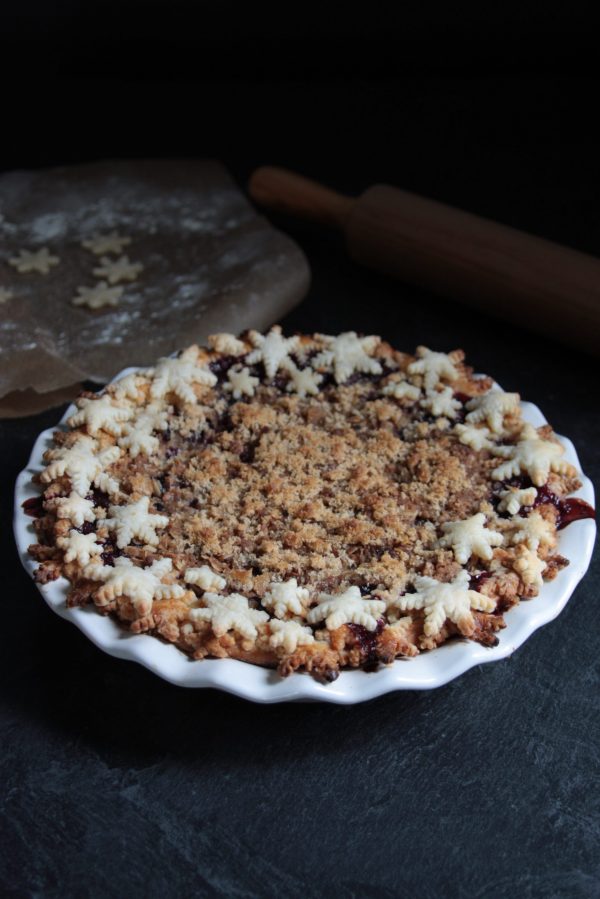
With all the pretty, white, wet, blowing, bitterly cold snow covering everything, I remembered I had these snowflake shaped pie crust cutters. Cutting out pie crust into pretty little snowflake shapes made the fact that we had been lulled into a false sense of Spring only to be back handed with a bit fat dose of winter, a little more bearable.
So that’s what the “Winter” in the name of this pie refers to. It’s not made with some mystical blueberry that grows in the snow, but it does give you an excuse to satisfy your summer blueberry cravings, even when buried under a pile of snow. If you’re not in the dead of winter, the crust stamps come in a variety of other shapes for any season or occasion. So many great excuses to make pie!
| Prep Time | 30 minutes |
| Cook Time | 70 minutes |
| Passive Time | 2-3 hours |
| Servings |
servings
|
- 1 1/4 cups All purpose flour 150 grams
- 1 tablespoon granulated sugar
- 1/4 teaspoon salt
- 8 tablespoons butter very cold, unsalted, 115 grams
- 3-6 tablespoons water ice cold
- 8 cups blueberries fresh or frozen. 1000 grams, around 40 ounces. The blueberries I used were rather large so it was only 3 pints worth. If the blueberries you're using are smaller you may want 4 pints.
- 1 tablespoon orange juice 29 grams, about 1 orange's worth
- 2 teaspoons orange zest 4 grams, about 1 orange's worth
- 1/2 cup All purpose flour 60 grams, 3/4 cup or 90 grams if using frozen blueberries.
- 1 tablespoon cornstarch/cornflour 9 grams
- 1 cup granulated sugar 198 grams
- 2 tablespoons butter room temp, unsalted, 29 grams
- 2/3 cup light brown sugar packed, 142 grams
- 3/4 cup old fashioned rolled oats 67 grams
- 1/2 cup All purpose flour 60 grams
- 1/2 teaspoon cinnamon 2 grams
- 6 tablespoons butter room temp, unsalted, 87 grams
Ingredients
For the Crust (Double this recipe if you're making pie crust cut-outs*)
For the Filling
For the Streusel Topping
|
|
- Whisk together the flour, sugar and salt.
- Cut the butter into small cubes. Use a pastry blender*, two knives or a food processor to cut the butter into the flour mixture until you have lumps the size of small peas.
- Add 2 tablespoons of the ice water and use a fork to toss the mixture. Add one additional tablespoon of water at a time and continue tossing until the mixture starts to come together and can easily form a ball.
- Form the dough into a ball, then flatten it into a disk. On a floured surface, roll the dough out. Start from the center and roll up, start back at the center and roll down, then turn the dough a quarter turn to ensure it's not sticking to the surface. Lightly flour the rolling pin, work surface and dough as needed and continue this process: roll up, roll down, quarter turn, until the dough is about 1/8" thick and is about 12" in diameter.
- Transfer the dough to the pie plate. Rolling it around the rolling pin or folding it in half or in quarters can help to safely move it. Gently press the dough into the pie plate and trim the overhang so you have at least one even inch all the way around the plate.
- Fold the overhang back by at least half an inch and press it into the backside of the crust to form a lip that stands above the pie plate. Crimp the edges however you'd like. Keep in mind, butter crusts don't hold their shape as well as shortening crusts while baking so small details will cook out of any design. Large, simple crimps work best.
- Carefully cover the dough with plastic wrap and refrigerate for at least 30 minutes.
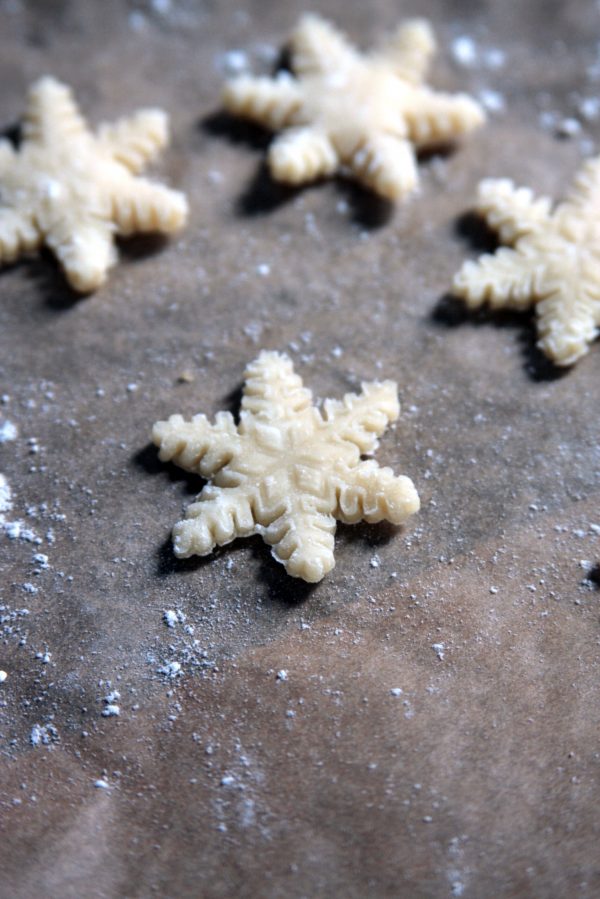
- Prepare the second batch of dough the same as above. Use your pie crust stamps to cut out whatever shapes you'd like. Tips I found helpful for using these crust stamps are below:
- The smaller your stamp, the colder your dough should be to ensure it doesn't stick to the stamp. If after rolling out your dough it no longer seems chilled, slide it onto a baking sheet, cover in plastic wrap and refrigerate for 20 minutes.
- Have a bowl of flour available and lightly press the stamp into the loose flour. Tap the stamp vigorously against the side of the bowl to dislodge any flour that may have gotten stuck in the tiny crevices. Do this every single time you stamp out a shape. The more detailed the stamp, the more likely your dough will stick to it if you don't do this.
- If cutting out multiple sizes, start with the smallest stamp first, then progress to the largest so as the dough warms, you're cutting out the easiest shapes last.
- Press the stamp straight down onto the dough without pressing down on the plunger first. This is the most important part. You want to press down hard and make sure the dough is completely cut around all sides but you can't wiggle the cutter like you can when cutting out sugar cookies. Then press down on the plunger with moderate pressure. You want the design stamped into the shape but you don't want it to mush the dough out from under the stamp. If this is giving you problems, your dough may be rolled out too thick. It needs to be thinner than the depth of your stamp when the plunger is raised.
- When you lift the stamp, the shape should stay stuck in the stamp. You may need to pull away some of the surrounding dough. Pull it off towards the plunger side of the cutter so it does not pull your shape out of the stamp.
- Use the plunger to force your shape out of the stamp. I found pressing the plunger 3-4 times quickly helped get some of the smallest snowflakes out most easily.
- Place the cut out shapes on a parchment lined plate, cover in plastic wrap and freeze for several hours or at least 30 minutes. The dough needs to rest and be very cold when you bake it to try to retain as much of the current detail as possible. Otherwise it will puff up tremendously and you will lose all detail. You won't add these to the pie until it's been in the oven for about an hour so even if you don't make these ahead of time, they'll have at least 50 minutes of freezer time.
- Set baking rack to the lowest level, and preheat oven to 400 degrees.
- Wash and dry your blueberries. If using frozen, run cold water over them to melt any chunks of ice that may have formed in the bag. You don't want to add any extra unnecessary liquid to the pie.
- Put about a third of the blueberries in a separate large bowl and roughly mash them. Add the juice, zest, flour, cornstarch and sugar and mix well. Add the whole blueberries and stir everything together thoroughly.
- Combine all streusel ingredients in a bowl and mix. I use my hands to mix everything together and crumble the butter into everything but you could also use a pastry blender or a fork. Set the streusel aside.
- When your oven is finished preheating, remove your pie crust from the refrigerator and remove the plastic wrap. Give the filling one last stir and add it to the crust, creating a slight mound in the middle. This will cook down.
- Cut up the butter into small cubes and place them evenly over the filling.
- Place the pie on a baking sheet lined with parchment paper. This will prevent it from dripping all over your oven when it bubbles over. The parchment makes for easy cleanup of your pan.
- Place the pie (still on the baking sheet) in the oven and lower the oven temp to 375 degrees. Cook for 50-60 minutes or until the filling begins to bubble. If using frozen blueberries, it may take an additional 10-15 minutes. Keep an eye on the edge of the crust and if it begins to get too brown for your liking, add a pie shield or tin foil to the edges.
- Once the filling is bubbling, carefully remove the pie from the oven and sprinkle the streusel over the top. The filling is extremely hot and sticky so be careful not to get any on your skin.
- Remove the pie crust cut-outs from the freezer and place them around the edge/over the top of the streusel as desired. I found the sugar in the streusel and butter in the crust was enough to get them to stick to the pie while baking but you could secure them further by brushing the backs with an egg wash before placing them along the edge.
- Return the pie to the bottom rack of the oven for another 10-15 minutes or until the cut-outs barely start to turn brown along the edges. Check the pie every 5 minutes. I didn't brush the tops of the cut-outs with an egg wash because I wanted them to be lighter in color since they're snowflakes. If you were doing leaves or something that you wanted to turn a darker, shiny golden brown, an egg wash would help you achieve this.
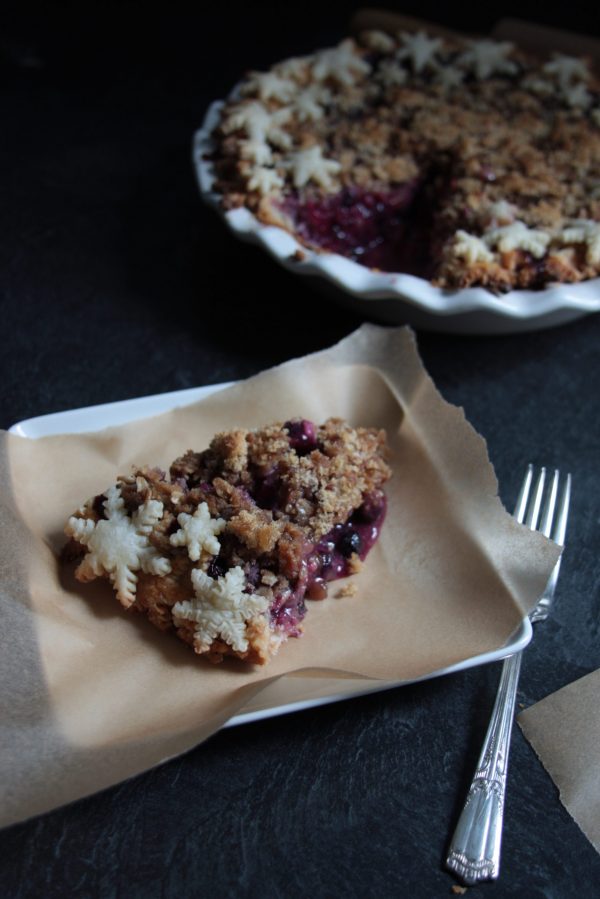
- Remove the pie from the oven and cool on a cooling rack for 2-3 hours or until room temperature. If you cut into it while it is warm, the filling will not have set up yet and it will be rather messy. Delicious, but messy. 😉
*See below for linked images on pie crust stamps and pastry blenders. A pastry blender is an inexpensive tool that makes cutting butter into flour much easier.
A note about the sugar: I like my pie on the sweeter side so this recipe reflects that. The sweetness will vary greatly depending on your blueberries though. Always taste your blueberries ahead of time to see if more or less sugar is needed.
Also, the streusel topping has a lot of sugar in it. If I wasn't using a streusel topping for this pie and wanted to do a lattice or other crusted top, I'd add about another 1/4 to 1/2 cup of granulated sugar to the filling, again, depending on the sweetness of the blueberries I was using. Always taste the blueberries ahead of time and adjust the amount of sugar to your taste.
A note about pie thickener: The goal is to thicken the juices in your pie enough so when you cut into it, the slice holds together on its own and you don't get a pool of juice running onto the plate. At the same time, you don't want the filling to be gummy. I've always be happy with the flour/cornstarch combo because it has rarely failed me, I always have the ingredients on hand and I don't mind the opaque color it given the juices. There are several other options though if you want the juices to be more clear, want the filling to be gluten free, or just want to try something else. King Arthur Flour has a great reference chart for the different pie thickeners and how much to use with different types of pie. Definitely check it out if you need an alternative thickener.
A few things you may find helpful for this recipe:
Since blueberries are so good for you, this can be considered a health food, right? ;P What is your favorite kind of pie? Streusel topping, traditional crust topping or naked pie? Comment below!