
Oreo’s! This cake was a test run for a few aspects of a different cake I’ll be making in a few weeks. Fingers crossed that cake turns out but in the mean time, this one was a keeper all on its own. Initially, I was considering doing a cookies and cream cheese cake, not to be confused with a cookies and cream cheesecake, but the Irish cream aspect will come in handy for the other cake I’m making later so I wanted to try it out here. It worked beautifully! Chocolate, Irish cream and cookies to boot! How could it go wrong!?
Plus, I’m a sucker for Oreo’s. Particularly now that they come out with a new limited edition flavor every month or so. I can’t pass up an untried flavor! Mint Oreo and chocolate birthday cake Oreo are our go-to flavors, but we’ll never pass up the opportunity to try one of their new creations.

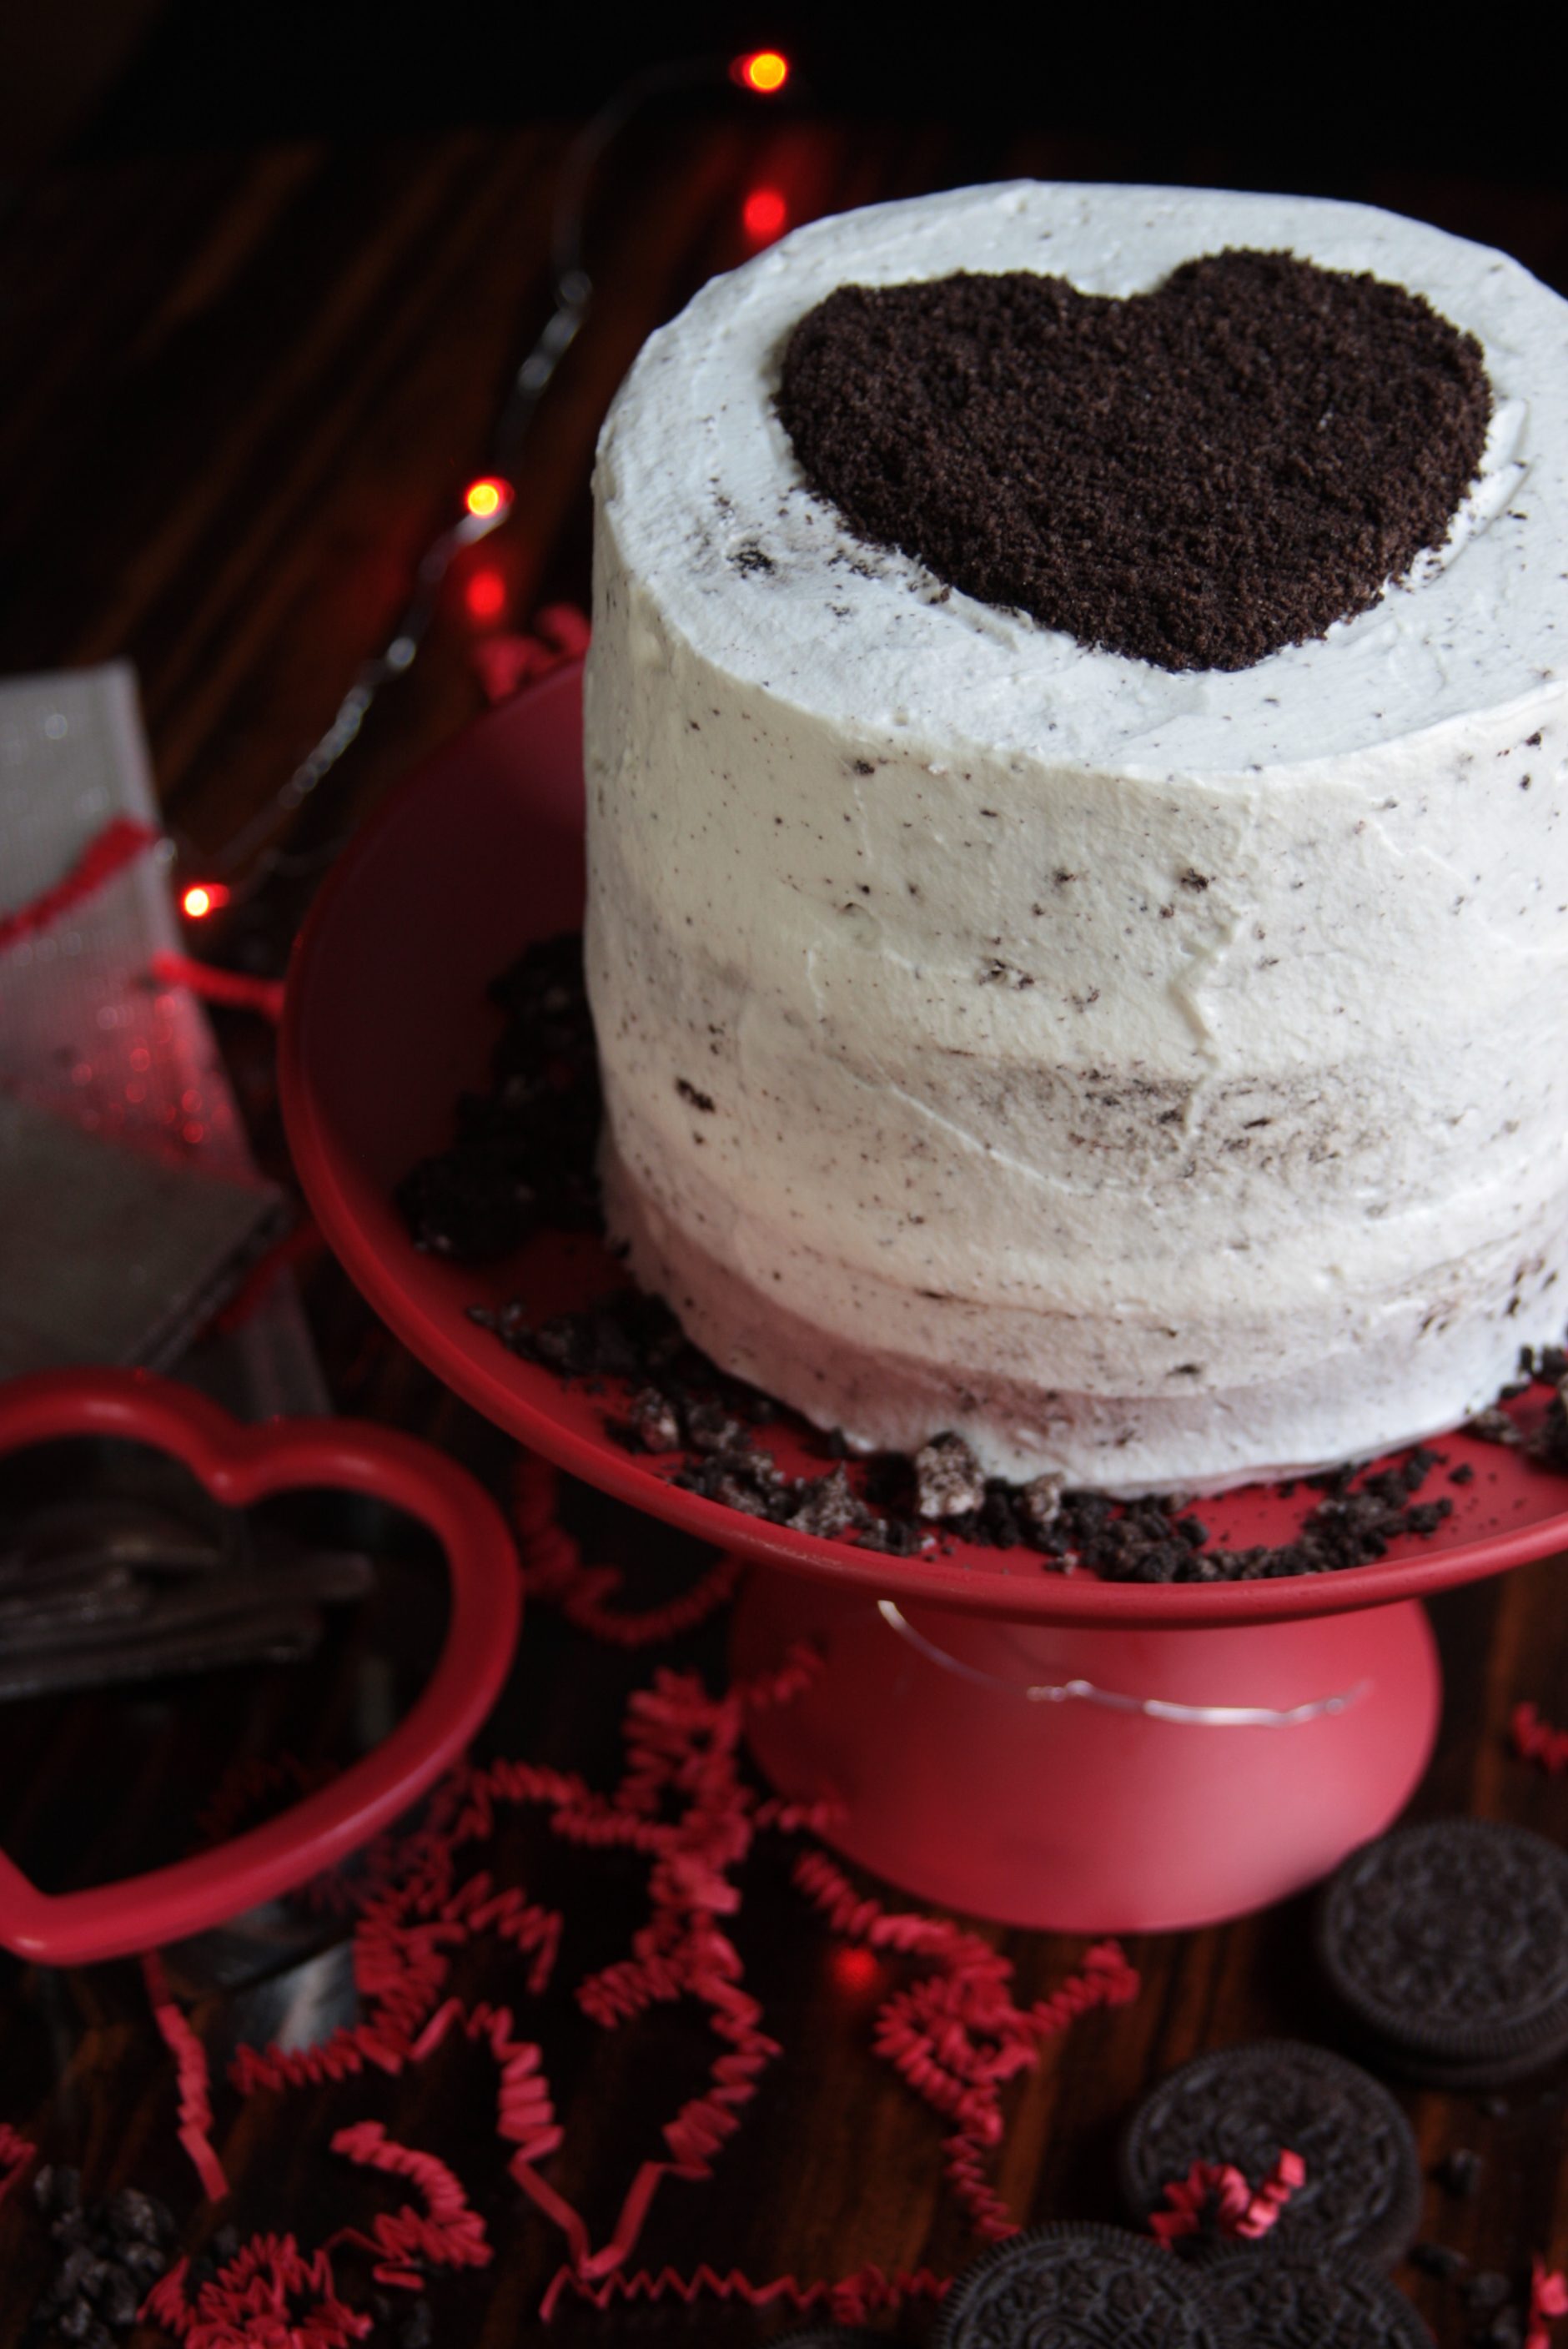
One thing I should point out is this is NOT a cake you want to try to transport anywhere. Because it’s a whipped cream filling and icing instead of a sturdier buttercream, any jostling or jiggling and the layers could just slide off of one another or at the very least, the filling could start to push out of the sides. Keep this one safe and just serve it at home to your special someone. Alternatively, you could use a buttercream icing but I thought the flavor of the whipped cream, as well as the color, better mimicked the flavors in an Oreo.
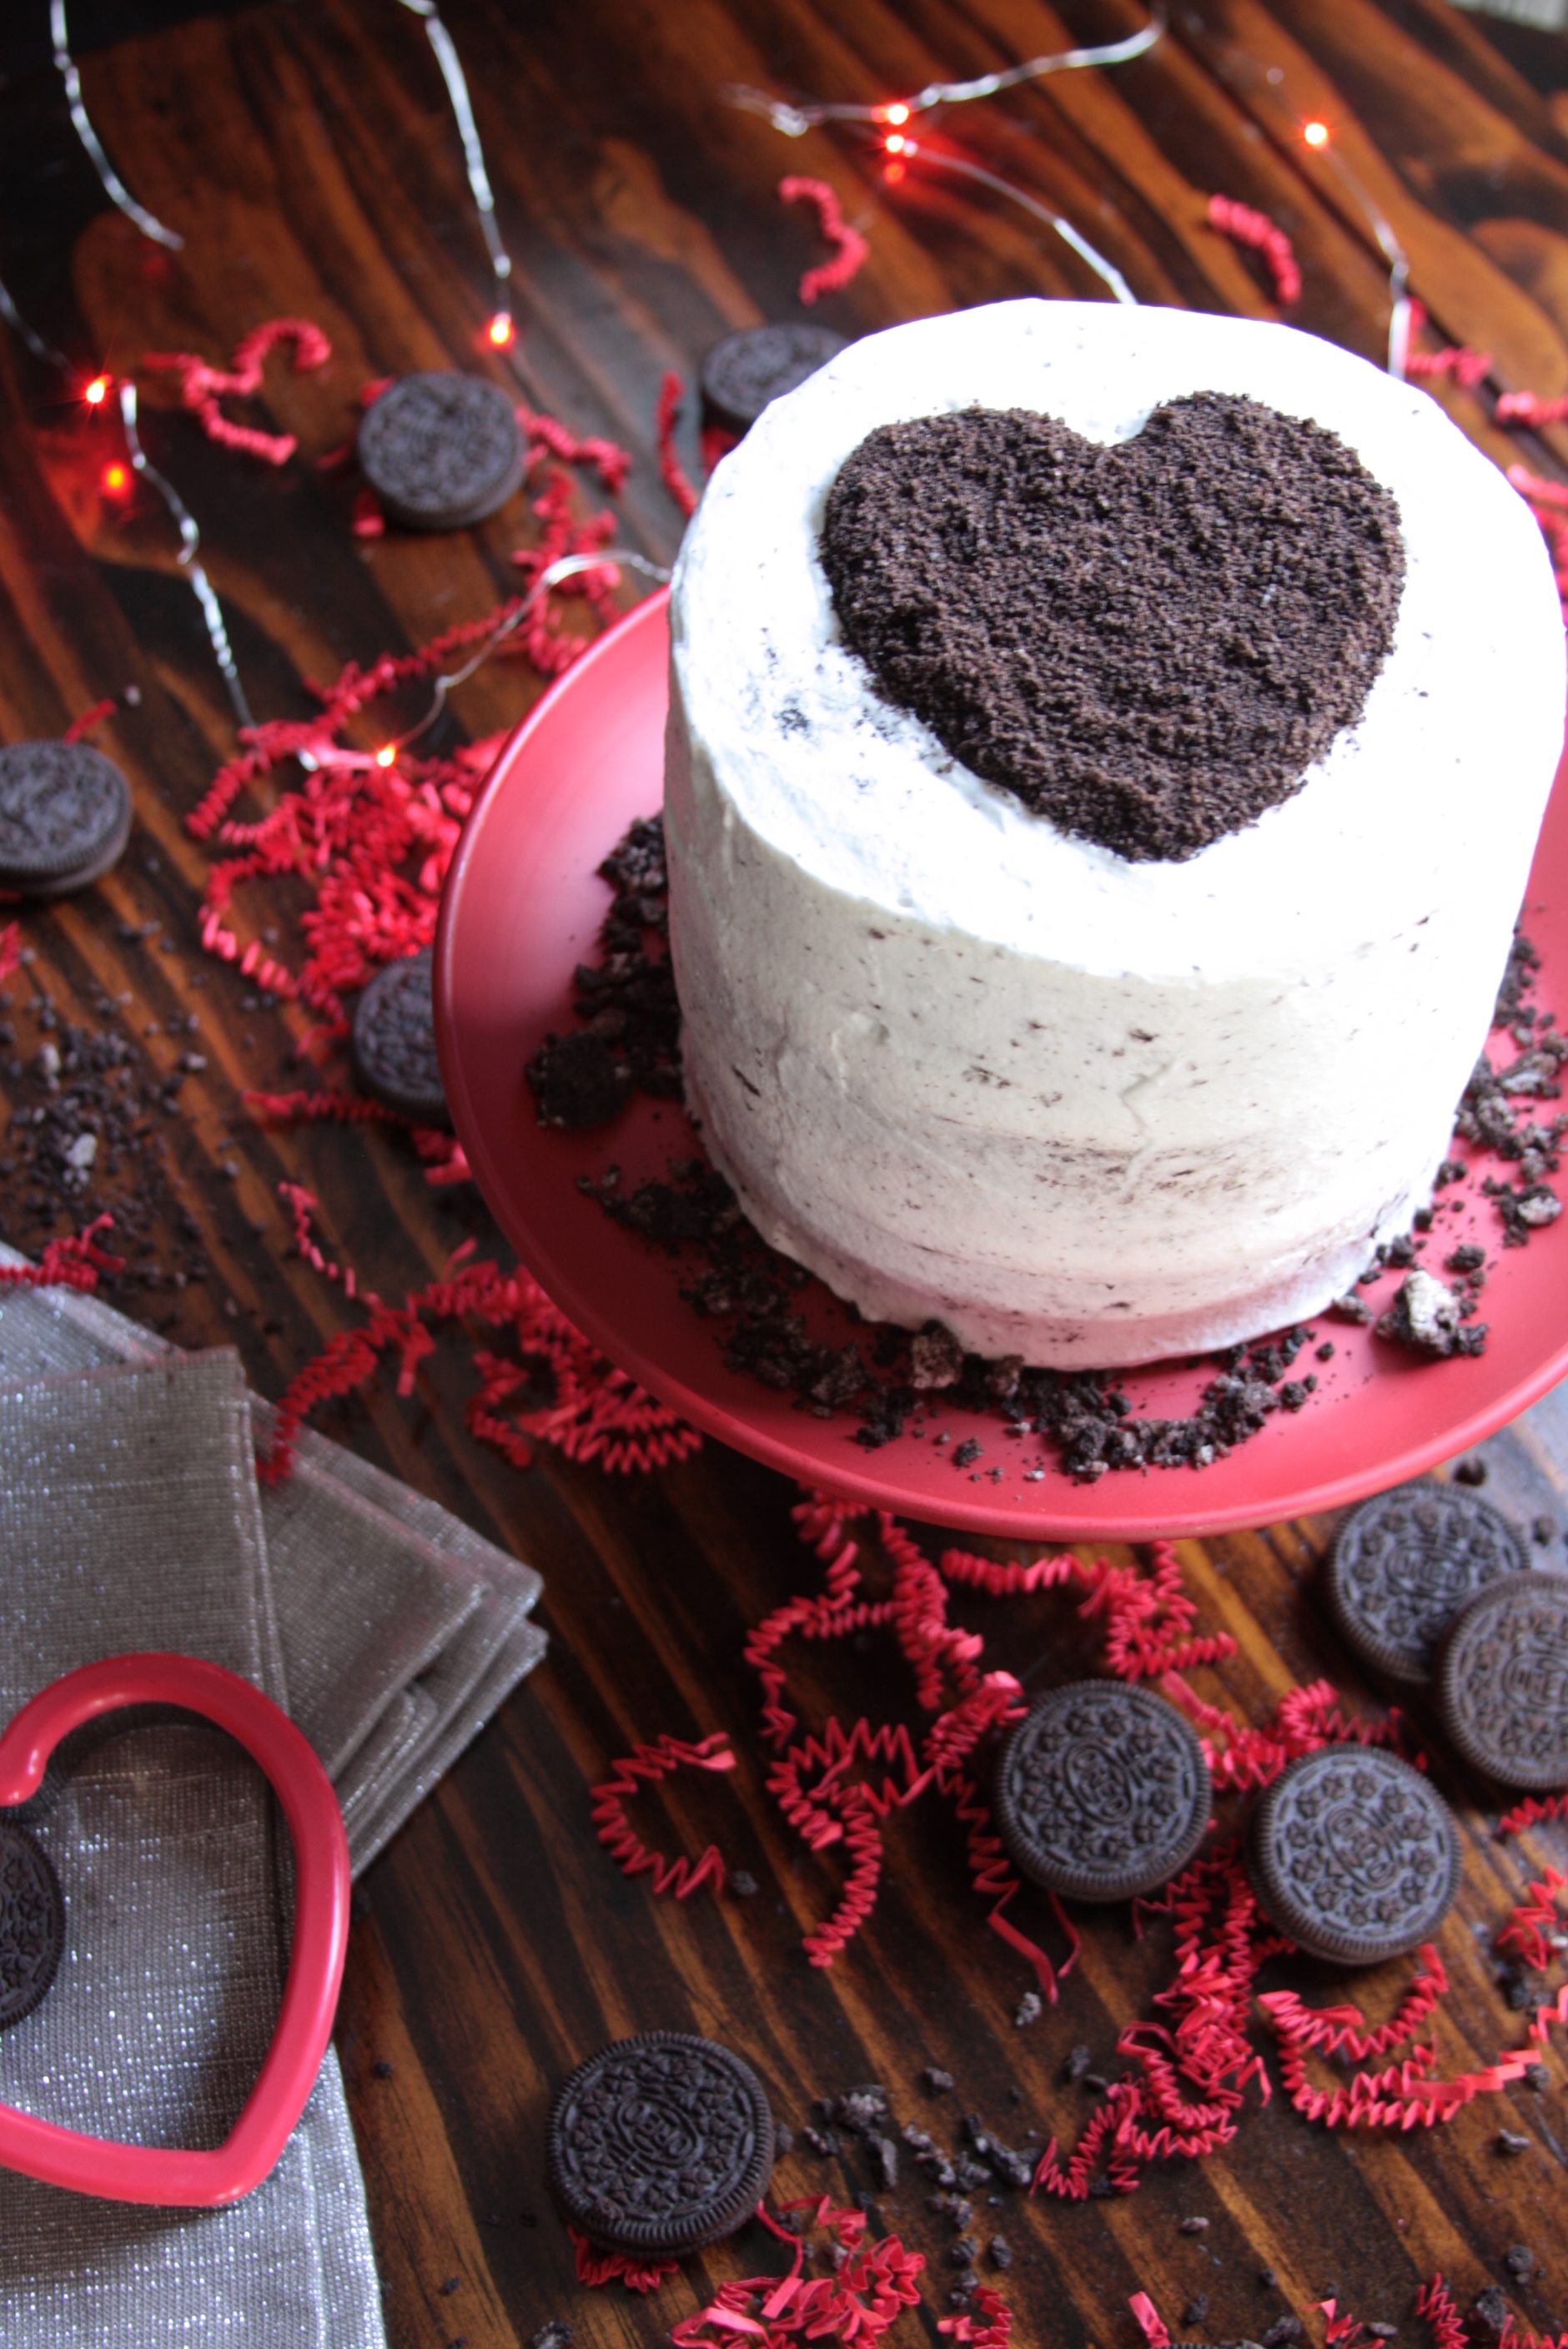
The color was actually the main reason I used the Irish cream in the filling and left it out of the icing. Irish cream gives the icing a light tan color and I wanted a bright white with tiny Oreo crumb speckles. Buttercream would have created the same problem since it’s more of an off white. I still wanted the Irish cream flavor in more than just the cake part though, so filling was the answer and it worked out perfectly! I really lucked out on this one. Half of the time, something that sounds like a really great idea only partially works out, if at all. This one was a win all around.

This is the first time I’ve put a cake recipe on the blog using the new recipe plugin I installed. I realized there are a lot more tiny tips and instructions that go into this cake than I thought there would be. It’s a pretty simple, rustic looking cake so I figured the instructions would be pretty short. That was actually one of the things I loved about the Cookies and cream part. You don’t really have to worry about a crumb coat or getting chocolate cake crumbs into the white icing because it goes along with the chocolate speckled look anyway. Bonus!
Even with such a simple design, there were all the little odds and ends that I didn’t want to forget next time. A big problem I have is making a recipe for the first time, loving it, then going back and attempting to make it again a year later and forgetting everything I did to make it awesome the first time. No more! It may be overkill but I intend to put everything I can think of into the recipe instructions so when I, or anyone else, goes to make it down the road, it comes out the same way it did the first time.
So don’t be frightened by the length of this or any other recipe I post. I’m just long winded and trying to ensure I can duplicate the recipe down the road with the same results. Without further ado, the recipe!
| Prep Time | 2 hours |
| Cook Time | 30 minutes |
| Passive Time | chill cake layers overnight |
| Servings |
servings
|
- 2 cups flour all purpose
- 1 3/4 cups granulated sugar
- 3/4 cup cocoa powder I used Hershey's Special Dark but use your favorite.
- 1/2 teaspoon salt
- 1 tablespoon baking soda
- 1 egg
- 2/3 cup vegetable oil
- 3/4 cup buttermilk
- 1/4 cup Irish Cream I used Bailey's
- 1 cup brewed coffee hot
- 8 Oreos roughly chopped
- 1 cup heavy whipping cream
- 1/4 cup confectioner's sugar
- 1/4 cup Irish Cream I used Bailey's
- 1 cup heavy whipping cream
- 1/4 cup confectioner's sugar
- 4 Oreos finely crushed
Ingredients
For the Cake
For the Filling
For the Icing
|
|
- Ideally, you should start this cake the day before you intend to serve it. Bake the cake part the day before, then refrigerate the layers overnight before making the icing and assembling on the day of.
- Preheat oven to 350 degrees.
- Brew one cup of strong black coffee. 1 heaping-2 tablespoons of grounds per one cup of water. Note that one "cup" on your coffee maker may not be completely accurate. Best to brew a bit extra to be on the safe side. Also, I've tried this with flavored coffees and while it does work, regular black coffee lets the Irish cream flavor come through best.
- Prepare three 6" round cake pans. This cake is very moist and slightly sticky so I do not recommend using cooking spray or the cake will likely be impossible to get out of the pan. I always cut parchment paper to fit the bottom of each pan and do not grease the sides. Then when the cake comes out of the oven, just run a knife along the edge and it pops right out perfectly.
- Stir flour, sugar, cocoa, salt and baking soda together. Make a well in the center and add the egg, vegetable oil, buttermilk and Irish cream. Stir everything together until well combined. Batter may look slightly thick and grainy. That's ok.
- Add the cup of hot coffee to the batter and stir. It will take a moment but it will eventually incorporate and become a smooth batter. It will be much thinner than what you may normally think cake batter should be.
- Pour the same amount of batter into each prepared cake pan. Bake for 25-30 minutes or until skewer stuck in the center comes out clean or with a few slightly moist crumbs.
- Let cakes cool in pans for about 10 minutes. Then run a knife along the edges, flip the pan over and peel parchment away. Cool completely on a cooling rack.
- At this point I recommend wrapping each layer in plastic wrap and refrigerating overnight. If you absolutely must, proceed to the filling and icing.
- Mix the cream, sugar and Irish cream together using a stand mixer with the whisk attachment. Watch the mixture closely! It will start to expand and then stiffen. You want it to be just stiff enough so when you lift the arm on the mixer, the cream clings to the whisk without dripping. It should still be very silky and smooth but will hold its shape.
- Mix the cream and sugar together using a stand mixer with the whisk attachment. Watch the mixture closely! It will start to expand and then stiffen. You want it to be just stiff enough so when you lift the arm on the mixer, the cream clings to the whisk without dripping. It should still be very silky and smooth but will hold it's shape.
- Gently fold in 1-2 tablespoons of the finely crushed Oreo crumbs depending on how speckled you want your icing to look.
- Use a serrated knife or a cake leveler to cut any domed top off of each cake layer and to ensure each layer is the same height.
- Set the first layer of cake on your cake plate or revolving cake stand. If using a revolving cake stand, you should use a piece of cardboard cut slightly smaller than the diameter of the cake layers under the first layer so you can transfer the cake from the revolving stand to the serving plate when you are done.
- Use a pastry bag or icing spatula to spread the filling over the first layer, leaving about a half inch around the edge so the filling won't smear into the white icing and be visible.
- Sprinkle half of the coarsely chopped Oreos on top of the filling.
- Add the next layer of cake gently on top. Make sure the top is level, turning the cake a few time to ensure it appears level from all sides.
- Again, add filling and chopped Oreos and gently top with the last layer of cake, again making sure the top is level.
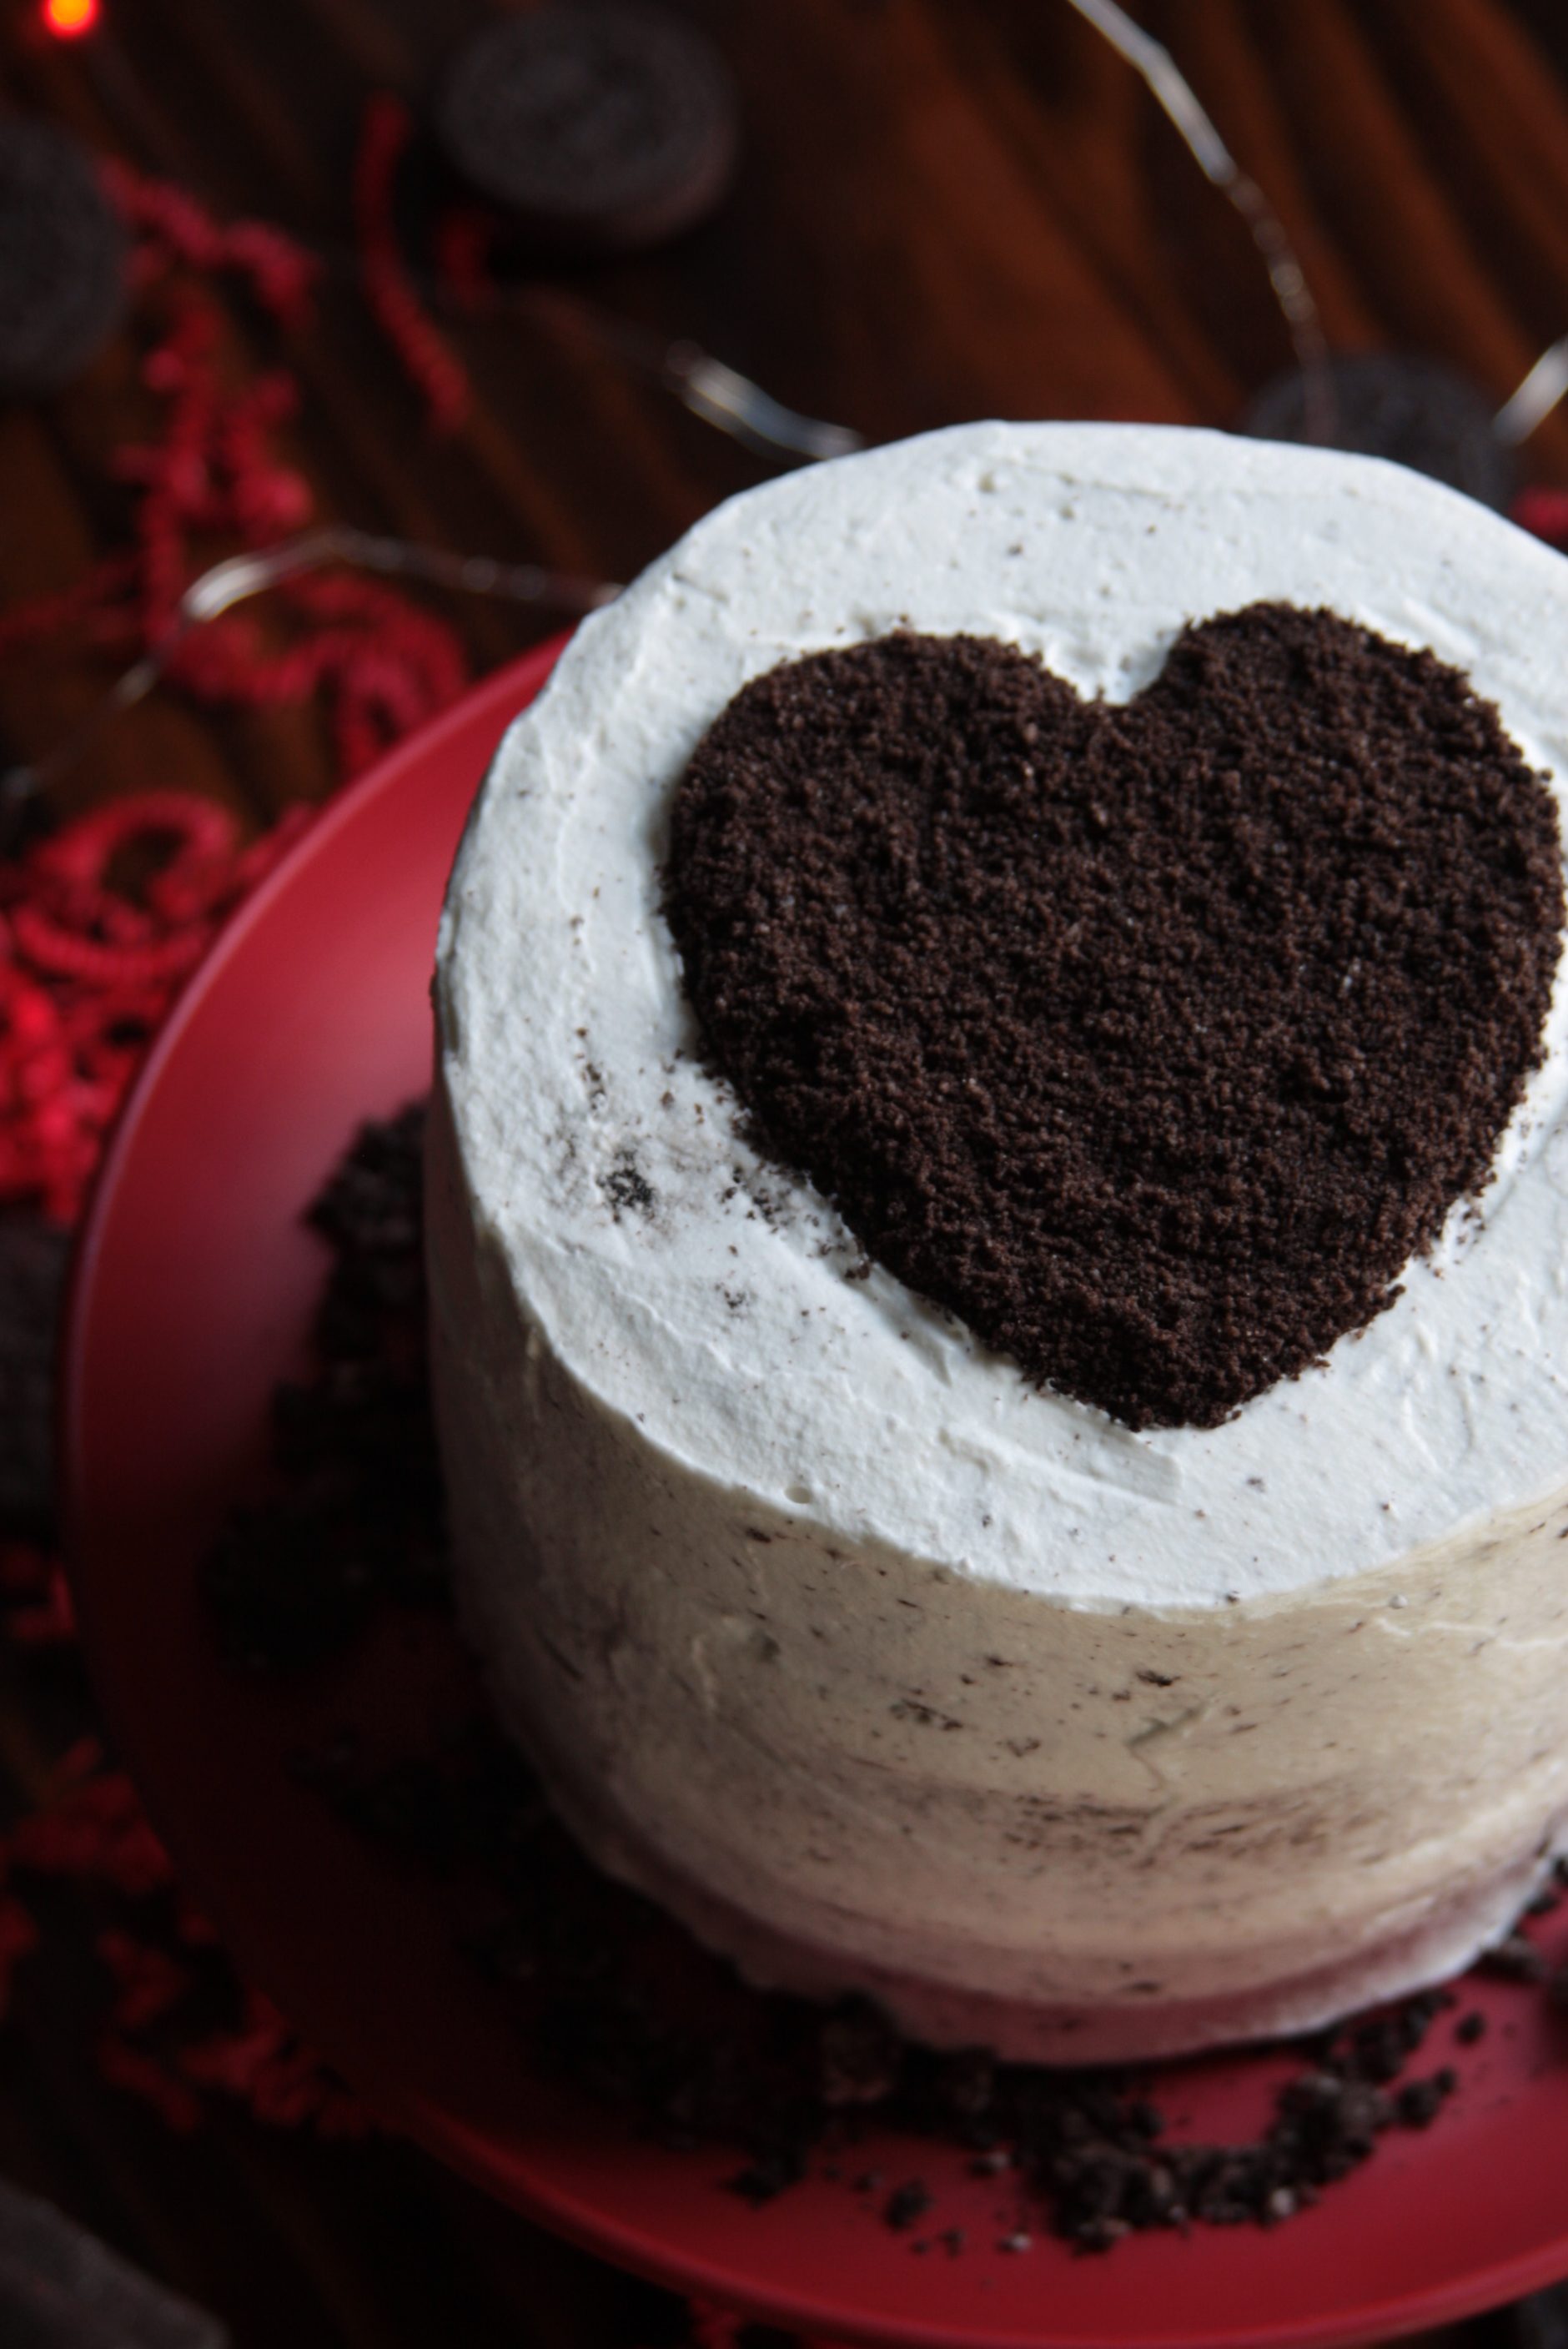
- Ice the cake, smoothing out the sides and top, turning the cake as you do to ensure they are level.
- Place a heart shaped cookie cutter, or cookie cutter in whatever shape you like, on top of the cake wherever you'd like the Oreo crumb heart. Sprinkle a thin layer of the finely crushed Oreos inside the cookie cutter and gently press the crumbs down to pack them in place, especially along the edges. The thinner the layer you sprinkle, the less likely the crumbs will be to spill out when you lift the cookie cutter.
- Gently lift the cookie cutter. Some crumbs may spill over your shape but just use a knife and carefully lift off the few out of place crumbs.
Two tools I highly recommend for this and most other cakes are a rotating cake stand and a cake leveler. The linked Ateco rotating cake stand is a bit pricey, but it’s nice and heavy, turns incredibly smoothly, and it’s pretty. 😛 Definitely worth it if you make more than a few cakes a year. As for the cake leveler, you could just use a long serrated knife like the pros do but I’m just not that good. I like being able to set the height of the wire and know that every single layer is exactly the same height. It makes the cake look so much nicer when you cut into it if everything is even. And for five bucks, even if you only use it once a year, it’s worth it.
Does this look like something you’d like to give to (or receive from) your Valentine? What’s your favorite Oreo flavor? What other fun treats do you have planned for Valentine’s day? Comment below!